Frequently Asked Question
macOS Ventura introduced a new feature, Stage Manager, which helps manage your windows.

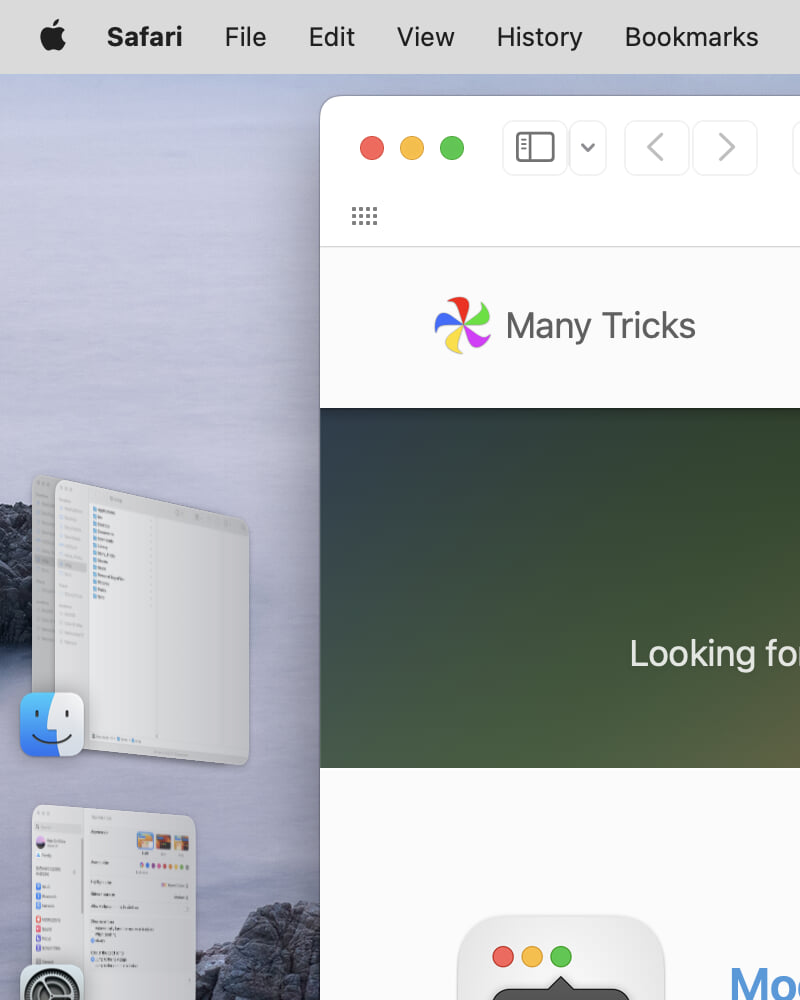
When enabled, you'll see a selection of thumbnails down the left side of your screen, as seen in the above image.
If you're using Moom with Stage Manager active, nothing changes, and Moom works just as it did before: If you tell a window to move and zoom to half-fill the screen on the left edge, it will do so. That window will cover the Stage Manager thumbnails, as would any window if you moved it manually to the same location.
The good news is that Apple wrote Stage Manager knowing that windows would wind up covering the thumbnails, so they included an auto hide-and-show feature, much like the Dock: Just mouse over to the left edge of the screen, and the Stage Manager thumbnails will slide back into existence. Click the thumbnail you wish to use, and that's that—and if you choose a thumbnail where there aren't windows on the left edge of the screen, the thumbnails will remain visible. Otherwise, they'll slide out of sight again, off the left edge of the screen.
In theory, we could add support in Moom to leave space for the thumbnails, but it's non-trivial because Apple didn't provide a developer API to Stage Manager (which we would use to find out if it's running, and the size and location of its thumbnails).
Given how well Apple has made things work already, we're not sure this would be worth the effort. And we'd only do this if we could do so in a robust manner that was likely to continue working well into the future. However, if you'd like to use Moom and Stage Manager together, and have Moom leave room for the Stage Manager thumbnails, there are two ways to do so today.
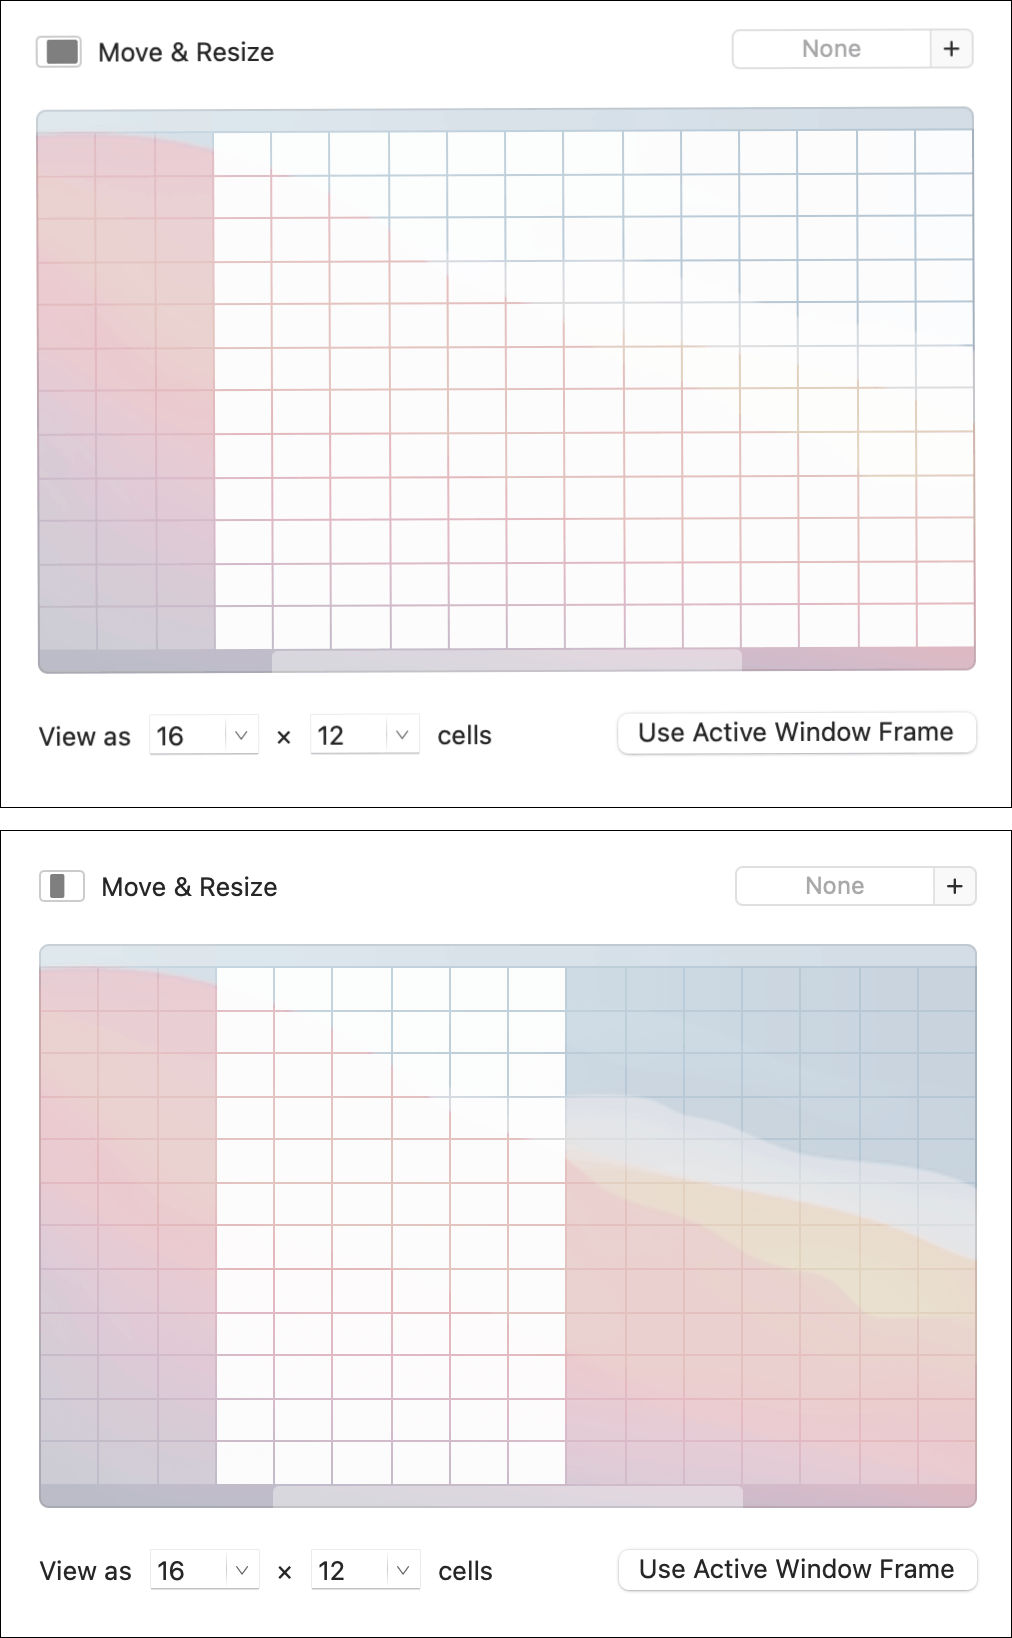
- Use custom Moom commands that allow for Stage Manager. Create custom Move & Resize (Move & Zoom in Moom 3) commands in Moom that allow for Stage Manager thumbnails, like this:

You will probably have to experiment with the grid size and number of leftmost columns to leave blank to allow for the size of the Stage Manager thumbnails on your Mac. Once created, you can add them to your pop-up palette (in Moom 4), assign a shortcut key to the custom commands, or access them via Moom's menu bar icon or a drop-down from the green button pop-up (which can be enabled in Moom 3's Mouse settings.) - Force Moom to leave space at the left screen edge. Using a hidden preference, you can modify Moom's behavior to enforce a defined gap (in pixels) at the left edge of the screen.
To use this method, first open Moom's settings and click on the General tab. Check (enable) the "Separate windows by..." box, and then the "Apply to screen edges" box as well. Now quit Moom. Open Terminal, in Applications → Utilities, and paste the following line:
defaults write com.manytricks.Moom "Grid Spacing: Apply To Edges: Gaps" -string "{0,0,0,75}"
This command is telling Moom to use custom gaps at the screen edges, as defined by the numbers. The order of the edges is top, right, bottom, then left. With zeros on the other three values, this command just enforces a gap on the left screen edge, where Stage Manager thumbnails reside.
Press Return, and relaunch Moom. Use Moom to resize a window that would normally go to the left edge of the screen, and you'll find that there's now a 75 pixel gap.
That's probably not the right amount for your setup, but it should give you a reasonable starting point. Quit Moom, switch back to Terminal, press the Up Arrow to bring back the last-used command, then use the Right Arrow to move to the end and edit the 75 to whatever you think the best value is. Repeat this process until you're satisfied.
 Many Tricks