

The Settings window is where you tell Keymou how you'd like it to operate. It's here where you'll customize what Keymou can do to control the mouse pointer, and set up some top-level features.
Actions
The Actions tab of Keymou's Settings window is where you define the actions that you'd like to apply to the mouse pointer. As noted in Welcome to Keymou, Keymou ships with a number of predefined actions, but you do not need to keep these actions.

Keymou has 15 possible actions, which you can see by clicking on the pop-up menu in any existing action:
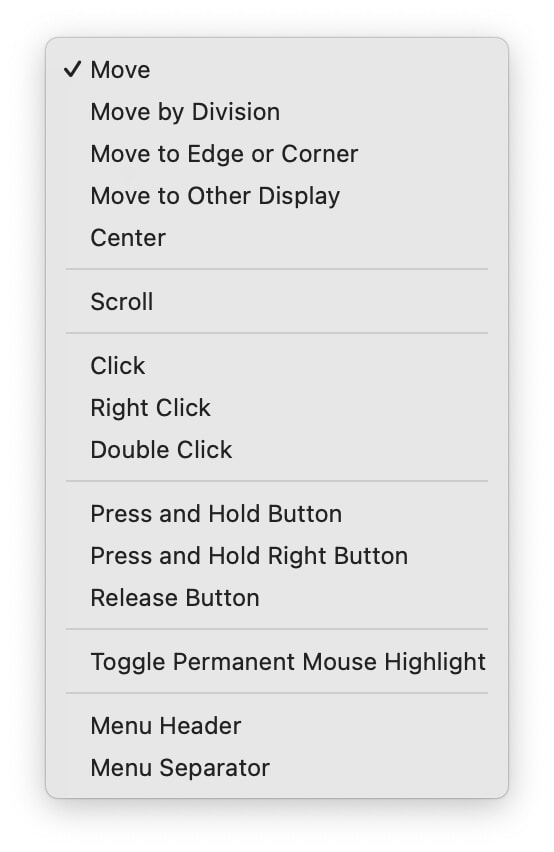
Here's what each action does, and how to configure them. Note: You don't have to use every action, obviously, so pick and choose those that you wish to use.
Move
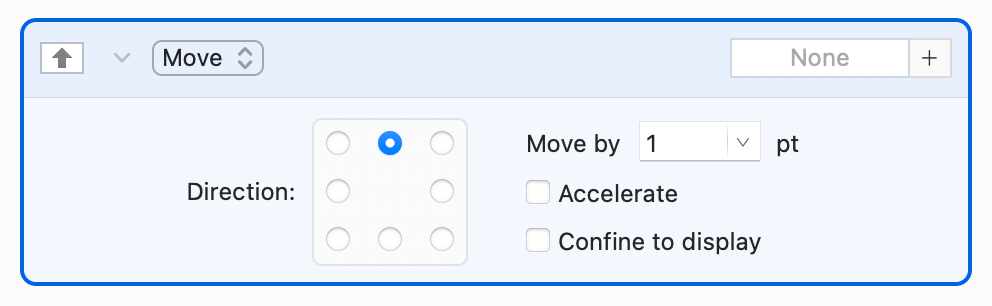
Moves the cursor in the direction indicated by the radio button, by the number of pixels specified in the 'Move by' pop-up menu.
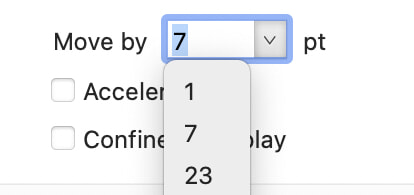 The Move action also supports custom distances. To use a custom value, click on the box next to the drop-down arrow in the "Move by" box, then type the new value in the input box.
If you create other Move actions with different custom distances, each unique custom distances will show at the top of the pop-up menu (see the image at right), followed by the standard distances. You can return to the default options by removing all custom distances from all Move actions.
If you check the 'Accelerate' box, then holding down the defined keys will apply an acceleration curve to the pointer's movement (i.e. it will get faster the longer you hold down the keys). If you check 'Confine to display,' then the pointer's motion will be restricted to the current display, if you have more than one.
Move by Division
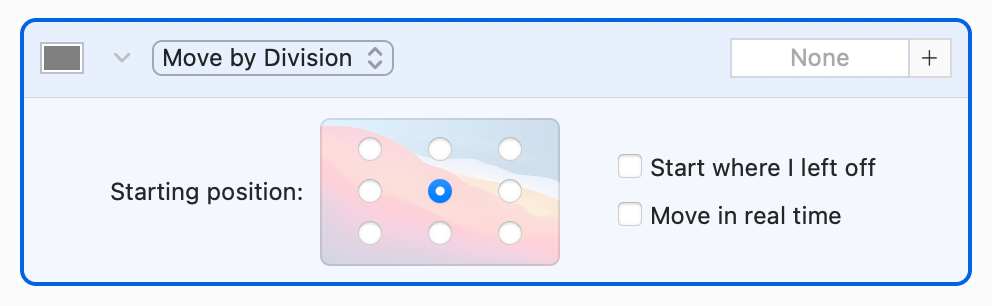
This is potentially the most complicated action to explain, yet it's also one of Keymou's most powerful features. Move by division makes it possible to move the mouse across vast distances with only a few key presses.
When activated, Move by Division will draw a crosshair on your screen, centered at the location specified by the radio button. Choose the center location, for instance, and the crosshair will appear at the center of the screen. Choose the top-left location, and the crosshair will be in the center of the top-left-quarter of your screen.
With the crosshair onscreen, pressing the arrow keys will move the crosshair exactly half of the available distance in the direction that matches the pressed arrow key. As you press additional arrow keys, this process continues, making it very simple to cover great distances with only a few arrow key taps. Once you have the crosshair where you'd like the cursor to be, press Return to move the actual cursor to that location and send a mouse click to the object under the cursor.
Note: In addition to the arrow keys, you can use H-J-K-L (left-down-up-right) and W-A-S-D (up-left-down-right) to move the crosshair around the screen.
Because this may be hard to visualize, here's how it looks in action:
If you check 'Start where I left off,' Keymou will draw the crosshair at the location where you last left it. With 'Move in real time' enabled, the cursor will move with each press of the arrow key, instead of only moving when you press Return. With this option set, pressing Return just sends a mouse click to the pointer's current location.
Move to Edge or Corner
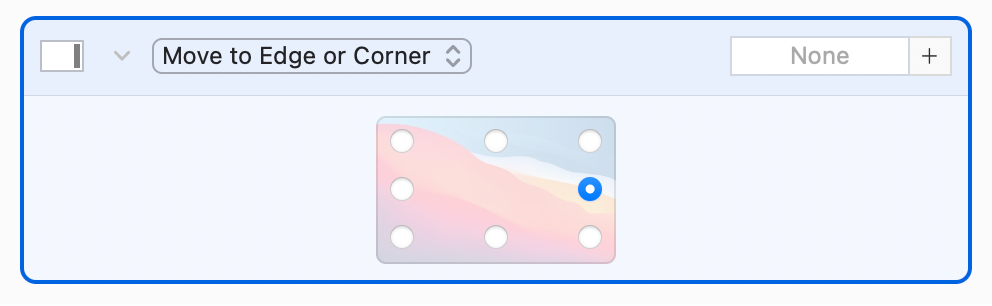
This action lets you move the mouse pointer to any edge or corner of the screen. Note that this is actually two distinct functions combined in one control. If you select one of the four corner location radio buttons, then the mouse will move to that indicated corner when you invoke the action. If you choose one of the four center radio buttons, then the mouse will move to that edge of the display, but retain its position on the other axis—it's literally "move to edge" not "center and move to edge."
If you'd like to move the cursor to a centered edge location, the best solution is to used two chained actions, as shown in the linked section.
Move to Other Display
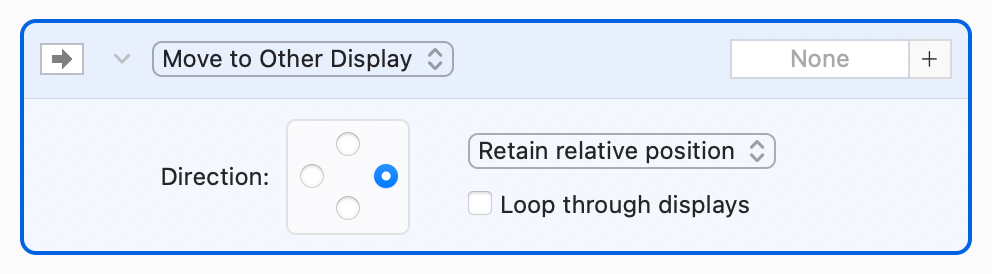
This action lets you move the mouse pointer to another display. The radio buttons are used to specify the direction of your additional display.
The 'Retain relative position' pop-up lets you control where the pointer will appear on the other display. The default setting tries to keep the pointer in the same approximate screen location as it is on the current display. You can also set it to 'Retain absolute position' to put the cursor at the same physical coordinates on the next display, or 'Center,' to place it at the center of the next display.
The 'Loop through displays' option, when set, will let you move the pointer to any attached display, cycling between them as you press the defined shortcut keys each time.
Center

This action centers the pointer on the current display.
Scroll

Scroll the current window in the direction indicated by the amount shown in the 'Scroll by' pop-up menu.
Click
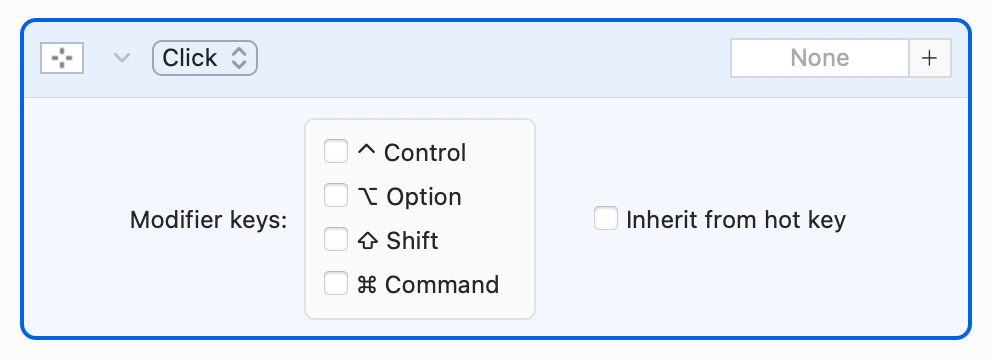
Use this action to send a mouse click at the current location of the pointer. You can add one or more modifier keys as well. If you check the 'Inherit from hot key' box, then the mouse click will send any modifier keys that are in the hot key definition (these keys will be reflected in the 'Modifier keys' section of this action).
Right Click

Functions just like Click, but sends a 'right-click mouse' event instead of a 'click mouse' event.
Double Click
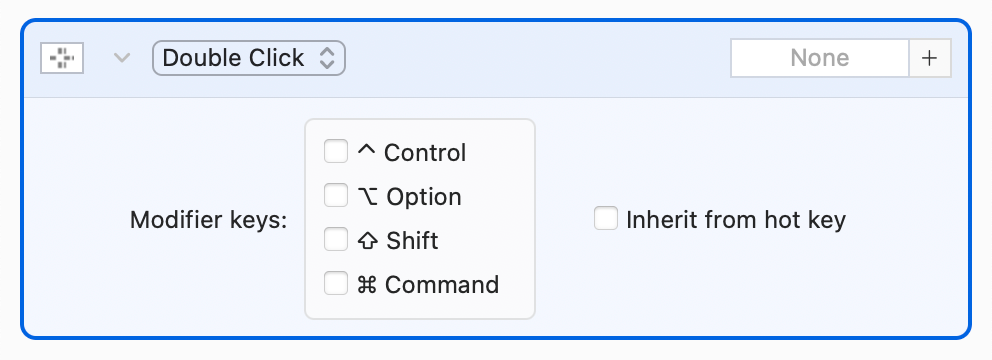
Functions just like Click, but sends a 'double-click mouse' event instead of a 'click mouse' event.
Press and Hold Button
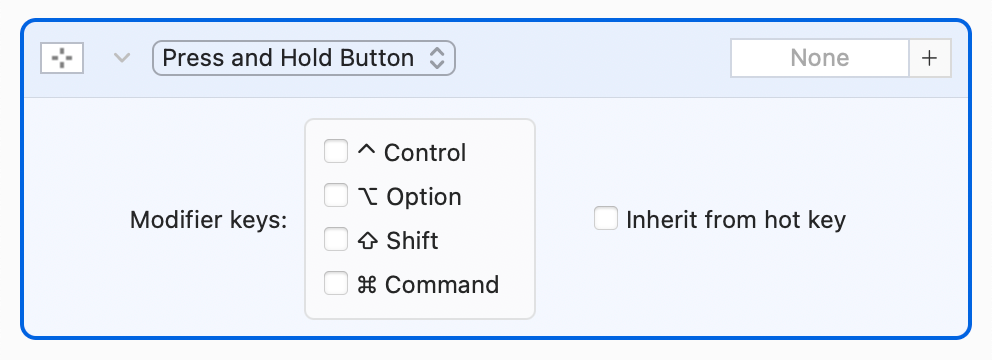
Unlike the single-event Click action, this action will simulate a "mouse button down" situation: You have your finger held down on the mouse button. This action will not end on its own; you must use a Release Button action to end it.
Press and Hold Right Button
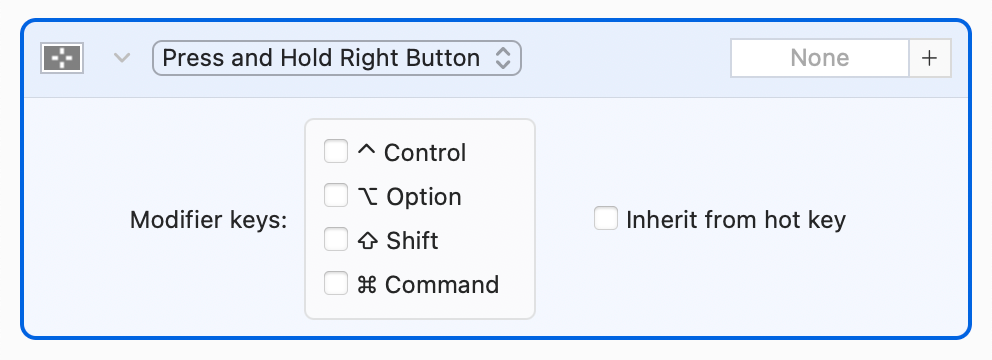
Unlike the single-event Right Click action, this action will simulate a "right mouse button down" situation: You have your finger held down on the right mouse button. This action will not end on its own; you must use a Release Button action to end it.
Release Button

Stops either of the prior actions—simulates releasing your finger from the mouse's button (or right button).
Toggle Permanent Mouse Highlight

You can use this action to quickly reveal the pointer's location with a simple hot key press. Regardless of the activation setting for highlighting the pointer location (as set in the Advanced section of Keymou's settings), this action will turn on the permanent mouse highlight. The highlight image used is the one set in the Advanced section of Keymou's settings.
Menu Header

A menu header is a line of small gray text that appears in the menu (when Keymou is used in Menu Bar mode). You can use these headers to help identify groups of related Keymou actions. In the screenshot above, the text has been set to "Mouse Click Actions."
Menu Separator

A menu separator is a thin gray line that divides sections of actions. Used together with menu headers, you can create visually separated groups of related actions, labeled with headers of your choosing.
Chaining Actions
Keymou allows you to chain actions together into a sequence that will be executed sequentially, as if they were one continuous action. Chaining actions together lets you perform complex cursor management operations with a single keyboard shortcut; here are just a few examples of what can be done:
- Move the cursor to your second display, then center it.
- Move the cursor 100 pixels up, then 50 left, then click the mouse button.
- Move the mouse to the center of the screen, then enable the permanent mouse highlight.
Creating a chain
To create a chain of actions, just assign the same keyboard shortcut to more than one Action. When you assign a duplicate shortcut, you'll see this warning from Keymou:
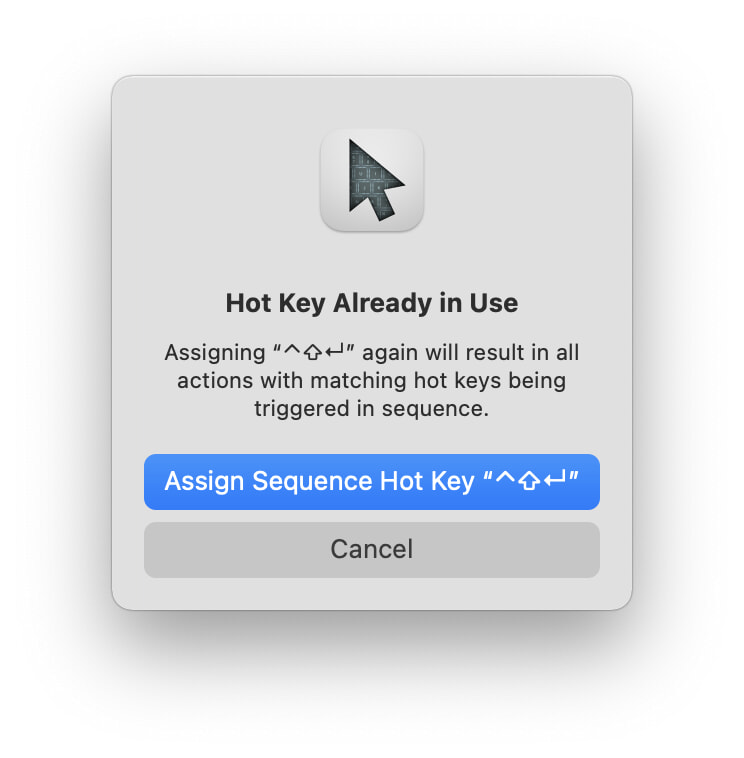
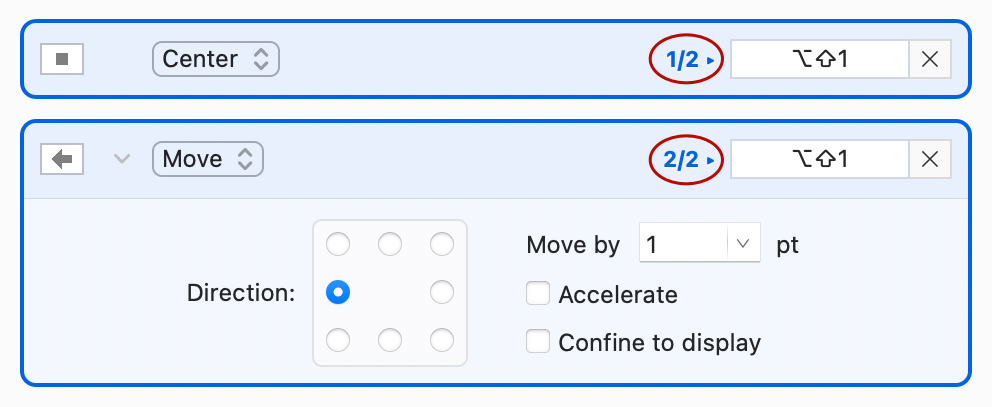
Assuming you really do want to create a chain of actions, click the "Assign Sequence Hot Key…" button to continue. Once assigned, when you select one item in a chain in Keymou's Settings window, a visual indicator appears, letting you know that you're working with a chain of actions, as in this chain to center the cursor then place it at the left screen edge:
As chained actions don't have to appear next to each other, this feature makes it easy to find all actions associated with a given chain.
The circled blue numbers in the above screenshot—they'll appear in whatever color you've set as the primary one on your Mac's Appearance System Settings panel—let you know the order of your chained actions (the left-side number), as well as how many total controls are in that particular chain (the right-side number).
Keymou uses the order of your actions (from top to bottom) to determine the order of execution with chained actions: the first-listed Action will execute first, and so on. To change the order of operations in a series of chained actions, simply reorder them via drag-and-drop.
Breaking a chain
To break a chain, all you need to do is change all involved actions' keyboard shortcuts so that they're all unique. Alternatively, you can remove the keyboard shortcuts to break the chain.
Advanced
The Advanced tab of Keymou's settings lets you control some additional aspects of Keymou's behavior:
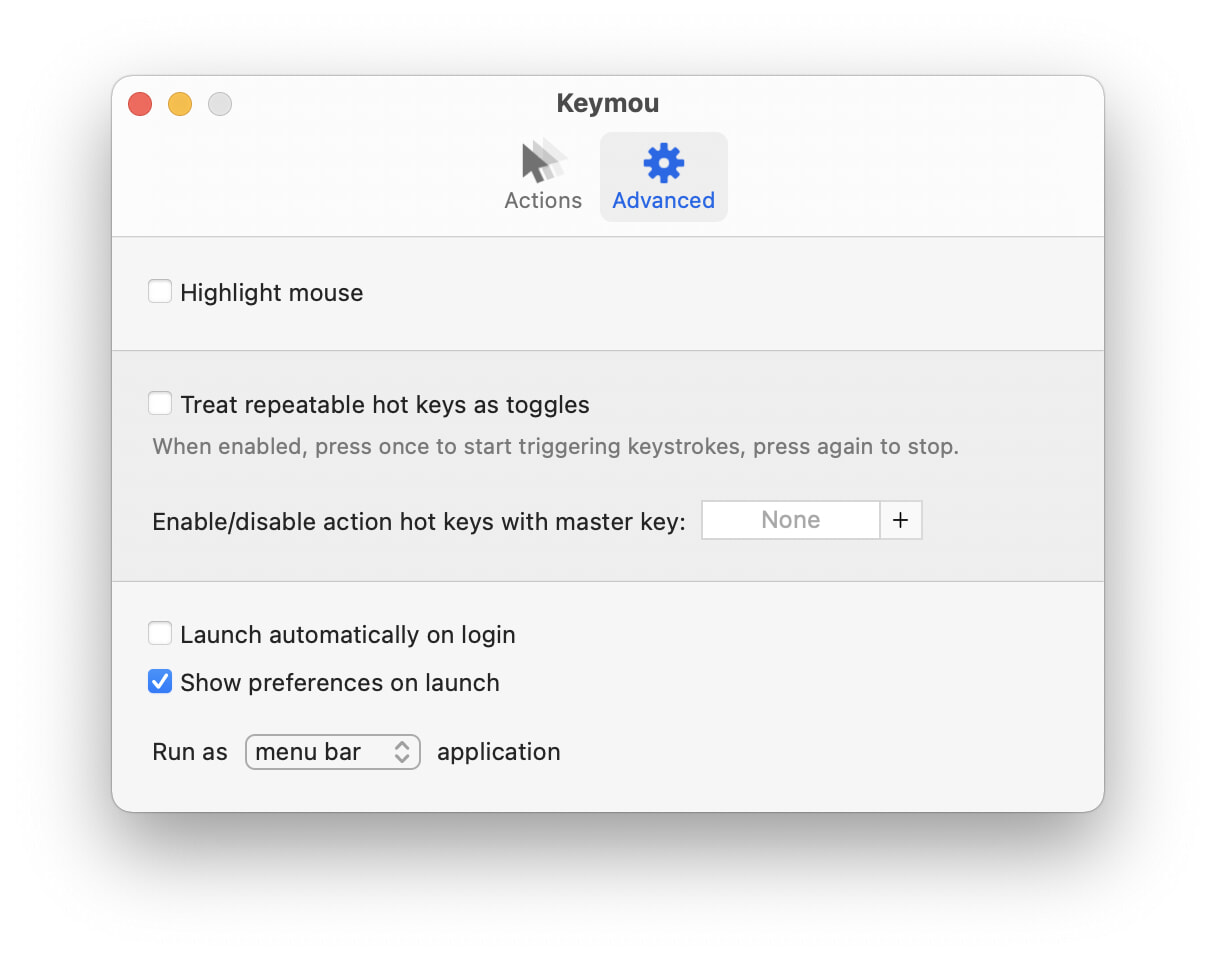
The Highlight mouse option controls Keymou's ability to highlight (call out) the mouse pointer's location onscreen. Once enabled, additional options will appear:
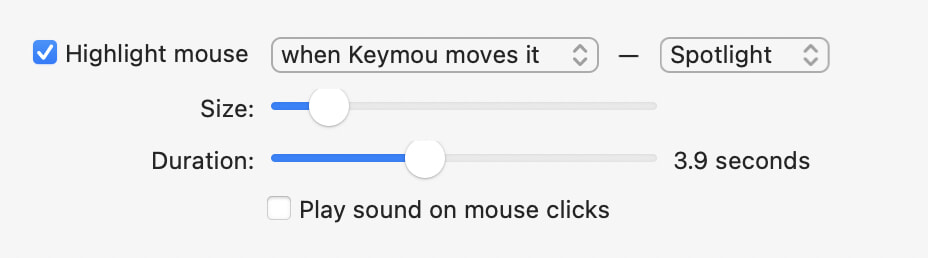
You can change how Keymou highlights the mouse pointer using the first pop-up menu. Set it to when Keymou moves it, and you won't see the highlight when you're using your mouse or trackpad. Alternatively, select whenever it moves (regardless of what causes it to move) or just temporarily after inactivity. This last option can be very useful for finding the pointer after you return from some time away.
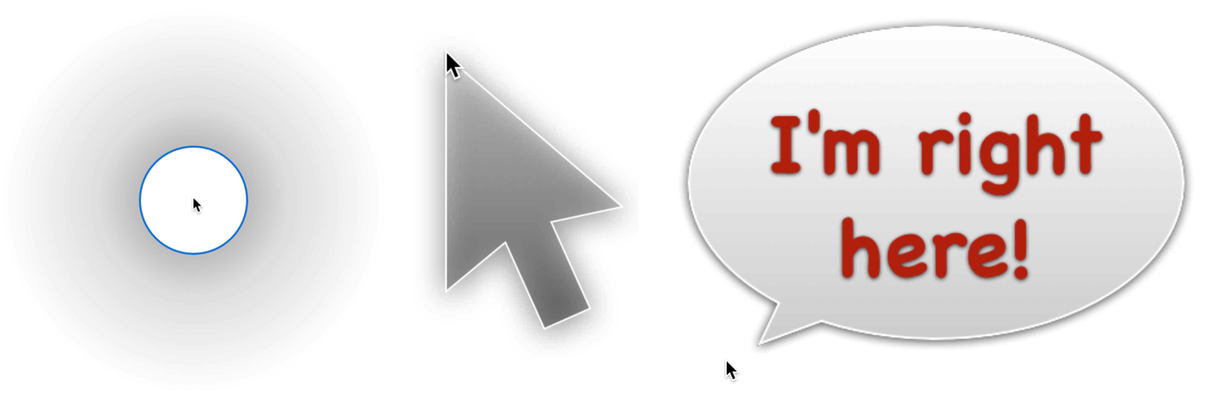
There are three highlight choices available in Keymou, set via the second pop-up menu: a Spotlight, a Giant mouse cursor, and a you-can't-miss-it Right here visual. Here's how each of those cursors look in action (though reduced in size here):
The size slider controls the size of the spotlight and giant mouse cursors; the size of the "I'm right here!" visual is fixed (but huge enough that nobody will miss it).
The Duration slider controls how long the mouse highlight will be onscreen after the mouse stops moving. The default value is three seconds.
If you're using this feature to find the cursor after you return to your computer ("temporarily after inactivity"), you may want to set the Duration slider to its leftmost position ("Only while moving"). Then, when you return to your Mac, the cursor will highlight while you move the mouse around, looking for the elusive pointer. Once you spot it and stop moving the mouse, the highlight will vanish.
If enabled, Play sound on mouse clicks will do just that for clicks that Keymo generates. Note that this is part of the "highlight mouse" feature and can only be enabled when highlight mouse is enabled.
Treat repeatable hot keys as toggles If enabled, move (non-division moves) and scroll actions will repeat indefinitely until invoked again.
Enable/disable action hot keys with master key: If you set a hot key here, you can use it to disable all of Keymou's hot keys. If you use an app that has keyboard shortcuts that interfere with Keymou, for example, you could press this hot key to disable Keymou's keys while you're in the app, then press it again to re-enable them when you're done.
Launch automatically at login and Show settings on launch are straightforward, and do what you'd expect. If you want Keymou running all the time, and want it to launch silently, then reverse the default settings—check the first box and uncheck the second.
The Run as pop-up menu lets you specify how Keymou will operate. When run as a standard application, Keymou will have a Dock icon when running, and it can be selected like any other application. If run as a menu bar application, you'll see the Keymou icon in your menu bar; click the icon to reveal a menu that lets you open the settings window, execute Actions, quit Keymou, and more. Finally, if run as a faceless application, Keymou will be invisible—no Dock icon, no menu bar icon.
To access Keymou's settings when used in faceless mode, double-click the Keymou icon in Finder. Launching the app when it's already running causes the Settings window to appear. To quit Keymou when in faceless mode, first launch it again, then click the Quit Keymou button at the bottom of the Advanced tab of the Settings window.
Keymou can be fully customized to meet your needs—you don't need to keep the defined Keymou actions as they are. Feel free to change (or remove) the assigned shortcut keys, rearrange the actions, add dividers and headers, and even completely remove the actions. Remove them all and start with a blank slate, or start with what Keymou provides and modify them as you see fit.