

Time Sink has been designed to be both simple to use and yet powerful enough to show you exactly how you've been spending your time. With a simple double-click, Time Sink will start tracking your activities, and it won't stop until you quit the app (or stop using your Mac).
There are ways to suspend the timers, which will be covered elsewhere in Help. But in general, if Time Sink is running, it's tracking what you're doing.
Time Sink communicates with you through two windows: the Organizer window and the Reports window, which are both covered below. Time Sink can also be used as either a regular macOS app, or as a menu bar only app. Using Time Sink as a regular macOS app is straightforward, but there are some differences when using it as a menu bar app, so read through the section (in Settings) on menu bar mode as well, if you intend to use Time Sink in that mode.
Organizer Window
This is Time Sink's main window; it displays everything happening on your Mac, including summary data for foreground and total running time. Here's a look at that window, complete with some helpful explanatory notes.
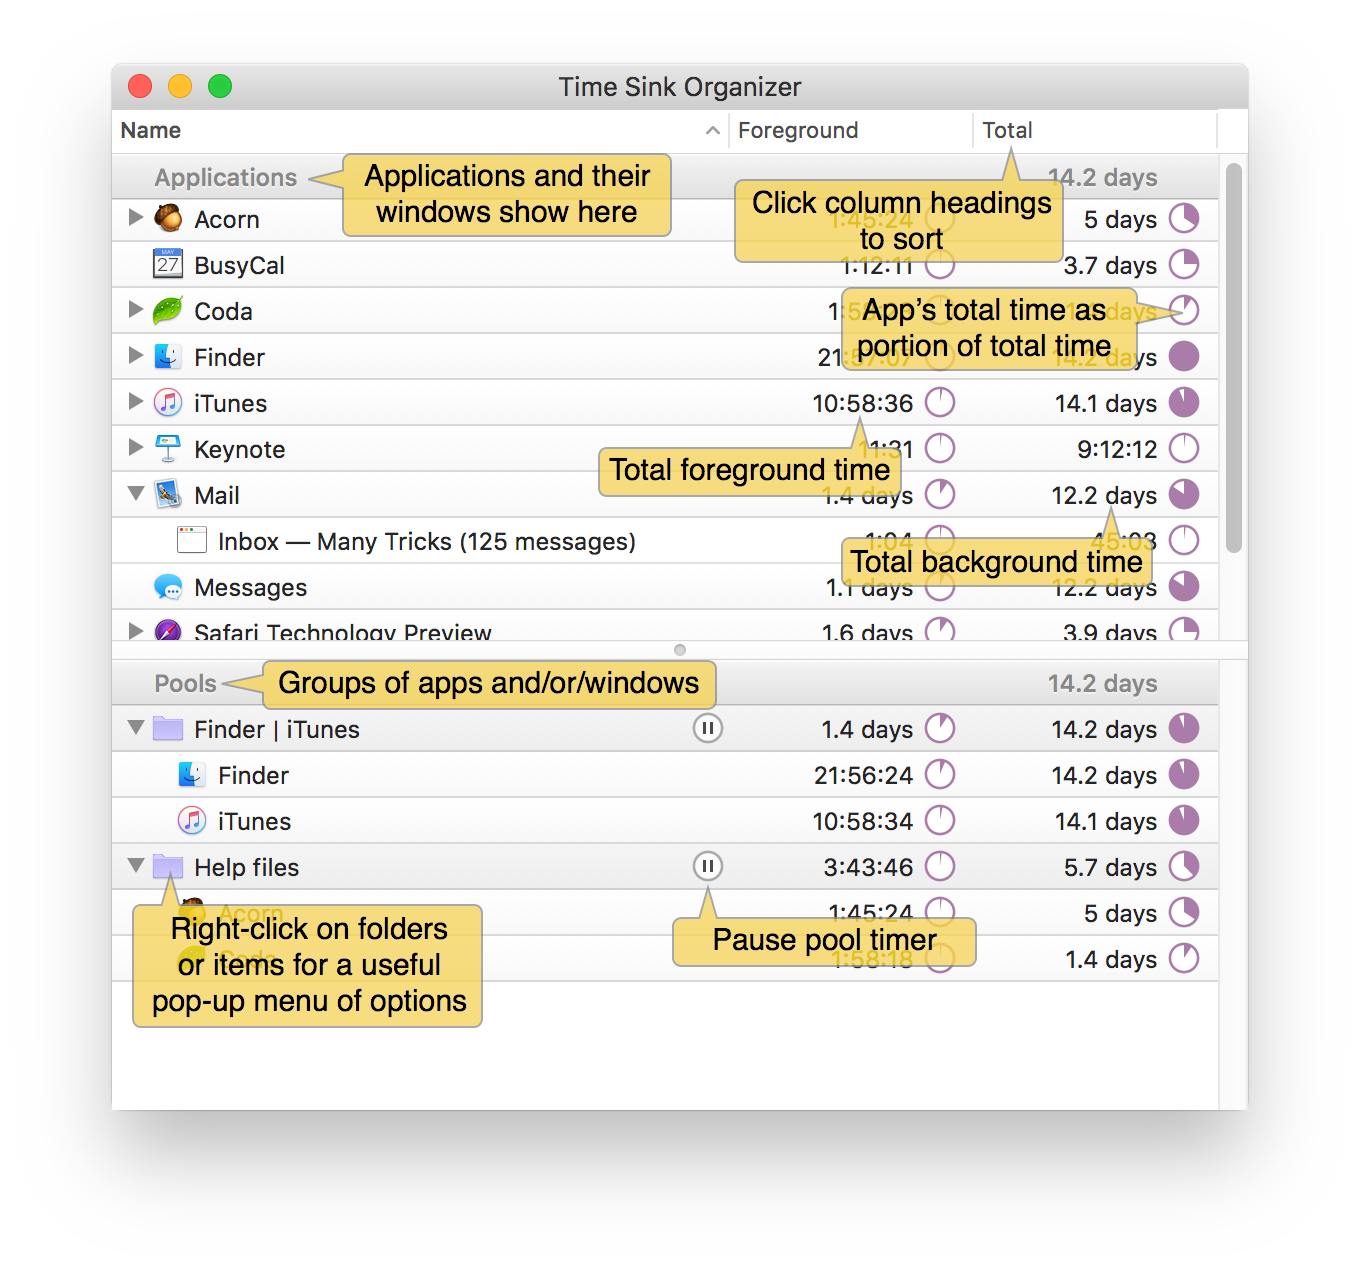
Here are some of the ways you can interact with the Organizer window:
To remove an item from the list, select it, then press Delete. This will remove the item from the list, and add it to Time Sink's ignore list, so it will never return. (You can also Control-click and use the 'Remove from List and Add to Ignore list' contextual menu item.)
If you want the window or app back in the list, open Time Sink's settings, go to the Ignore tab, and remove the entry you'll see there for the window or app of interest.
Control-click on any app in the list to see a useful contextual menu:
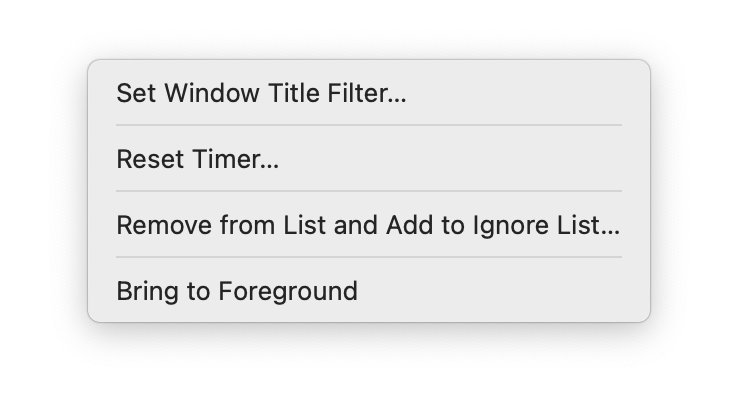
The first entry, , creates a rule that can be used to combine windows in the Organizer (see next section). The other three entries are self-explanatory, and include a shortcut to quickly add the selected app to Time Sink's ignore list.
Control-click any window in the list and select from the contextual menu to reset the selection's timer. (You can also do this by selecting the item, then choosing File > Reset Timer. Note that this will also reset child timers for pools and apps—that is, resetting an app will also reset all of its windows.
If you want to reset all timers, Time Sink's menu contains options to do just that: , , and . You'll be asked to confirm this action, and even then, it is undoable (via Command-Z) if you change your mind.
To sort the list, click on the Name, Foreground, or Total column headers. (The sort you apply to the Organizer window will also apply to the Activity Report window.)
Drag entries from the Apps section into the Pools section to create a Pool. Read the Pools section of help for more information on using Pools.
Combining Windows
Some apps append data to the filename that normally appears in a window's title bar. For example, Adobe's Photoshop app appends the current zoom level. Each time you change the zoom level, Time Sink will create a new entry in the Photoshop section, because the window's title has been changed. For example, if you look at one photo using three zoom levels, you'll see three entries in Time Sink:
- Flowers in spring.jpg @ 50%
- Flowers in spring.jpg @ 75%
- Flowers in spring.jpg @ 125%
This is probably not what you want, as it makes viewing total time spent in one document much harder. But Time Sink has a way to handle apps that do such title window renaming: You can create a window title filter to eliminate these duplicate entries.
To create a window title filter, right-click on the app's name in the Organizer window and select from the pop-up menu. This will pop up the window filter dialog, which will initially be blank. You can fill in whatever text you like, which Time Sink will then use as a truncation point for that apps' windows.
For instance, to solve the above-noted Adobe naming issue, you'd put an at sign (@) in the Truncate at box, like this:
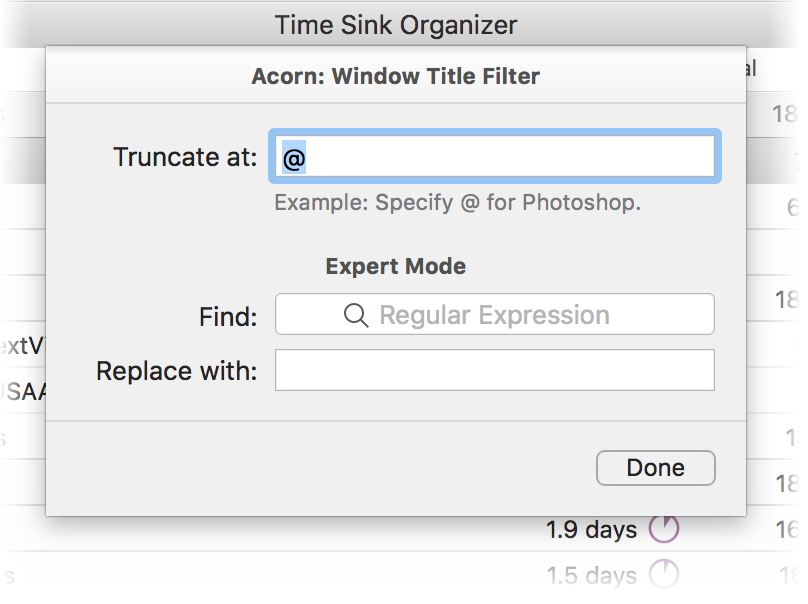
Click Done and Time Sink will check window names (in the selected app) only up to the @ sign, and merge identically-named (using the truncated names) windows.
For even more power, those who know regular expressions can build fancy find/replace queries to combine window titles using all sorts of complex pattern matching. Such exercises are left to the reader.
When you've set a window title filter, Time Sink will display a visual reminder of that in the Organizer view, via a small funnel to the right of the app name:
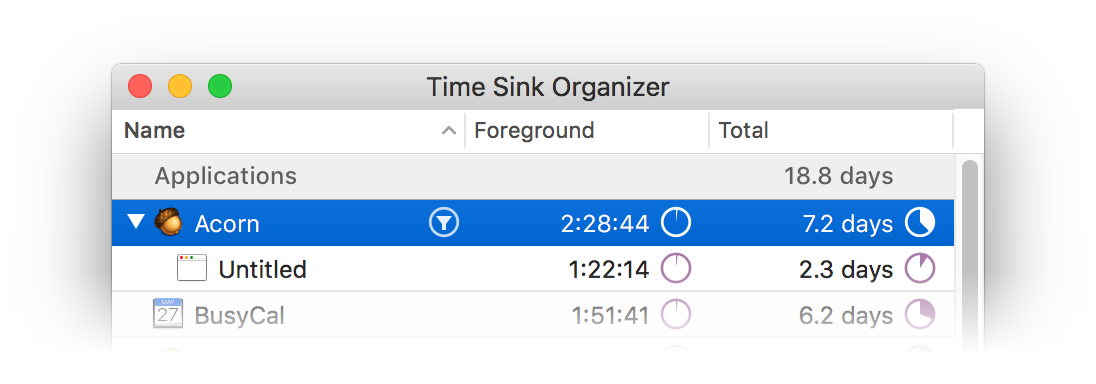
Each app can only have one window title filter.
Activity Report Window
The Activity Report window provides a graphical snapshot of your usage over a given period of time. (By default, the time period is the total duration of Time Sink's history.)
Here's what the Activity Report looks like in its default form, along with some explanatory notes.
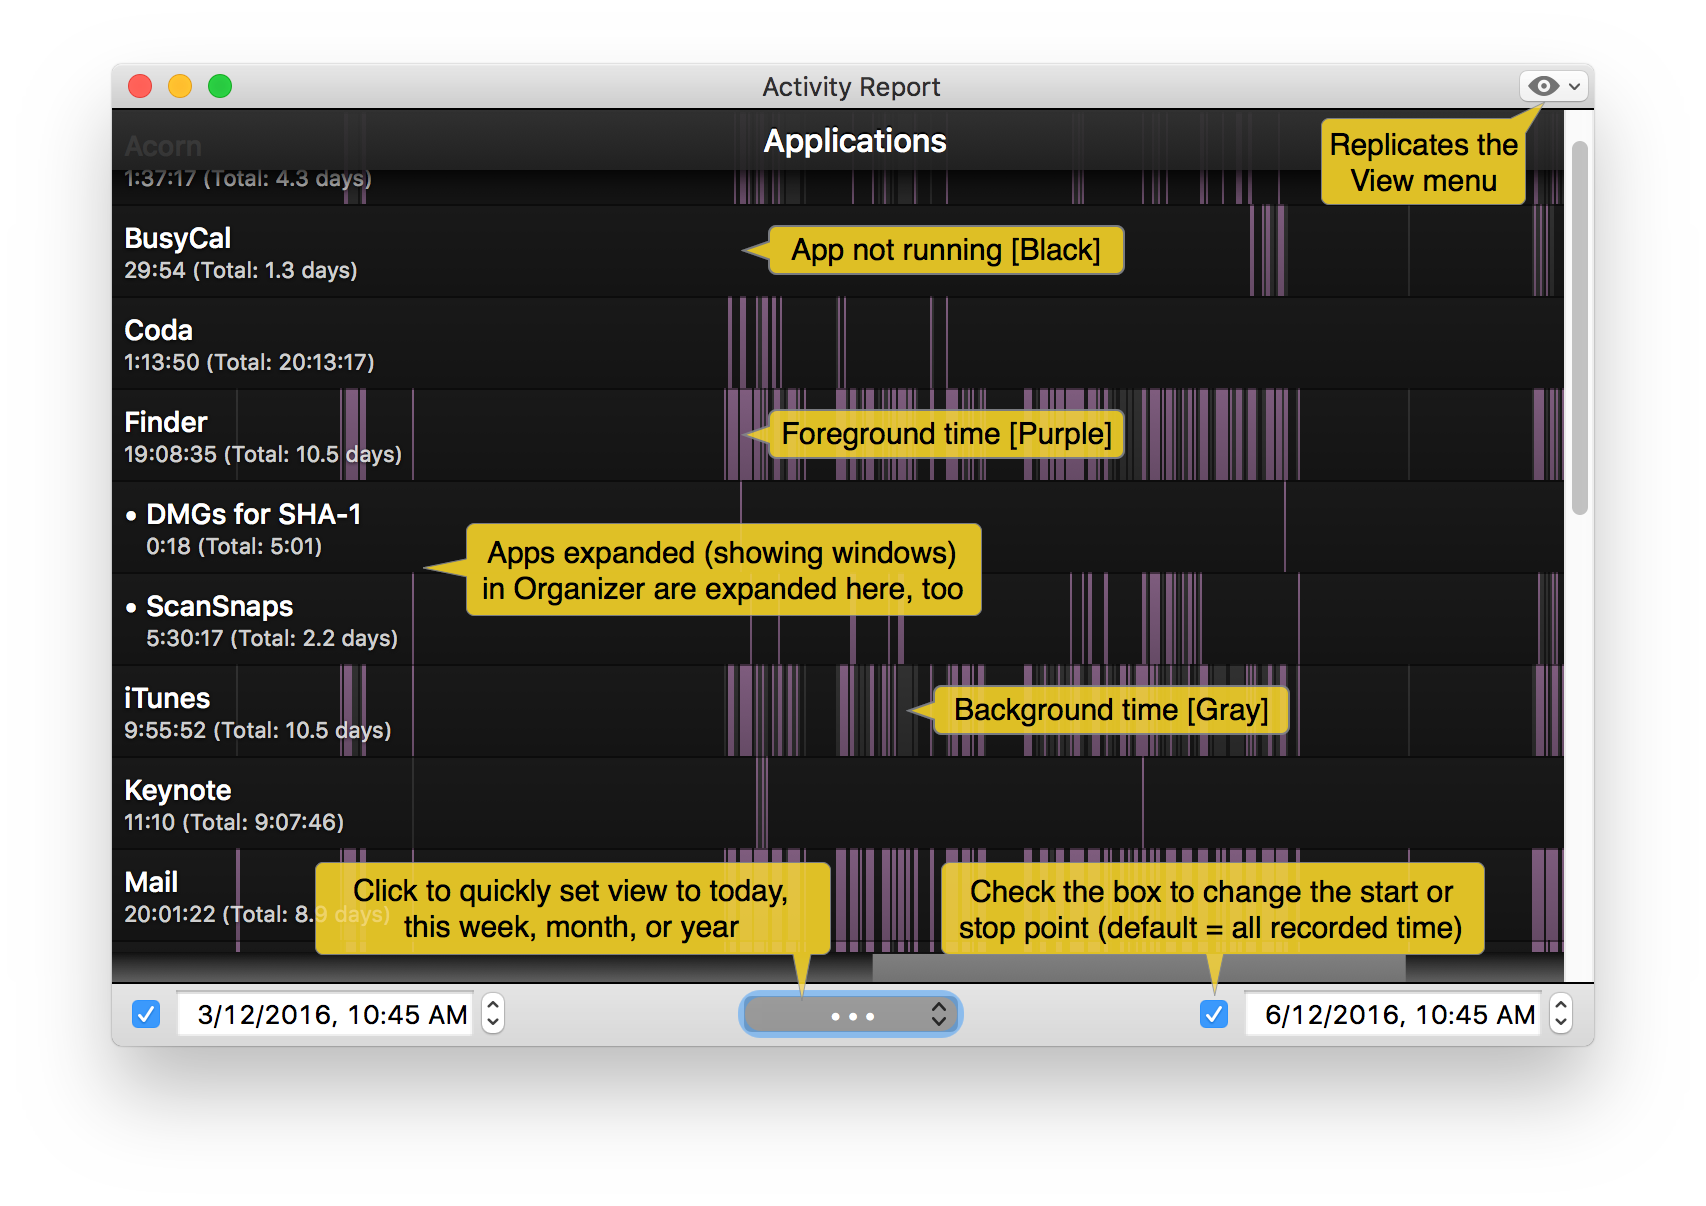
The default format for the report is what Time Sink calls a Time Lapse view. The width of the window covers the time range that Time Sink knows about, and individual bars represent foreground (purple), background (gray), or untracked (black) periods of time for each app or window.
You can easily change this to a "timed used" view (which Time Sink calls Time Portions), and modify many other things about the Activity Report, if you wish. For more detail on how to do that (and more), read the Reports section of Help.
Menu Bar Mode
When using Time Sink in menu bar mode (set on the General tab of Time Sink's settings), there is no traditional File menu, and the app itself has no actual windows. Instead, when you click Time Sink's menu bar icon, the main Time Sink window will appear just below the menu bar:
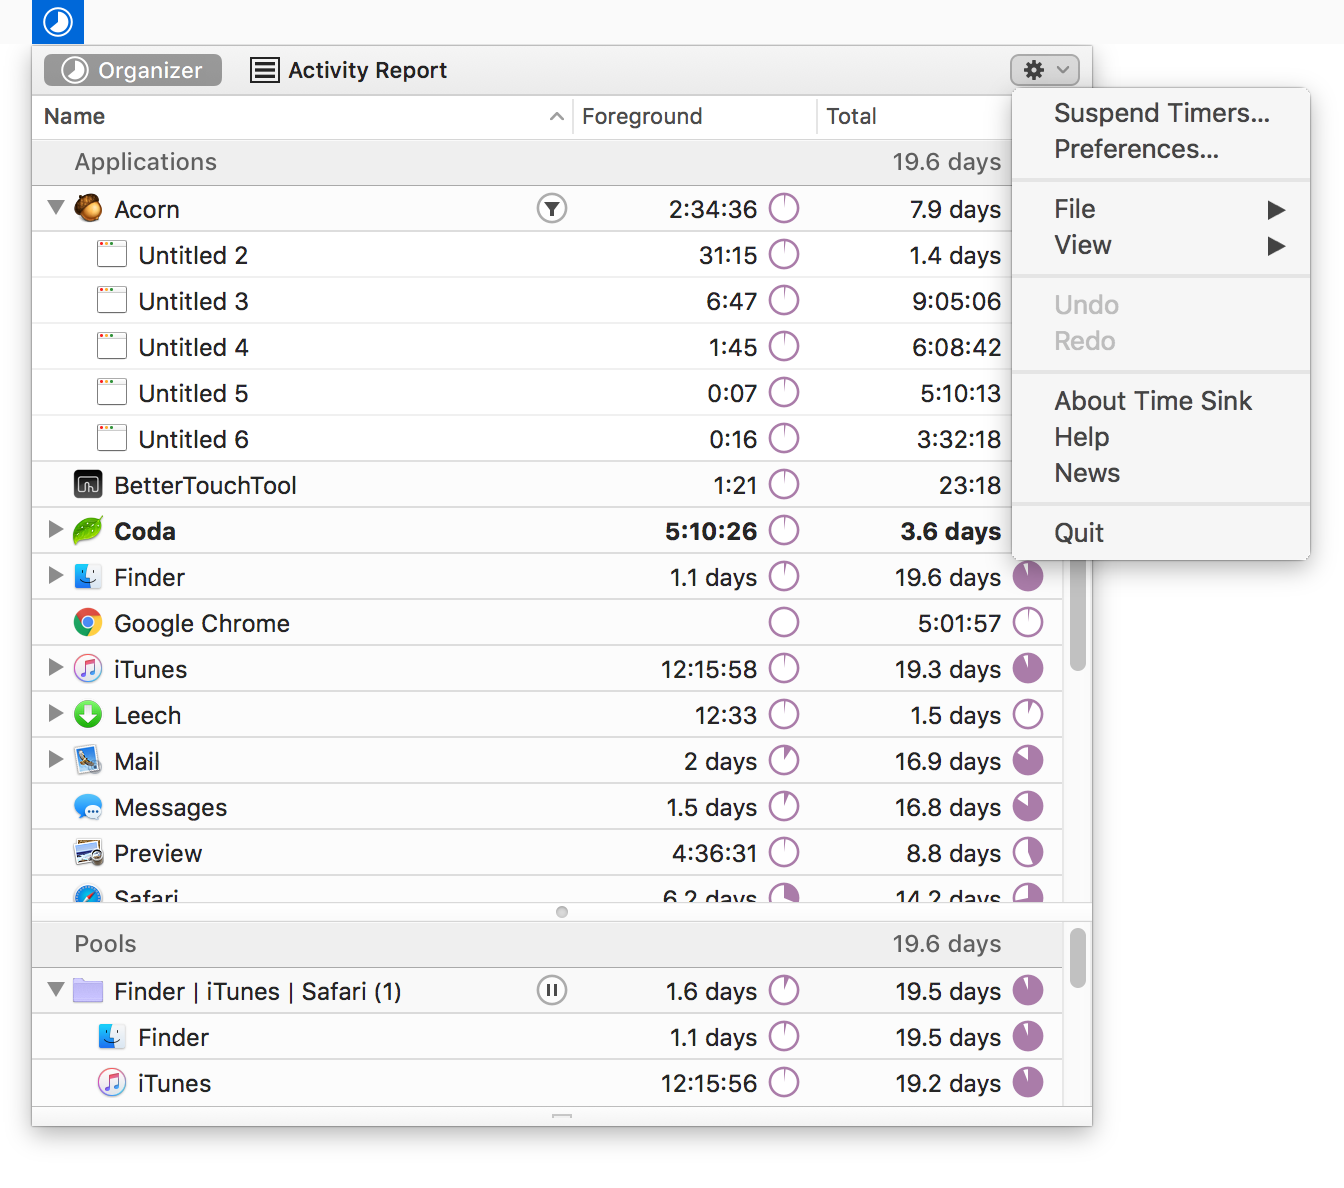
The buttons at top left toggle between the Organizer and Activity Report views (Time Sink will open to your last-used view), and the gear icon at top right contains all of the menus needed to use Time Sink.
For instance, to export a report, you'd first click Activity Report, set the date range (if desired) at the bottom of the window, then click the gear icon. In the drop-down menu that appears, navigate to File > Export Snapshot, and you're done.
Similarly, if you decide you'd like to return to full app mode, click the gear icon, then choose Settings, and toggle the app mode in the General tab.
When in menu bar mode, the Time Sink window is attached to the menu bar, so it can't be moved. It can, however, be lengthened and resized by using the narrow strip at the bottom of the window. (The resize corner may be bottom left or bottom right, depending on the position of Time Sink relative to your other menu bar icons.)