

Moom is great for saving window layouts—arrangements of windows across one or more applications, making it easy to restore your windows to where you want them to be. In general, Moom will attempt to match existing window titles with the titles of the windows in your saved layout—so if you have a Word document named “2020 Taxes” open, and that document was open when you saved the layout, then that window will go to where it was when you saved the layout.
If Moom can’t match an existing window title, however, then it just works with the number of windows—if you saved a layout with four windows open across three apps, and you have that same number of windows open in those same apps, then Moom will restore your layout, but the windows won’t be opened to whatever they were displaying when you saved the layouts (because Moom can’t open files, folders, documents, URLs, etc.).
As much as our users may wish it possible, it’s not feasible for Moom to restore whatever it is you were working on in whatever apps are in your saved layout—we’d end up writing lots of custom code on a per-app basis, and there are still some apps where we probably wouldn’t be able to get them to open documents, so we’d end up with a solution that only sort of worked.
For me personally, the only time I really want Moom to open the actual things I had in my saved layout are when I’m working in Finder. I have a number of saved layouts—one has my preferred window layout when working on Many Tricks projects, another that I use when I file documents I’ve scanned, and a third for managing my downloads. Unfortunately, because Moom can’t save the folders with the windows, I have to manually navigate to the proper folders after restoring these layouts…or do I?
With the help of Automator and Moom’s ability to open saved layouts via AppleScript, you can restore not only your Finder windows’ sizes and locations, but the folders you had open in those windows. You can even assign your Automator solution a global keyboard shortcut, making it very easy to use.
Step 1: Set up Moom’s saved layout
Let’s assume I want to restore a three-window Finder layout, like this:
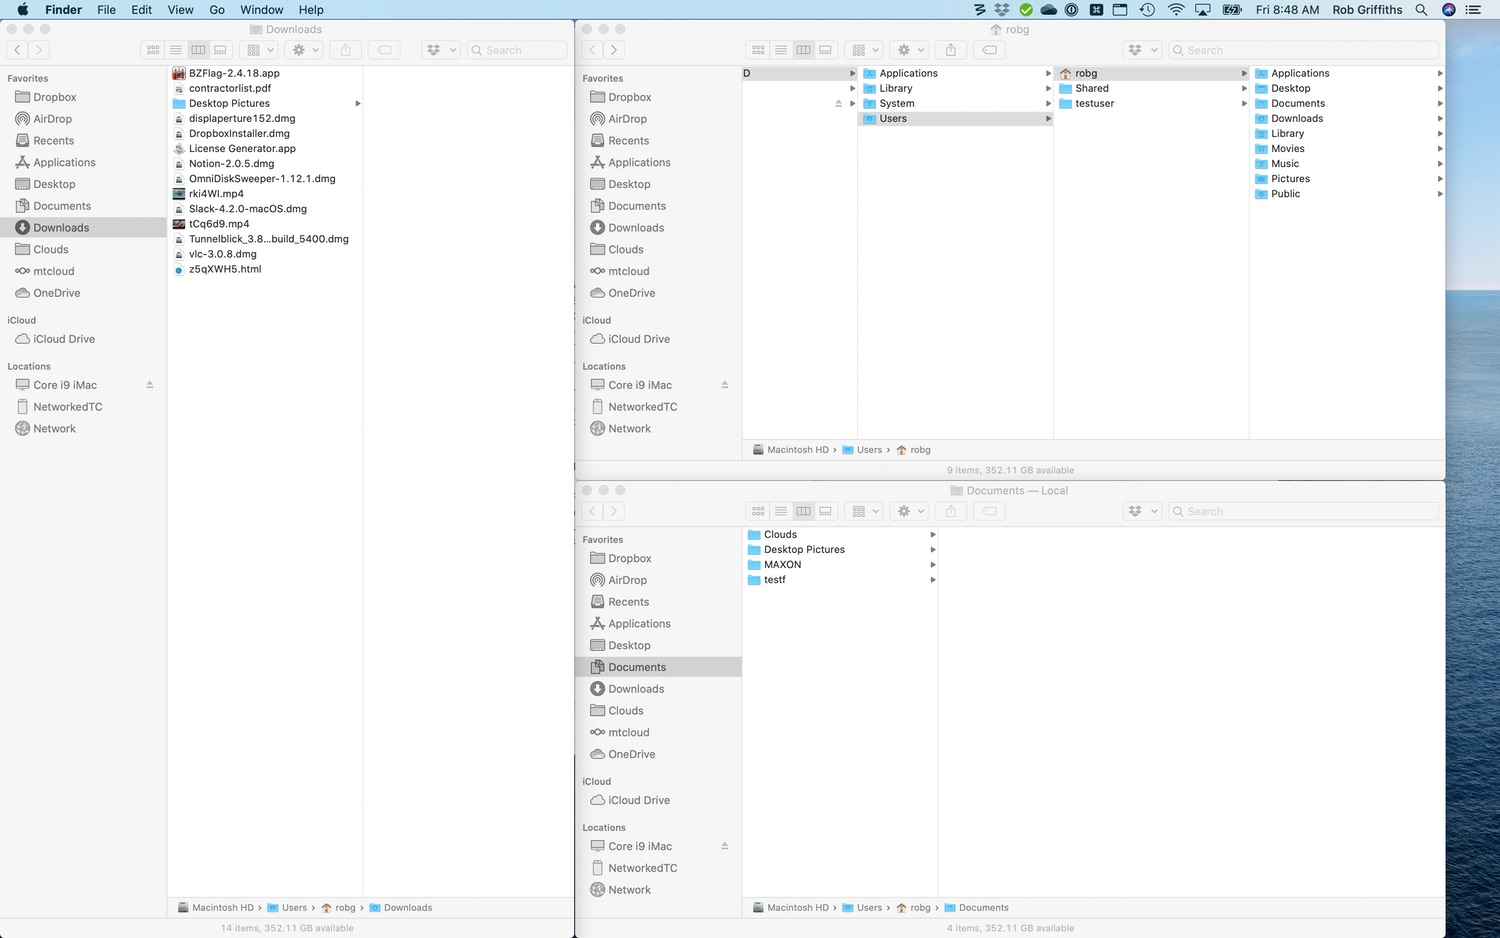
The three windows contain my Documents folder, my Downloads folder, and my user’s home folder. To set this up, first lay everything out as you’d like it to be, then use the Finder → Hide Others menu command so that only Finder is showing.
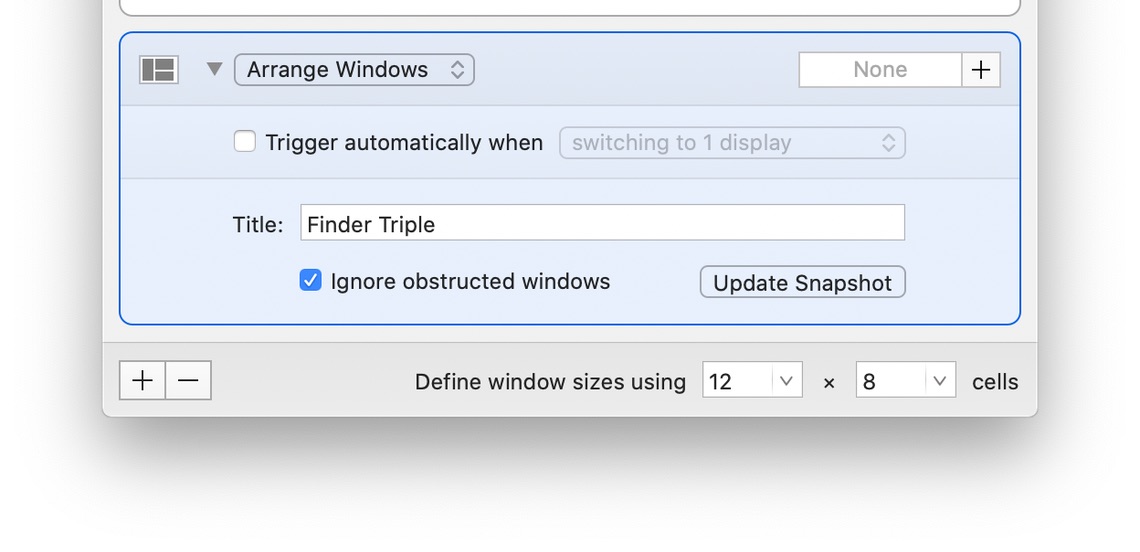
Under Moom’s menu bar icon (assuming you’re using it that way), select Save Window Layout Snapshot…, and give your saved layout a custom name—I named this one Finder Triple:
Step 2: Create the Automator action
Initial Setup
Once you have the layout saved, launch Automator. On launch, Automator will display a window with a sheet asking what type of document to create; select Quick Action:
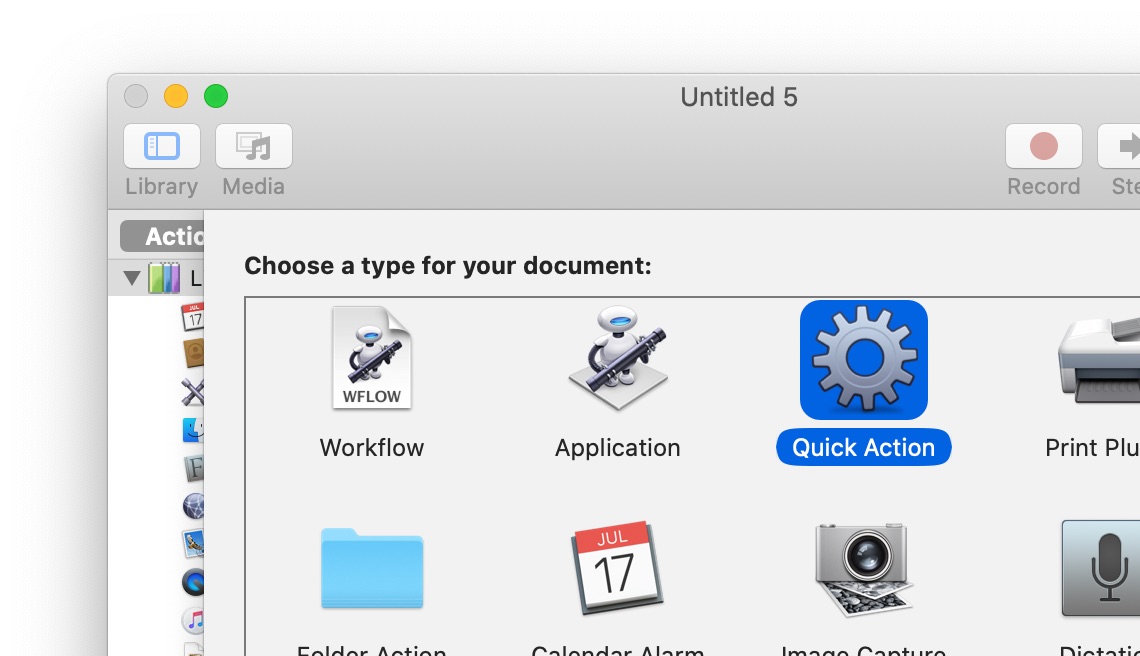
(If you don’t see the above, but rather a standard macOS file dialog, click Cancel, then select File → New to see the document selector.)
After selecting Quick Action, click the Choose button, which will open an Automator window.
At the top of the work area, some default information will have already been filled in. Change the “Workflow receives” pop-up to “no input,” and the “in” pop-up right next to it to “any application.” (If you only want to use this action when you’re in Finder, you can set it to “Finder” instead.)
You can leave the other pop-ups as they are—or if you want a custom color or image for your action, just select it from the respective pop-up menu. Here’s how the top area looks after setup:

First Automator Action
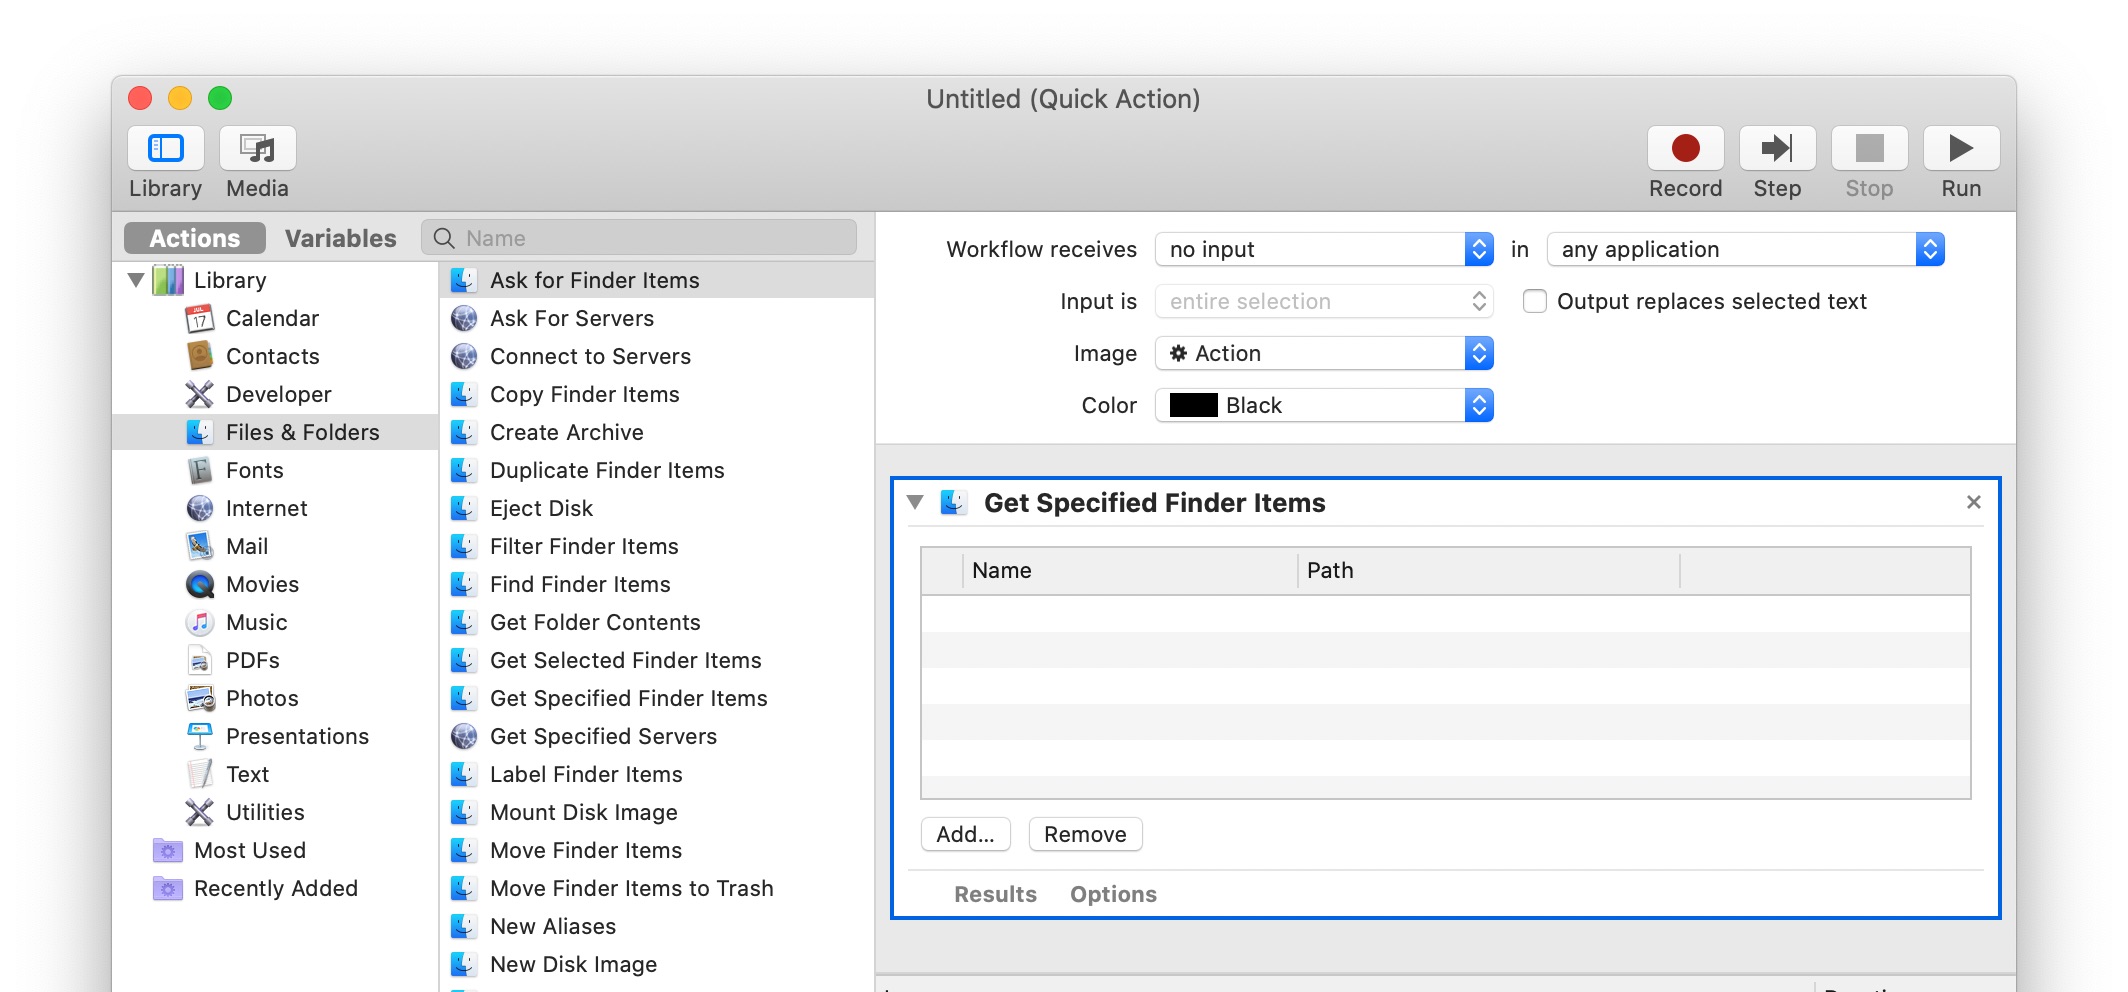
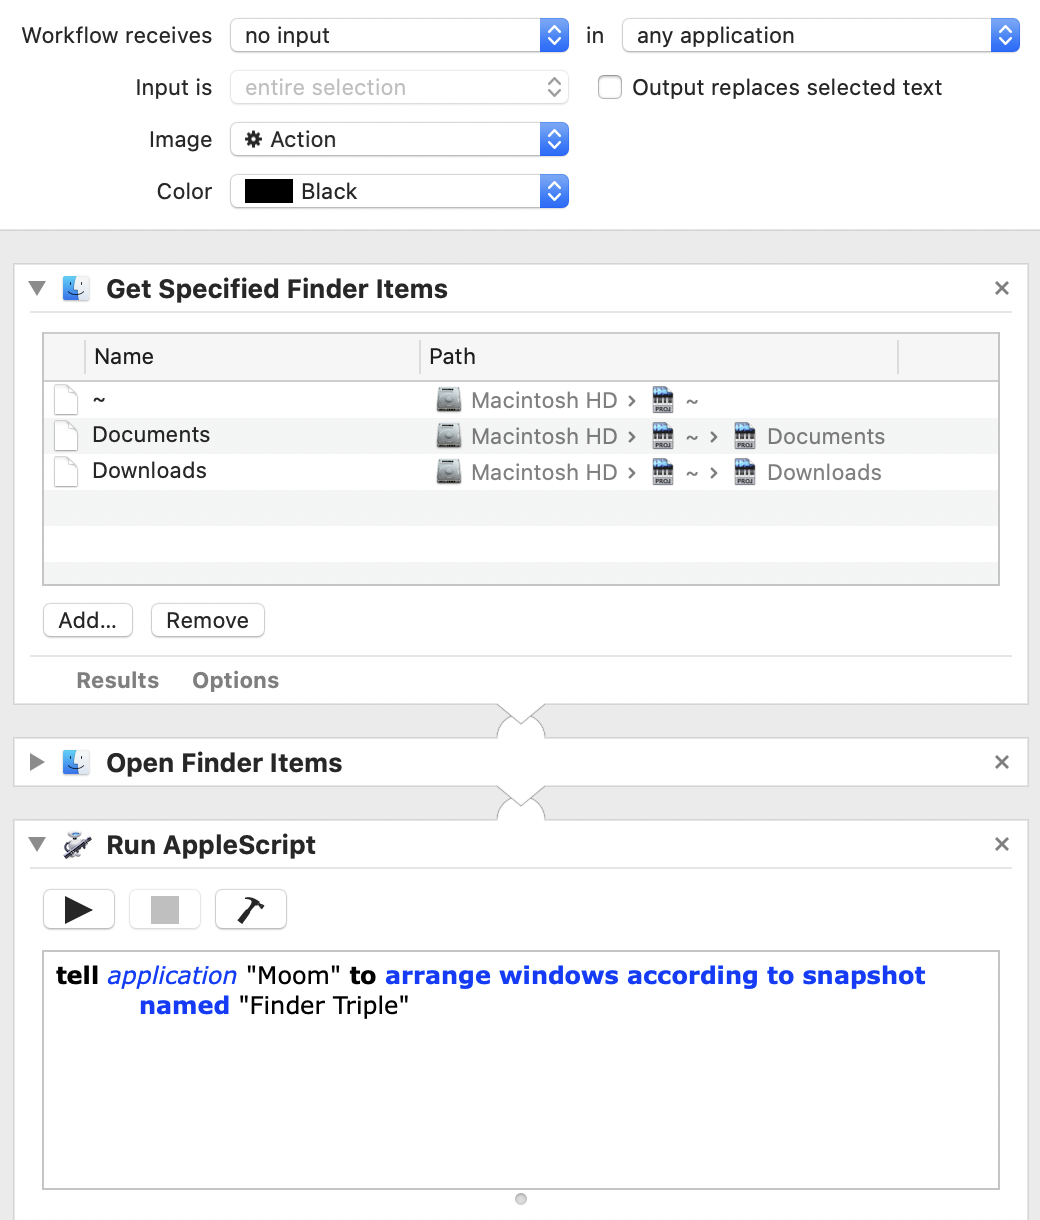
On the left side of the interface, click on Files & Folders, then drag Get Specified Finder Items from the next column into the far right work area; it should look like this when done:
Click the Add… button within the newly-added action, and then use the standard macOS file open/save dialog to navigate to your folder of interest; once there, click the Add button.
Repeat this step for each folder you’d like to navigate to—remember that the total number of folders needs to match the total number of windows in your saved layout.
Second Automator Action
Once you’ve added the proper number of folders to the first action, drag Open Finder Items from the second column (assuming you still have Files & Folders selected in the first column) into the work area, and drop it below the Get Specified Finder Items entry.
You do not need to make any changes to this action—it simply opens the folders you specified in the first step.
Third Automator Action
Click on the Utilities entry in the leftmost column, then drag Run AppleScript into the work area, as the last item in your workflow.
In the Run AppleScript action, there’s a default script that starts with on run…. Select all of the existing text and delete it, and replace it with this very simple one-line script:
tell application "Moom" to arrange windows according to snapshot named "name of snapshot"
Important: Replace name of snapshot with the name you gave your saved Moom snapshot—in my example, that’d be Finder Triple—and make sure you leave the quotation marks around the name of the snapshot.
With everything set up, the actions area should look like this:
Now select File → Save, and give your Quick Action a name—you can name it the same as your saved Moom layout, or whatever else you like. I named mine Finder Triple.
Step 3: Using your Quick Action
The Quick Action you created can be used in at least two ways.
Via the Services menu
Because your Automator action is a Service, it’s accessible via macOS’ Services menu:
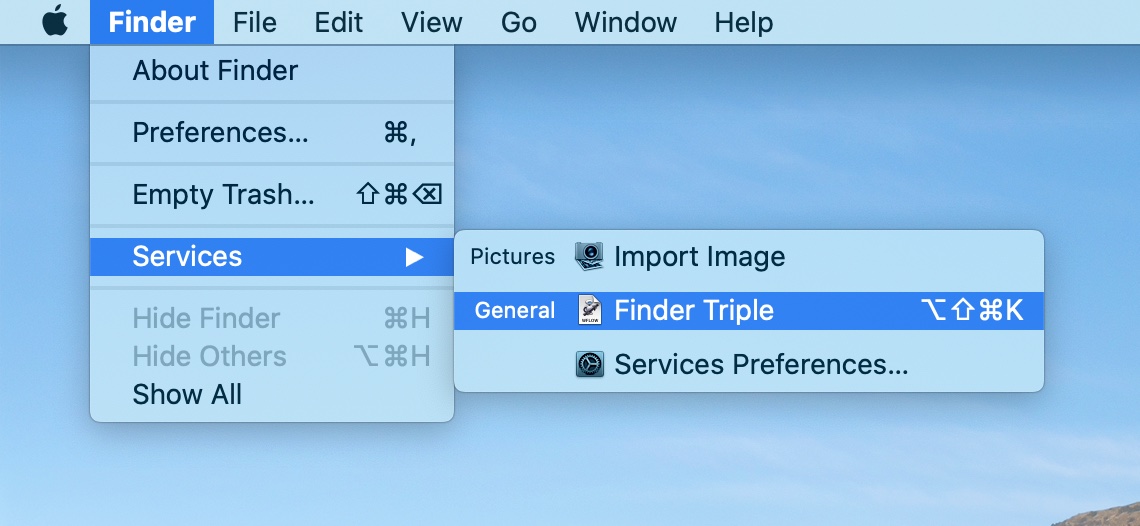
Select your item in the Services menu—in any application—and your Finder windows will open to the correct folders, and then Moom will arrange them according to your saved layout, just like this:
There is one (sort-of one-timeish) hassle associated with using your service, though: Permissions (see below).
Via a keyboard shortcut
You can also access your service via a global keyboard shortcut, which requires only a couple of setup steps. Open System Preferences, then the Keyboard panel, and finally, the Shortcuts tab. Select the Services item in the left column, find your service in the right column, then click on “none” to assign a shortcut; here I’ve assigned Shift-Command-Option-K for my triple-Finder-window service:

Permissions
Whether you use the Services menu or a keyboard shortcut, you’ll probably run into a permissions issue: When you try to use your service for the first time in a given app, you’ll see a variation on this dialog:
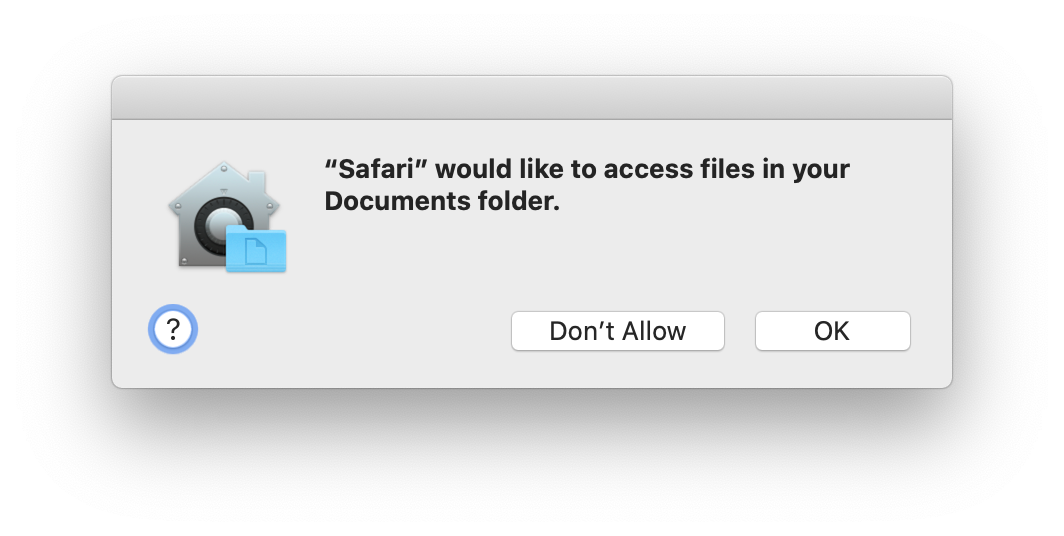
The dialog appears because macOS Catalina needs your permission before it will allow one app to show content from another app. In the screenshot above, the service was triggered from Safari, so macOS is making sure it’s OK for Safari to access the specified folder in Finder.
One dialog may not look too bad, but you’ll see another dialog for every folder your service needs to open—in my example, I’ll see the dialog three times. And you’ll see those dialogs the first time you run the service in any app—thankfully, just once, as after that, macOS remembers that you’ve given your permission.
You could use variations on this service to open particular URLs, or specified documents in specified apps, before restoring a layout with Moom. It takes a bit of work to set up, but the end result is a customized solution that opens the things you want open, and positions them in the location and at the size you prefer.