All posts in the ‘How To’ category

Subscribe to the RSS feed for the 'How To' category

Access Moom’s custom actions via pop-up menus

Thursday, August 29th, 2024

If you’re a keyboard-oriented Mac user, Moom 4 speaks your language. Every custom action can have its own keyboard shortcut, for starters. And, of course, there’s Keyboard mode, with even more keyboard-centric powers.

Keyboard access to all custom actions

One of the new keyboard-focused features in Moom 4 is hiding at the bottom of the Keyboard section of Moom’s Settings window: The “Access custom actions via hot key” keyboard shortcut box.

This feature isn’t enabled by default (and it’s independent of Moom’s Keyboard mode), but in the above screenshot, it has been assigned a Shift-Control-Option-M shortcut.

(more…)

A much simpler way to create Name Mangler services

Thursday, May 30th, 2024

Remember last week, when we posted a very detailed writeup that explained to how create Quick Actions for Name Mangler 3.9 and newer? Well, we have found a much simpler way to get this done, thanks to Apple’s Shortcuts app—and to our user Eric, for spurring us on to find a simpler solution.

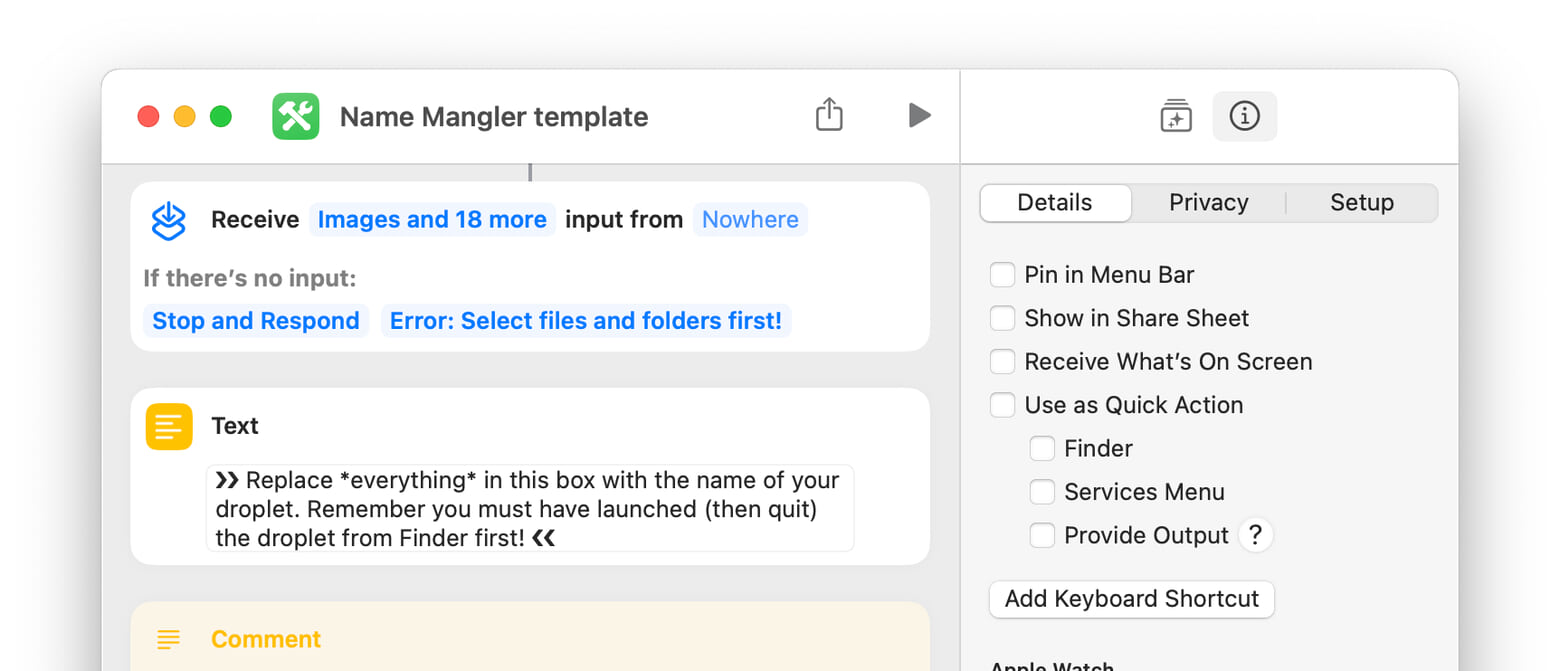
Here’s how the Shortcut looks (click to see the full Shortcut):

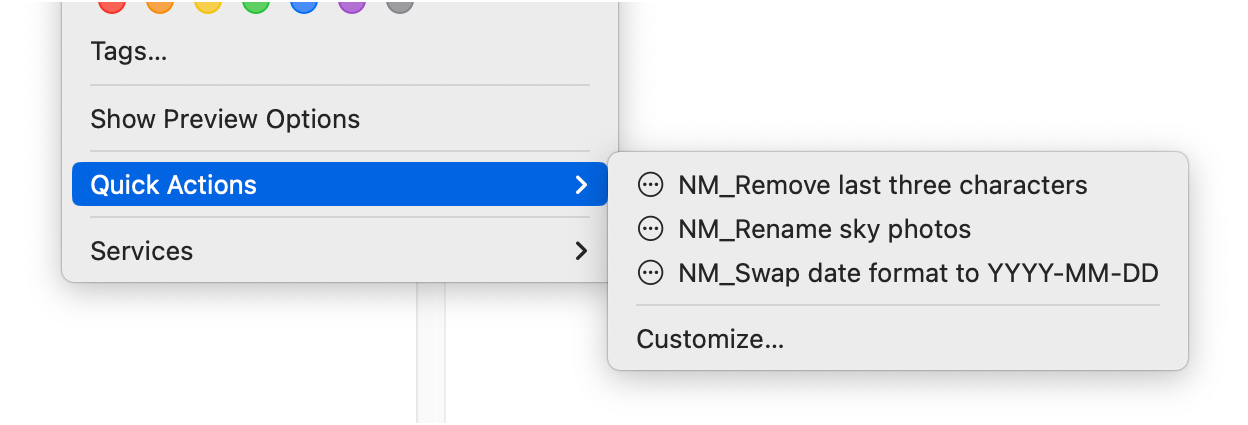
Apple’s Shortcuts app not only makes it (much) simpler to create Name Mangler Quick Actions, but you can also access them from Finder’s Finder → Services menu. Or run them from the menu bar. Or via a keyboard shortcut. Or use all of the above methods at once. And if you want to share your Shortcuts with others, it’s as easy as a couple of clicks.

We’ve created a template that requires a few simple edits in Shortcuts, and is then ready to go for your own use. Here’s how to get going…

(more…)

Quick Actions are the new Services for Name Mangler

Tuesday, May 7th, 2024

Note: We have found a much simpler way to implement Quick Actions, via Apple’s Shortcuts app. See the linked post to download the template, make a few simple edits, and you’ll be up and running with Quick Actions.

You are welcome to use the following Automator solution, which still works fine, but the Shortcuts solution is easier, and offers more ways to invoke the Quick Action.

As of today’s Name Mangler update, sharp-eyed users will notice that the File → Create Context Menu Service menu item has vanished. Unfortunately, due to recent changes in what kinds of things Apple allows apps that create Services to do, we had to remove the feature. (Basically, the only thing we’d be able to include would be a set of standard pre-defined Services, and that’s not very useful for an app that renames files.) So that’s the bad news.

The good news is that there’s a relatively easy workaround that will let you create Quick Actions using Automator. These will function as Services did before, though via the Quick Actions menu instead of the Services menu.

The process of creating Quick Actions for Name Mangler isn’t overly complicated, and we have several different ways for you to learn how to complete the task.

We have a video for those who learn best by observing, and a step-by-step write-up for those who learn best by reading. Also, at the end, you’ll find a “just make it work for me!” section that provides a nearly ready-to-go Quick Action that you can duplicate and edit as needed. (However, knowing how to create Name Mangler Quick Actions is important, so we recommend watching the video and/or reading the instructions as well).

(more…)

How to: Use Moom in macOS Shortcuts

Monday, December 13th, 2021

Users of macOS Monterey can use the new (to macOS) app Shortcuts to automate many tasks. Developers can add direct support for Shortcuts to their apps, and we’ve heard the requests: We are investigating Shortcuts to see how we can improve support in the next major version of Moom. But just because better support may be coming in the future doesn’t mean you’re locked out of working with Moom in the Shortcuts app right now.

Moom has long supported a basic AppleScript dictionary, and Shortcuts can (with a simple setting change) execute AppleScripts. Once you’ve made that change, you can use Shortcuts to interact with some of Moom’s features. In particular, you can:

  • Activate a saved window layout snapshot.
  • Save a window layout snapshot. You can optionally merge with an existing saved layout snapshot, or replace an existing one (if one exists; if not, it will be created).
  • Center the frontmost window, either using macOS guideline (which is slightly above screen center), or to the exact screen center.
  • Generate a list of saved window layout snapshots.

Here are a few examples to get you started.
(more…)

How to: Use Moom and Automator to restore Finder windows

Thursday, May 7th, 2020

Moom is great for saving window layouts—arrangements of windows across one or more applications, making it easy to restore your windows to where you want them to be. In general, Moom will attempt to match existing window titles with the titles of the windows in your saved layout—so if you have a Word document named “2020 Taxes” open, and that document was open when you saved the layout, then that window will go to where it was when you saved the layout.

If Moom can’t match an existing window title, however, then it just works with the number of windows—if you saved a layout with four windows open across three apps, and you have that same number of windows open in those same apps, then Moom will restore your layout, but the windows won’t be opened to whatever they were displaying when you saved the layouts (because Moom can’t open files, folders, documents, URLs, etc.).

As much as our users may wish it possible, it’s not feasible for Moom to restore whatever it is you were working on in whatever apps are in your saved layout—we’d end up writing lots of custom code on a per-app basis, and there are still some apps where we probably wouldn’t be able to get them to open documents, so we’d end up with a solution that only sort of worked.

For me personally, the only time I really want Moom to open the actual things I had in my saved layout are when I’m working in Finder. I have a number of saved layouts—one has my preferred window layout when working on Many Tricks projects, another that I use when I file documents I’ve scanned, and a third for managing my downloads. Unfortunately, because Moom can’t save the folders with the windows, I have to manually navigate to the proper folders after restoring these layouts…or do I?

(more…)

How-to: Track top-level web site usage with Time Sink

Monday, January 2nd, 2017

Our time-tracking app Time Sink relies on window titles to track your activities. This approach works great for most use cases, as window titles are supplied by the vast majority of apps out there, which means Time Sink is able to keep an eye on nearly everything you do.

But when browsing the web, relying on window titles can sometimes be problematic: Many sites don’t include any site-specific information in their window titles. For instance, a news site may just have the title of the news article as the window title. So if you were interested in finding out how much time you spend on that news site, Time Sink apparently wouldn’t be able to help, because there’s no way to tell which site those news stories came from.

Other sites do include some site-specific data in their window titles, but what that is will vary by site, as well as where it appears within the window title.

The good news is that Time Sink can track site-wide time usage for both types of windows—it’s relatively simple for sites that include site-specific data in their window titles, and it’s somewhat more involved for sites that do not.

(more…)

How-to: Make Witch (indie) launch on login in Sierra

Tuesday, October 25th, 2016

We’ve had a few reports of the direct version of Witch not automatically launching at login after upgrading to macOS Sierra. While we haven’t seen this issue here, if it happens to you, here’s how to resolve the problem. (There have been no reports of troubles with the App Store version, so the following is only for our direct customers.)

First, disable Witch in its System Preferences panel, then switch to the Users & Groups panel and click the Login Items tab. Scan the list of items and see if witchdaemon is listed.

If you see witchdaemon in the list, start by getting rid of it: Select it with a single click, then click the minus sign to remove it. Now just follow the rest of these instructions.

If you don’t see witchdaemon then—leaving System Preferences open—switch to Finder.

In Finder, navigate to your user’s Library folder (or to the top-level Library folder, if you installed Witch for all users). Your user’s Library folder may be hidden; if so, hold down the Option key and choose Go > Library from the Finder’s menu.

Once inside the Library folder, navigate into PreferencePanes. There you will (hopefully) see Witch.prefpane. (If you don’t see it, it’s probable you installed Witch for all users, in which case you need to navigate to the top-level /Library > PreferencePanes folder, then follow the rest of these instructions.)

Right-click on Witch.prefpane and choose Show Package Contents from the contextual menu; this will display a Contents folder. Navigate into Contents > Helpers, which should show just oen entry, witchdaemon.app. Leave this window open.

Now drag witchdaemon.app from the Finder window into the list of login items in System Preferences, and drop it there. Make sure witchdaemon now appears in the list, then close System Preferences. You should now be good to go—Witch should now launch properly at login.

If you need additional help with this process, or Witch still isn’t launching at login after even though it’s listed in login items, please open a trouble ticket for additional support.

How-to: Give Moom extra room to work in El Capitan

Tuesday, June 30th, 2015

If you’re a developer (or public beta tester) using El Capitan, you’ve probably discovered that you can hide the menu bar (via System Preferences > General > Automatically show and hide the menu bar).

If you use this feature, and you’d like Moom to use the extra pixels afforded by the hidden bar, here’s how. Open Terminal (no need to quit Moom first), paste the following text, and press Return:

defaults write com.manytricks.Moom "Ignore Menu Bar" -bool YES

From now on, Moom will freely place windows in the top portion of the screen. This change will affect everything Moom does—those 23-ish pixels at the top of your display are now part of Moom’s real estate.

Later on, if you decide you don’t like the auto-hiding menu bar and disable it, you’ll want to also disable Moom’s use of that space—lest you find windows partially hiding behind the menu bar. To do that, go back to Terminal (again, no need to quit Moom), paste this text, and press Return:

defaults write com.manytricks.Moom "Ignore Menu Bar" -bool NO

With that command done, Moom will once again respect the menu bar’s real estate.

How to: Discover the magic of the sequence identifier

Monday, May 19th, 2014

One of the main features in Name Mangler 3 is multi-step renaming. Instead of being limited to just one renaming step, you can add many steps to one renaming task. In prior versions of Name Mangler, you’d need to use Advanced mode, or run multiple repeated single tasks, to handle multi-step renaming tasks. This is a great change for everyone, and has greatly reduced the need to use Advanced mode.

But Name Mangler 3’s Advanced mode still has a few tricks that you can’t do using the “normal” renaming options. One of the most powerful of these hidden gems is the “sequence identifier” parameter for the sequence action. The help file has this to say about the sequence identifier:

The sequence identifier, if included, indicates that sequence indexes are only inferred from the number of files that share the same identifier, as opposed to the overall number of files to be renamed.

Clear as mud, right? That’s entirely my fault, and I’ll try to come up with better wording in a future update. But for now, here’s a hopefully-clearer description:

The sequence identifier, if included, is used to group files together (by a common criteria) for sequencing. All files that share a sequence identifier will be treated as part of the same sequence.

Hopefully that’s a bit clearer…and here’s a real-world example of how you can put sequence identifiers to use to simplify your renaming tasks.

(more…)

How-to: Replace preference files in Mavericks

Thursday, January 30th, 2014

Something many people do, myself included, is copy an application’s preferences file—either from one Mac to another (as a quick way of getting an app configured to my liking) or to replace a damaged/lost preferences file using a Time Machine backup. Until recently, this process was really simple: quit the app in question, trash the existing prefs file, insert the new prefs file, launch app.

Enter OS X 10.9, aka Mavericks, aka “the easy prefs copy killer.” Apple has made changes to the way the preferences system works in Mavericks, and one casualty of those changes is the easy replacement of an application’s preferences file. A brief bit of before-and-after, and then we’ll get to the fix—or just click the Read More link to jump right to the fix.

In prior versions of OS X, preferences files were always read by the application at launch. So as long as the app wasn’t running, if you replaced its preference file, it would read the new file the next time you launched the program.

In Mavericks, preferences are managed by a background daemon, cfprefsd. This service reads the preferences file once, when you first run the app. It then (I believe) receives notifications if you change the program’s settings while the program is running, and then writes them to the actual preferences file at certain points in time. But cfprefsd always has a copy of those settings in its cache, and that’s what the app gets when it checks its settings. (This reduces hard disk access, which is important in conserving battery life in laptops.)

Here’s the important bit: After you’ve launched an app once, it seems that any subsequent launches also get their preferences from cfprefsd. So if you try the old “replace the prefs while the app isn’t running” trick, you’ll be quite surprised to find that your program launches with its previous settings. It will do this even if you simply delete (via Finder) the old prefs file!

So how do you get around this aggressive caching of preference files?

(more…)