

What follows is an explanation of Usher's menu commands, including its extensive contextual menu. Please note, not every menu item is explained; we assume that you've used your Mac long enough to figure out what a → menu item does, for example, so we don't explain those things here.
Instead of explaining everything, we'll focus on those commands that aren't so easily understood.
Hover over any of the main entries below (i.e. Usher, File, Edit, etc.) and that actual Usher menu will appear as a visual reminder of what it looks like.
Usher
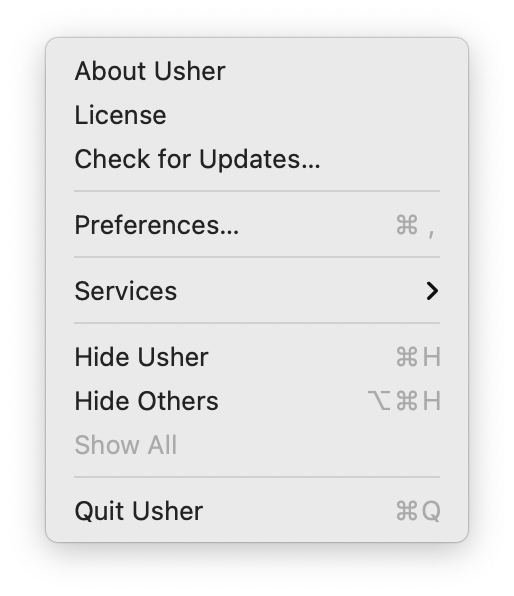
Usher's application menu is fairly standard for Mac OS X applications. You can use this menu to see the About box, of course, and you can see your license or check for updates, along with the other normal macOS features found in most any application menu.
File
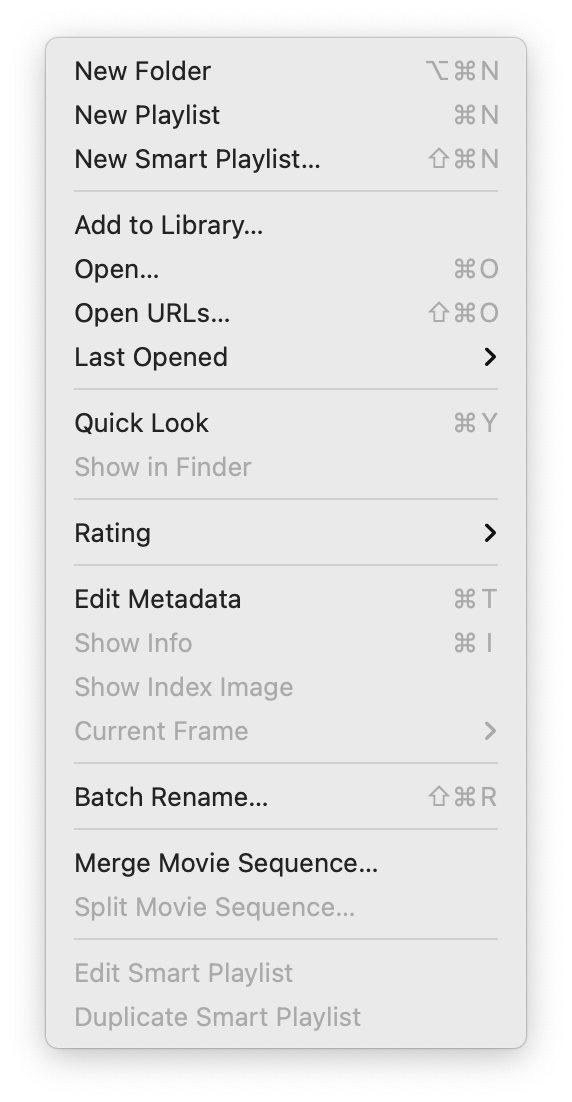
User's File menu is used to create new folders, playlists, and Smart Playlists, and to open files and URLs. Many of the menu items here are self explanatory; here are details on the less-obvious ones. (Note that some items are almost always grayed out here—some work only with one selection, some work only with multiple selections, and others work only while viewing a media file.
In addition to using the menus to create playlists and Smart Playlists, previous versions of Usher offered the ability to create playlists and Smart Playlists via a couple of buttons at the bottom of the sidebar. These buttons still exist, but they're hidden by default. Hold down the Control key to display (at the bottom of the sidebar) the +/- signs for adding and removing playlists, and add the Option key to turn the + sign into the gear icon for creating new Smart Playlists.
opens a standard macOS file browser, from which you can select a single file, multiple files (with Shift and/or Control), or entire folders to add to Usher's Library.
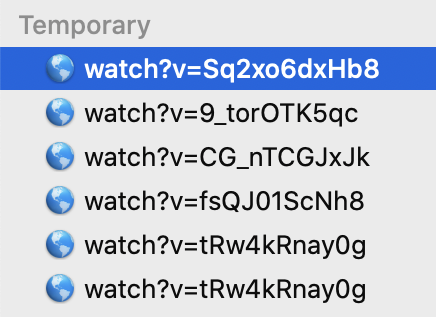 opens a window into which you can paste or type a list of video URLs. Usher will then add these URLs to the Temporary area of the sidebar:
Usher does not download files from the internet—all it stores is the URL itself. As such, if the source URL goes away, the link stored in Usher will no longer work.
Once in temporary storage, you can preview the videos by selecting one in the list and pressing the Space Bar, which will open a Quick Look window containing a web browser. If you double-click one of the entries, it will open in your default browser. The first time you do this, you'll see a message like this one, in the case of Safari:
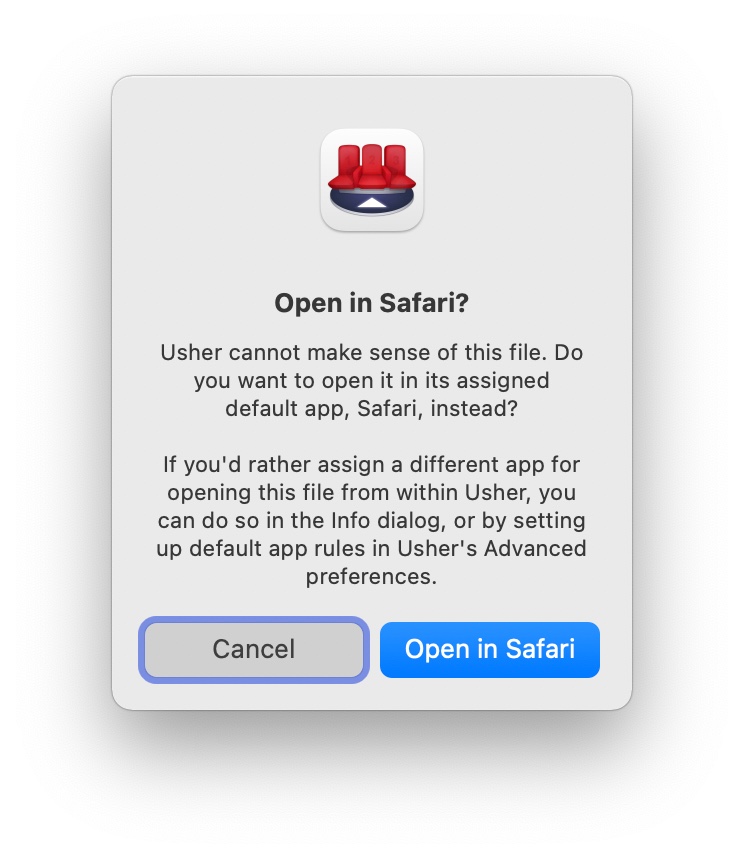
You'll also see this dialog if Usher tries to play a file format it can't handle, such as Apple's DRM-protected video files, MKV files, etc.
Although URLs are shown as entered in the sidebar, they don't have to remain that way: You can rename them to anything you like, as the URL info is encoded in the Usher library file. Note, too, that temporary storage is just that—temporary. If you want to keep these URLs in Usher forever, you'll need to drag them out of Temporary and into somewhere in the Library section.
You can tell Usher to never remove items in the Temporary section of the Library by unchecking the Clear temporary storage when Usher quits setting in the Library section of Usher's settings.
opens a new window that will create a single index image from frames of your video. You can specify the number of frames, size, spacing, border, and a number of other options, and then save the end result:
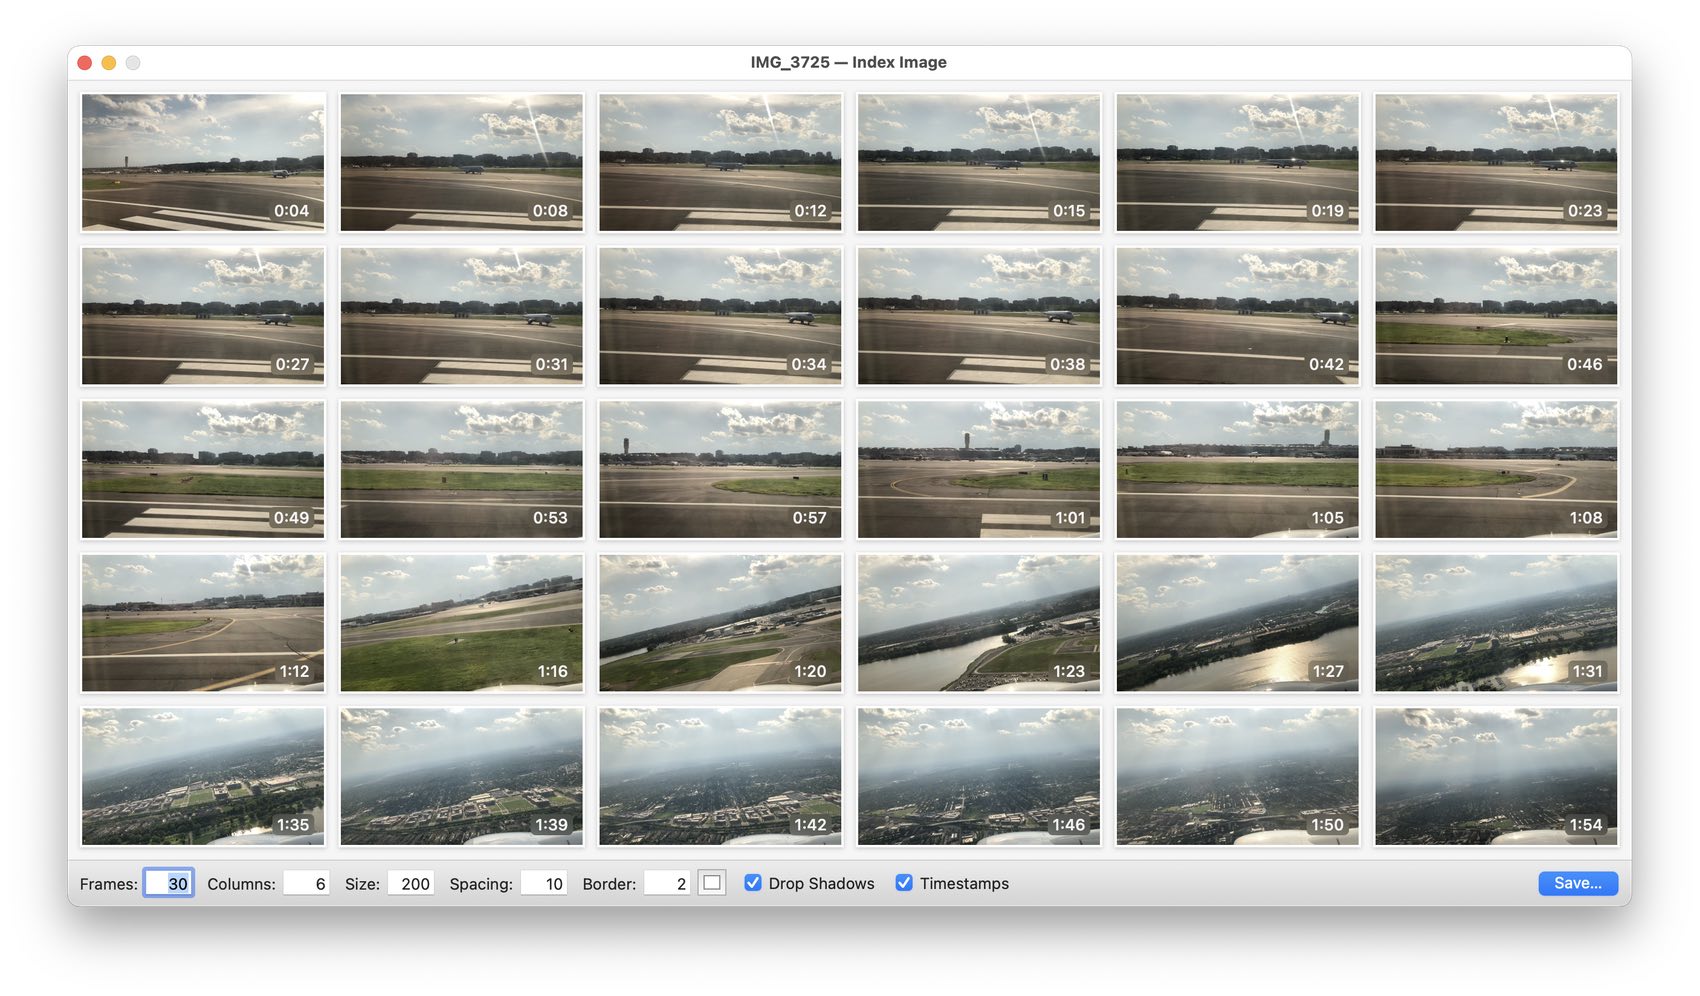
Here's a little trove of index image tips…
- Click or right-click on any index image for a useful contextual menu that lets you copy or save the image, or play the video from that point in time, amongst other choices.
- You don't need to use the Save option on the contextual menu—you can just drag an image out to your Desktop to save it.
- Geeky final tip: Try using negative column values, e.g. -140, to make Usher try to create the index image with an approximate outer aspect ratio, e.g. 14:10, instead of a fixed number of columns. Depending on how you use these, this may make sense when you compare index images for portrait vs. landscape videos.
 is only available while a video is open for playback. When selected, it will open a submenu, as seen at right.
will set the currently-visible video frame as the preview image for that video's thumbnail, while will let you drag out a selected area of the video to use as the preview frame.
and will export either the current frame, or a dragged-out region of the current frame, as a saved image file.
is only available when more than one media file is selected. (It can also be reached on the second tab when editing metadata for more than one media file.) The renamer lets you rename more than one media file at a time, using Usher's built-in batch renamer. You can choose from a number of renaming methods, as seen in the below screenshot.
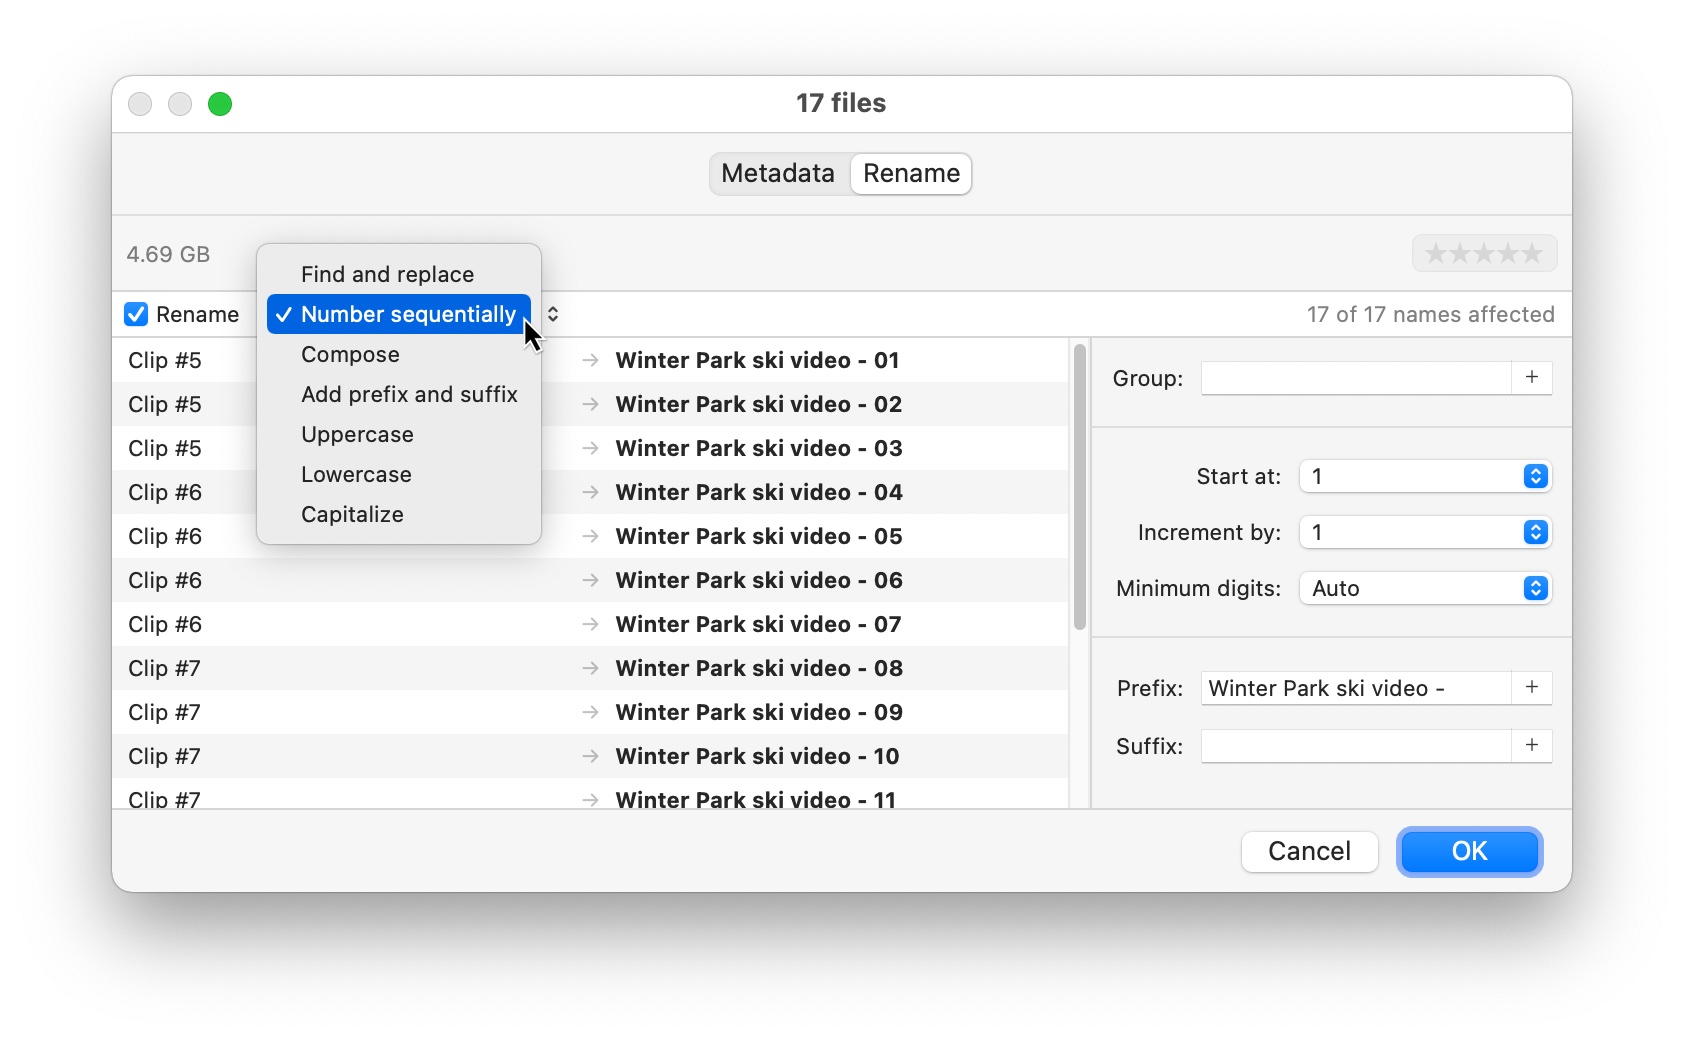
In many of the renaming commands, you'll see a small plus sign at the right edge of an input box. Clicking that plus sign to gain access to your files' metadata, so you can easily use those values as part of your renaming:
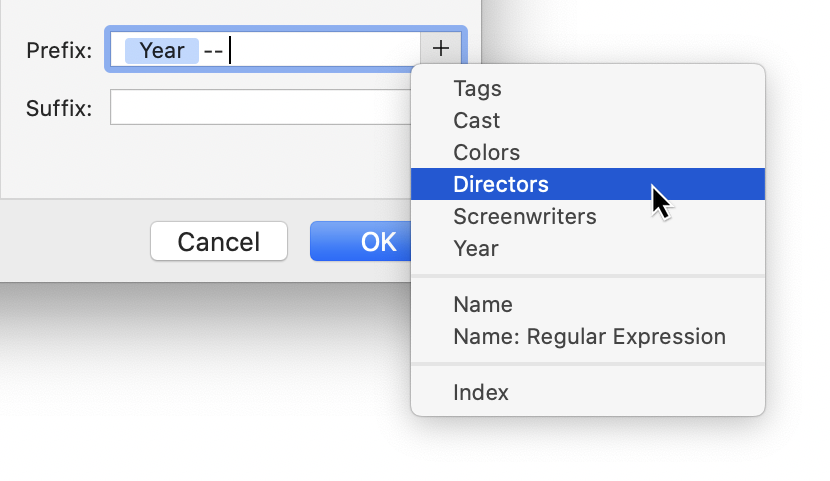
With full access to your files' properties, you could, for example, add the year of the recording to the filename, as seen above. But that's a very simple example; use your metadata as you see fit to massage your filenames.
You can use regular expressions to put even more power behind your renaming actions—both in raw regular expression form in the "Find and replace" action, and via a simplified method for use with metadata fields. Please see the Using Regular Expressions chapter of help for more details on how this works.
Keep in mind that changes made here are not undoable, so be certain of your renaming before you proceed. And if this isn't enough power for your renaming needs, we highly recommend Name Mangler (which can, in fact, undo name changes). But please, if you're using Name Mangler (or any other renaming tool), rename your files before you add them to your Usher library—it's best to only rename your already-added collection using Usher's built-in renaming tool.
(only available with multiple media files selected) and (only available with a previously-merged media file) let you combine (or split) separate media files. Usher will merge them in alphabetical order.
Many of these commands are replicated on the contextual menu you can access directly from a video's thumbnail image.
Edit
The Edit menu is similar to that of most apps' Edit menus, with a few additions. In the top section, most everything is self-explanatory, though if you have a media file open for viewing/playing, you can use the menu item to copy the current frame to the clipboard.
In the second section, selects all visible media files in Usher's main window (it does nothing when a media file is frontmost).
Usher supports some very basic video editing: Deleting selected portions of a video, or trimming a video to just the portion you've selected. To start, you need to select a portion of a video, obviously.
 After opening a video, move the playhead to the start of the section you'd like to mark, then use the menu item.
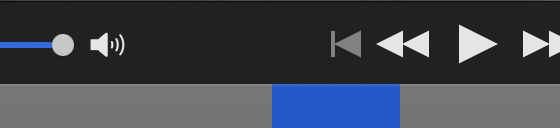
Next, drag the playhead to the end of the desired selection, and use the menu item. When done, the selected portion of the video's timeline will be shown in your defined highlight color on the controller bar, as seen in the image at right (the selection is in blue in this example; its color is based on your system's accent color setting).
Once a selection has been created, use to remove it from the video, or to get rid of everything but the selection. If you make a mistake while doing this, use to get back to the unedited video. If you change your mind, use .
Note: Editing is non-destructive; you can always use to get back to the unedited version of the video.
Sometimes you might want to work with a subset of your media collection, but not have to create a playlist in order to do so—maybe it's a one-time project to fix some metadata, for example. What you really want is a temporary playlist, and Usher can do just that.
Start by selecting the media files you'd like to focus on, using Command-Click and/or Shift-Click. Once you have all the files selected, select , and you'll see just the files you had selected, like this:
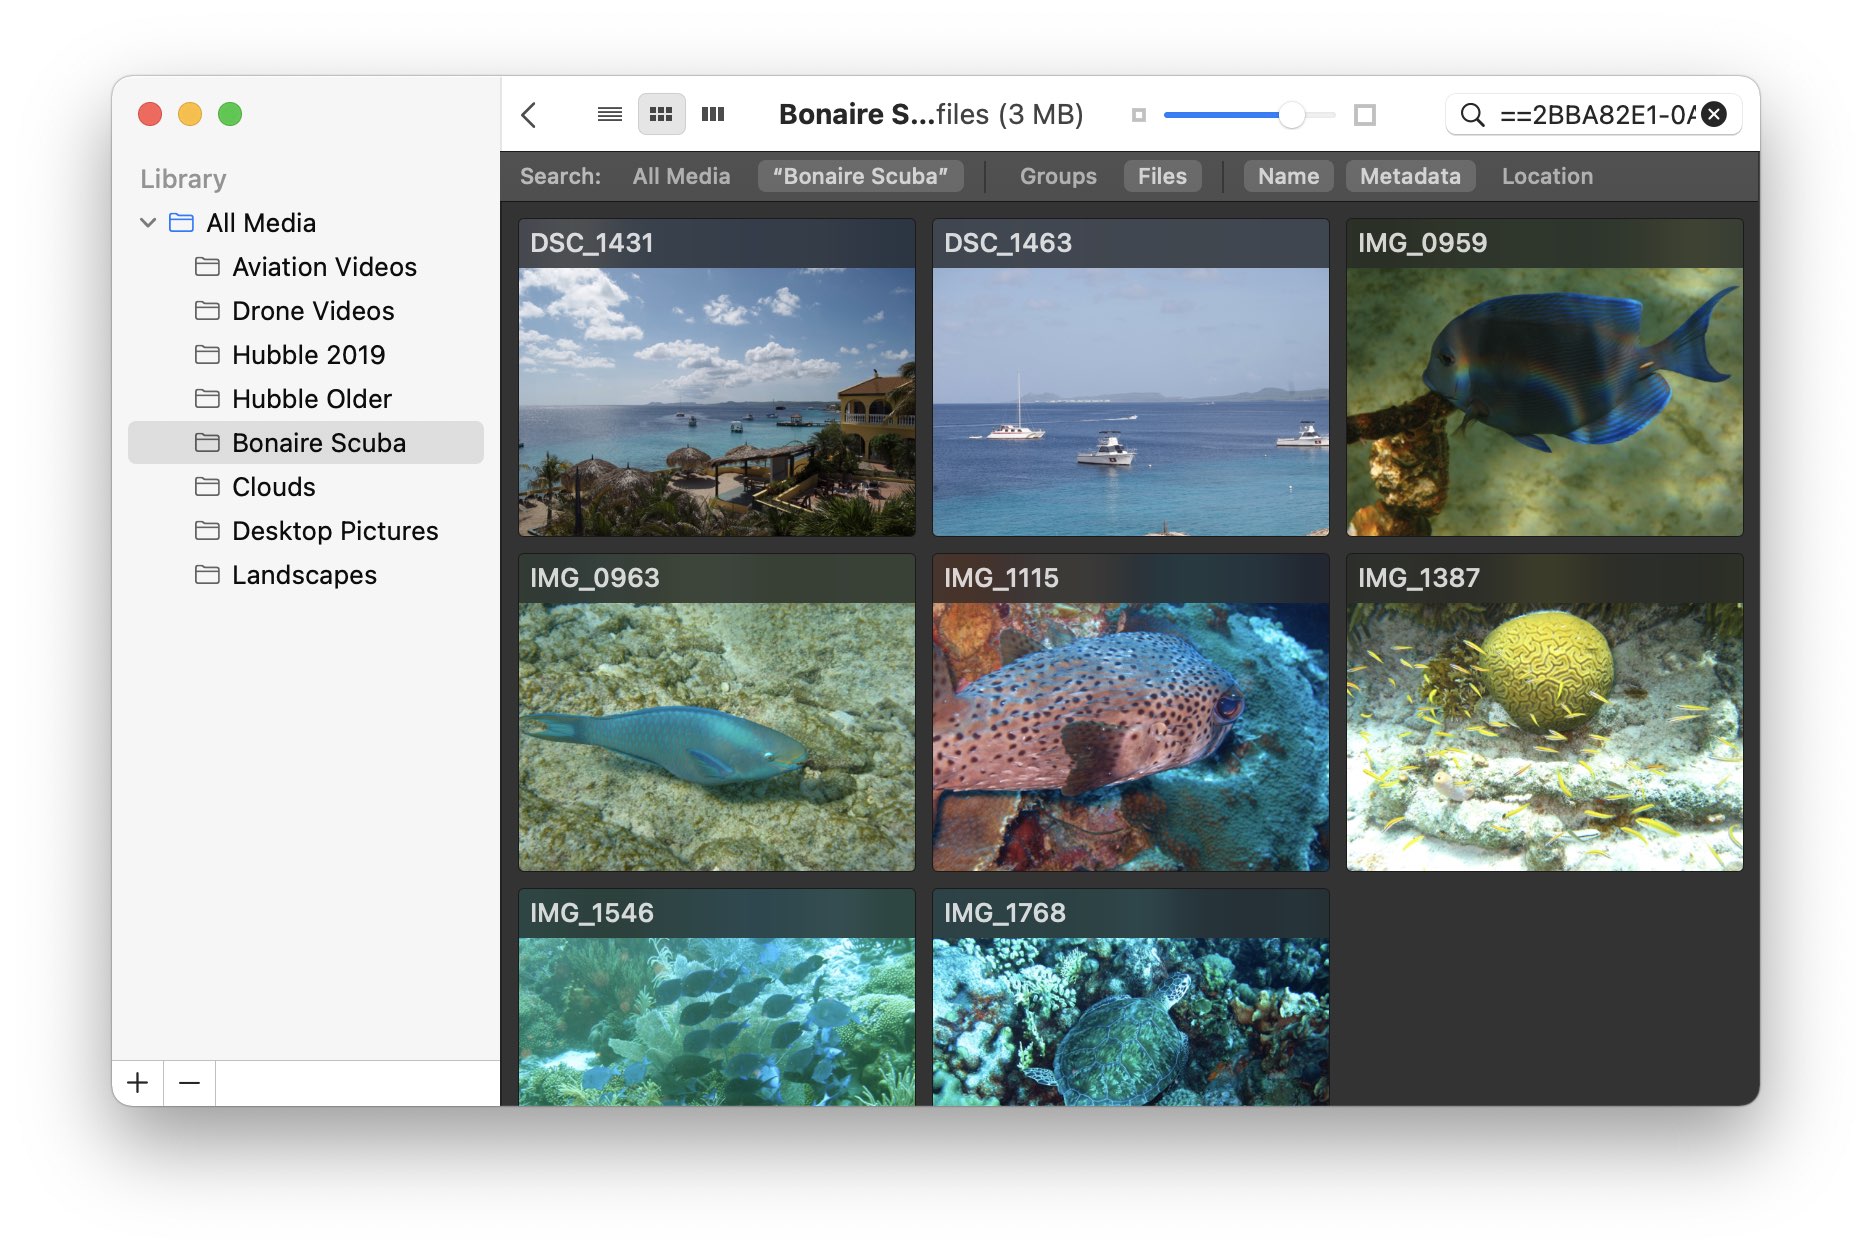
You can see that there are only eight images displayed, though the selected folder in the sidebar holds many more. Usher creates this temporary playlist by running a search using a special "unique identifier," which is the odd-looking string of text in the search box—you don't need to pay any attention to the identifier.
To clear a filtered selection, click the 'x' button at the right edge of the search box.
View
The View menu is extensive…very extensive. Some of its options work when media files are open, others work when the main Usher window is frontmost. Most of the functions in the View menu are self-explanatory by title, so they won't be covered, but here are some of the less obvious (and more useful) entries.
The first three entries, , , and , change the view mode—replicating the functionality of the icons at the top of the Usher window.
These three settings are not global. They apply on a per-folder and per-playlist basis.
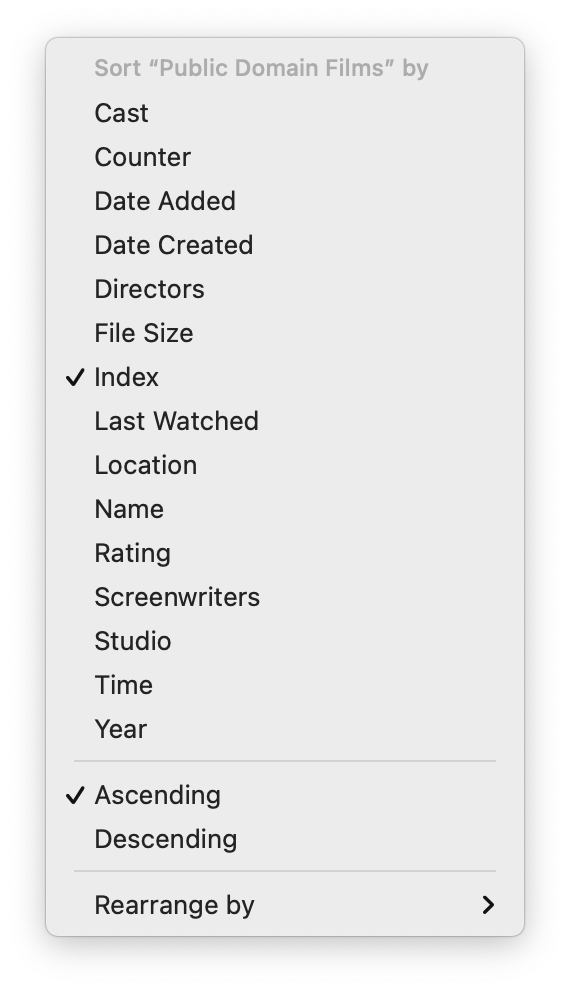
The menu item controls how your library is automatically sorted—the submenu has a number of sorting possibilities you can use. One of those choices is Index, which basically means no sorting—Usher will leave videos in the order in which you drag them.
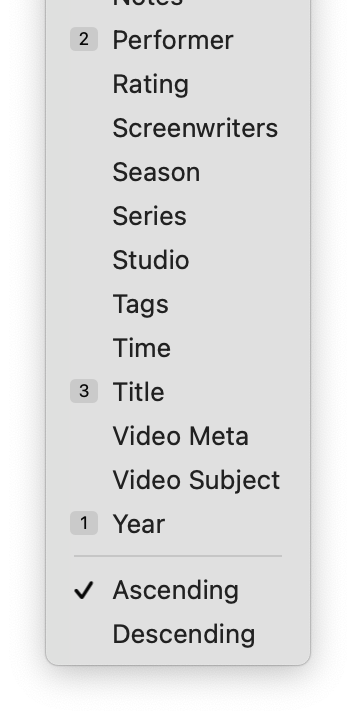
Although it seems you can only sort by one criteria, that's not the case. Here's how to sort using more than one criteria:
- Select the primary sort criteria from the menu. In the image at right, Year is the primary criteria.
- Hold down the Shift key, reactivate the menu, and select the secondary sort criteria (Performer in this example).
- Repeat the prior step for each additional sort level; in the example at right, there's just one more (Title).
As you select each sort level, the main window will refresh to reflect the latest change. The menu also shows you the sort order by prefacing sorted criteria with their rank in the sort order.
To remove multi-level sorting, simply select any one entry in the menu without holding the Shift key down.
The menu item is basically a special one-time sort. Select one of the options in the submenu, and your library will then be sorted based on the chosen criteria. If you select , Usher will randomize your media files, in case you want to watch a selection of videos in random order. Note: After rearranging, your media files will obviously no longer be sorted. To sort them again, just use the menu item.
The menu item is only active if you're viewing your Library as a list. If you are, use this menu item to control which columns show up in the list view. You can also add and remove columns by right-clicking anywhere in the header area of the list view itself.
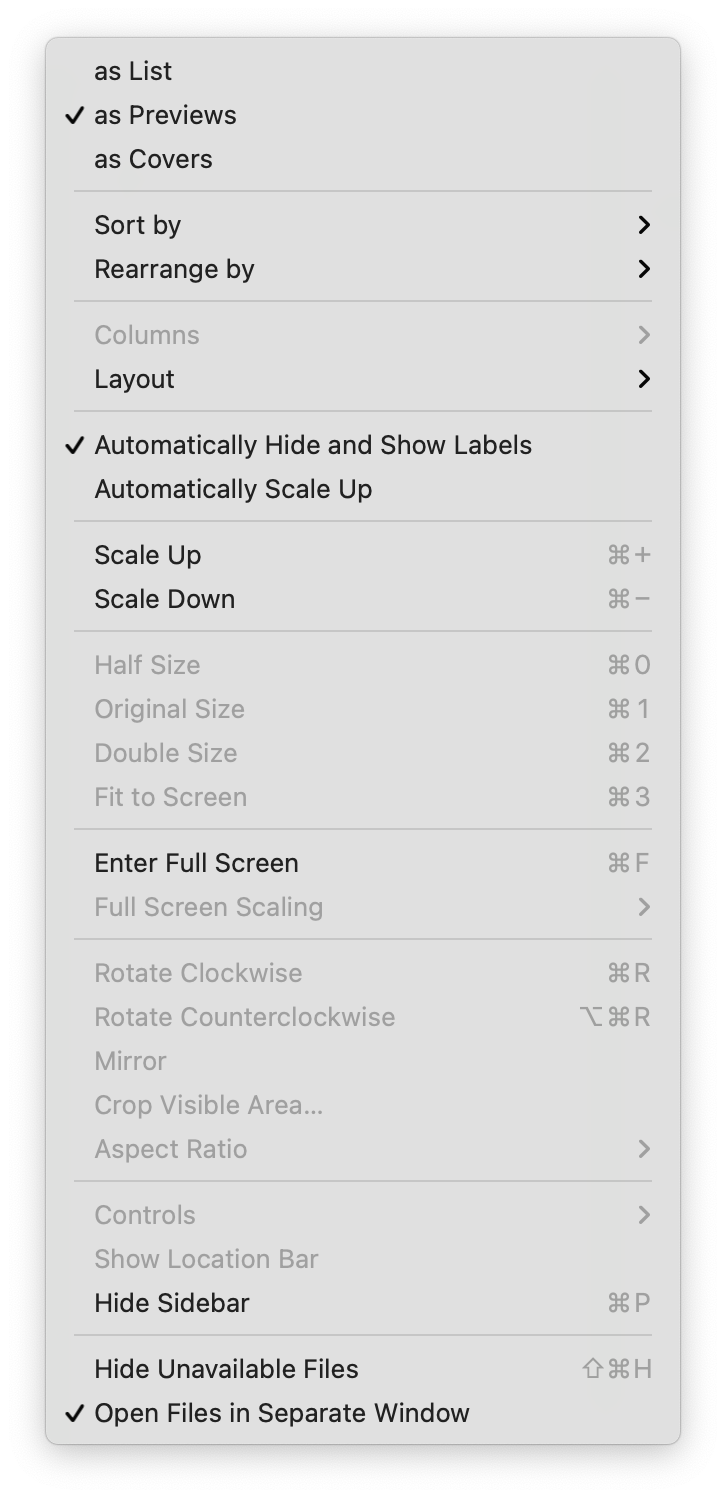
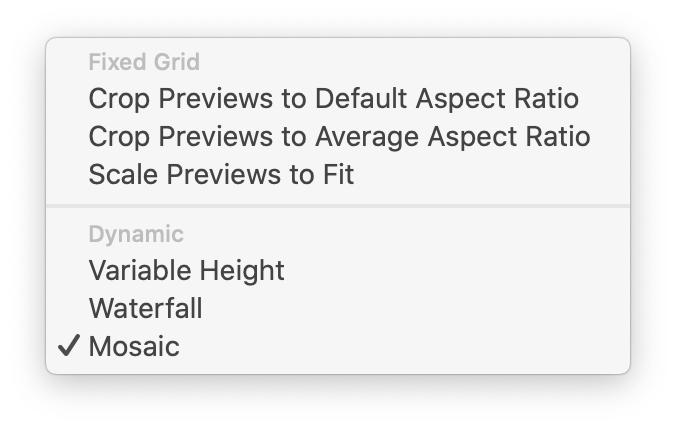 The menu item is only active if you're viewing your Library as preview thumbnails. When active, the submenu shown at right lets you choose how you want the previews to appear. There are two sections of the menu—Fixed Grid options maintain the defined rows and columns you're used to seeing, while the Dynamic section can change row and/or column dimensions in order to display your files in the chosen method.
And here's what each of those options does, in plain(ish) language:
sets each preview's aspect ratio to 1.48, which what Usher has always used in the past.
seta the previews to the average of the ratios of your media files' preview images (which may not match the actual file's aspect ratio, as previews can be manually created)
scales all previews to fit the available space. In this mode, labels are shown below the thumbnails.
mode adjusts each row's height to fit the tallest preview, so you'll see empty space around previews of varying heights, so that each row is a consistent height.
mode is similar to Variable Height mode, in that previews are adjusted to fit taller images. However, there's no padding of the row heights, so images tuck up next to each other, without the blank space of Variable Height mode. Column widths are uniform.
mode is basically a horizontal Waterfall mode. Each preview in a row is scaled so that all previews have the same height (but not the same width), and then the entire row is scaled to fit the window width. In this mode, the row height is fixed but there are no fixed columns.
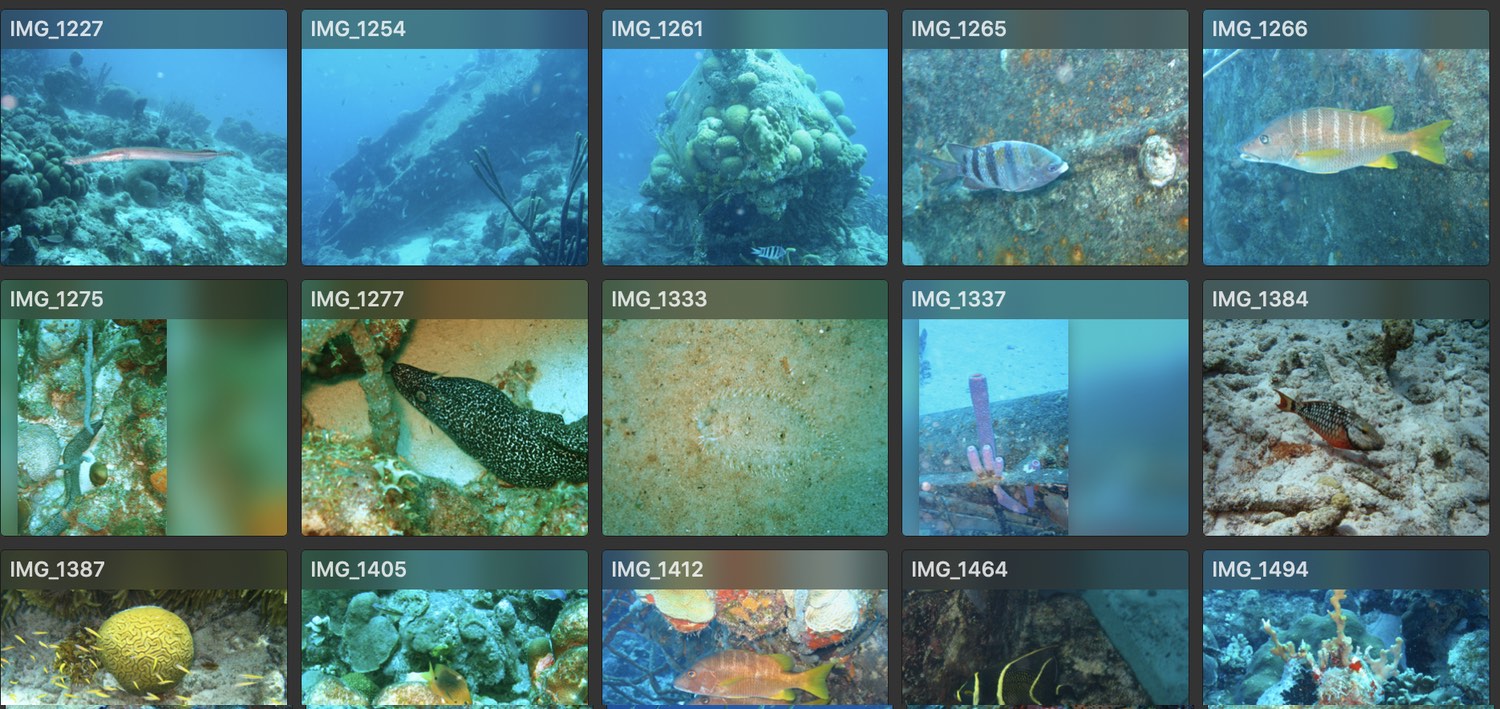
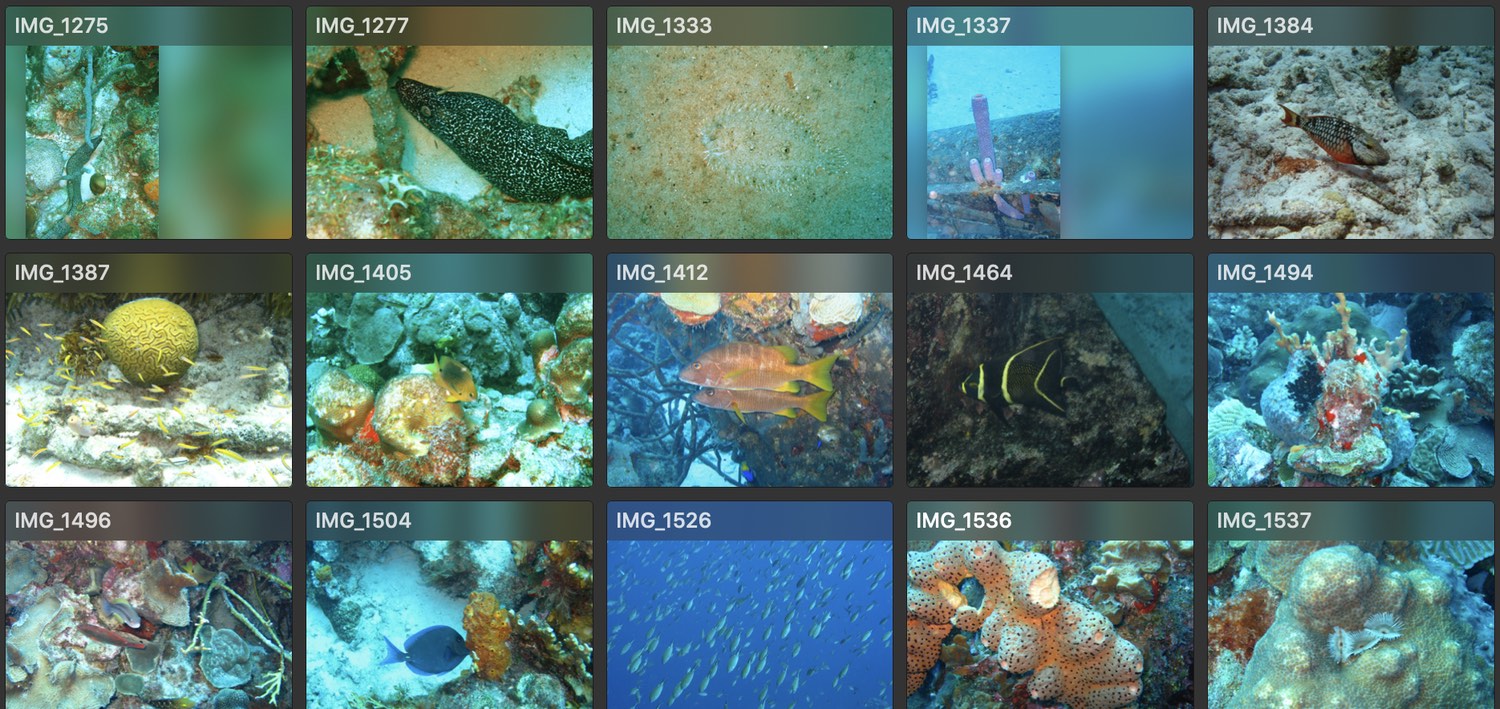
While words are useful, this slideshow demonstrates exactly how the various options affect media files' preview images.


In case this isn't enough layout options for your preview images, try holding down the Option key while the Layout submenu is open.
If you enable , then you'll only see the titles of your media files on hover.
adjusts the size of preview and cover images as you resize Usher's window, so they'll always use as much of the available space as possible.
Five of the above menu sections—, , , , and —are applied per view mode. That is, they can be set independently for Preview and Cover mode, but they will then apply to any folder or playlist using one of those modes.
You can use and both on media files, where they affect the size of the playback window, and on the main Usher window, where they affect the size of the preview or cover images.
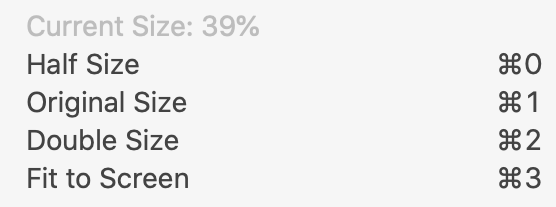 The next section of the menu, as seen at right, is only available while a media file is open. The top of the section displays the current size of the window relative to the file's native dimensions (39% in this example), followed by some commonly-used sizes. If you use and memorize the four keyboard shortcuts, you can very easily resize a movie without having to reach for your mouse.
Use the menu item to enter full screen mode, and use the menu item to change how Usher scales full-screen videos—it offers two subm-menus, and .
works with a video file open—use it to select a portion of the video to crop and treat as the full video area. When done, reset to the original version by choosing the menu item.
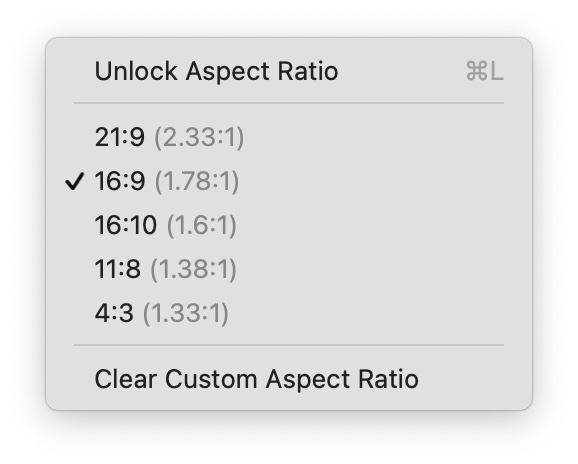 The menu item activates the submenu seen at right. When you have a media file open for playback, use this submenu to select from one of the five pre-defined aspect ratios, or choose to allow resizing of the media file without any constraints.
If you unlock the aspect ratio and then change the aspect ratio, the top entry in the submenu will change to Define Aspect Ratio, which will set that media file's aspect ratio to the value you created (and again lock the aspect ratio).
The menu offers three options for where the media playback controls appear. Choose to have the playback controls hover over the window, and vanish after a couple seconds of no mouse movement, as seen in the left image below.
Choose , and the controls will always be visible, and appear below the media playback window, as seen in the right image below. Finally, select , and you'll get always-visible controls above the media playback window (not pictured).
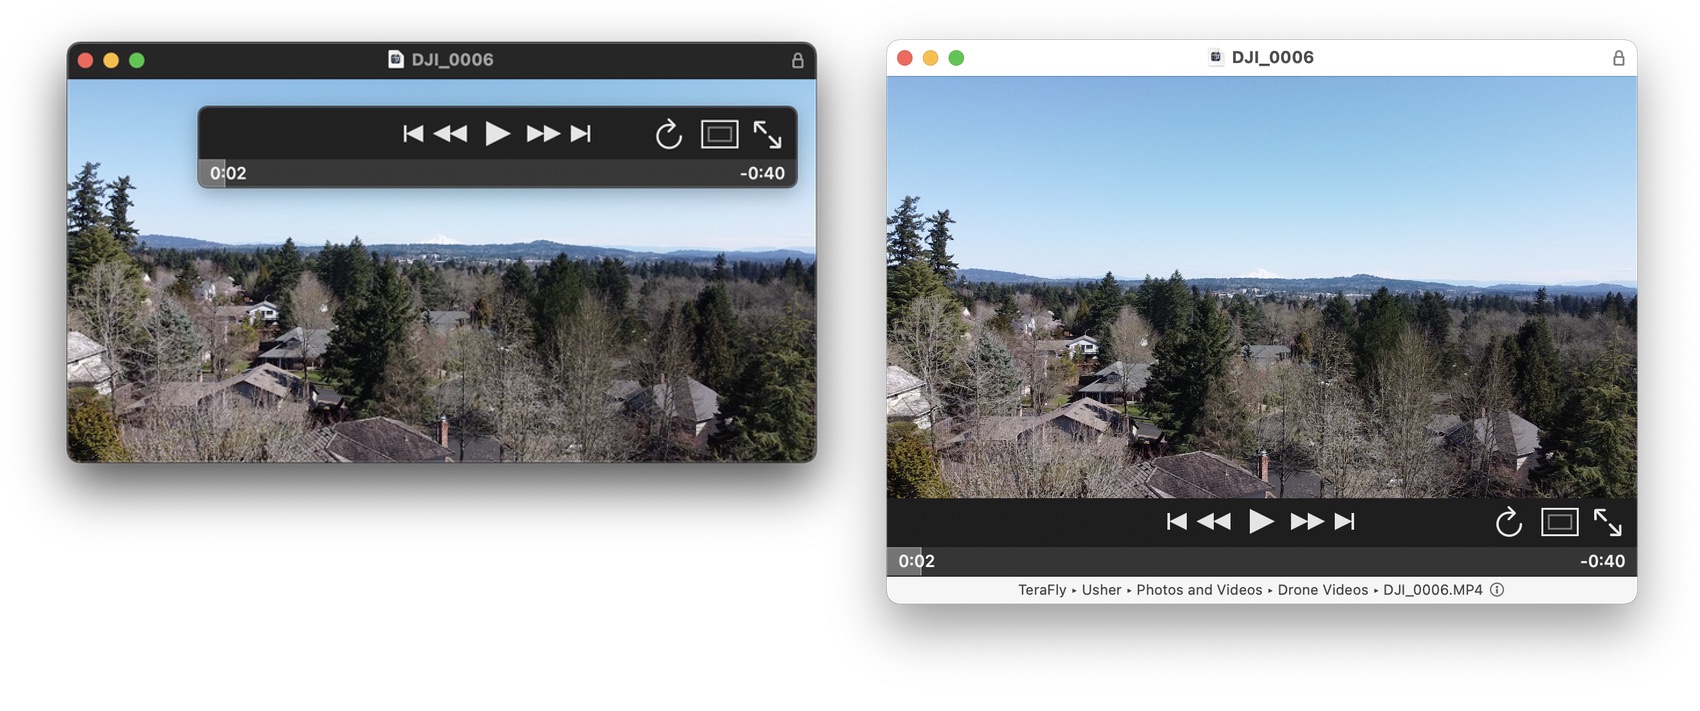
If you're using non-floating controls, Usher normally shows the path to the media file being viewed at the bottom of the playback window. If you'd rather not see this, just check and it'll vanish.
If enabled, will hide those files that Usher can't currently see. This is useful if you have media files that aren't always available to Usher—perhaps they're stored on a non-mounted drive. With this seting enabled, you won't see any evidence of these files in Usher. If you uncheck this option, then you'll see placeholders for your non-available files.
Finally, if you uncheck , playback of media files will take place in Usher's main window.
Controls

The Controls menu is used for (surprise!) controlling video playback. These entries are self-explanatory, and most won't be available unless you're watching a video. The volume controls and remote control interface are the exceptions; they're available at all times.
Media
The Media menu gives you fast access to your media file collection and to your playlists—and to any additional libraries you may have created. You can also use this menu to move or copy all media files to your Usher library folder. There's also a search box, to quickly find anything in your library.
The menu item provides a multi-level menu you can use to navigate your current Usher library. In addition, if you have a media file open for playback, it's marked to make it easy to find in the menus:
The menu item provides rapid access to other libraries you've created, and lets you easily move or copy your media files into the current library's folder:
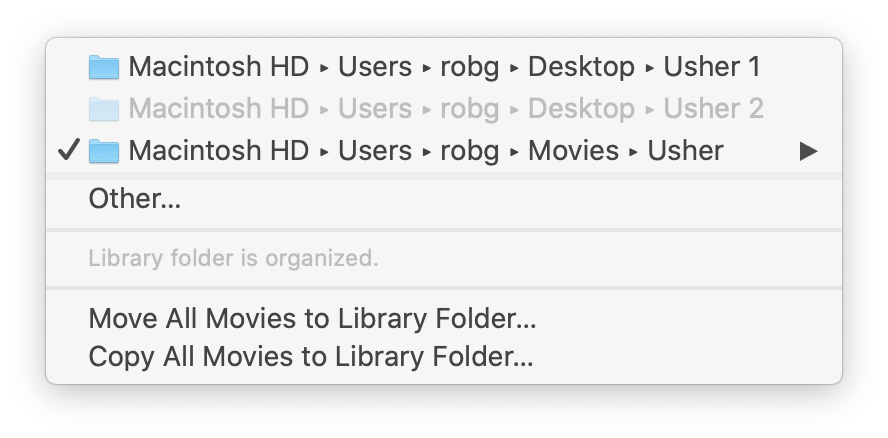
The and menu items will only show up if you have files that are outside of a defined Usher library folder.
Libraries listed here are those you've defined in the Library section of Usher's settings; jump to that chapter for all the details on working with multiple libraries.
Window
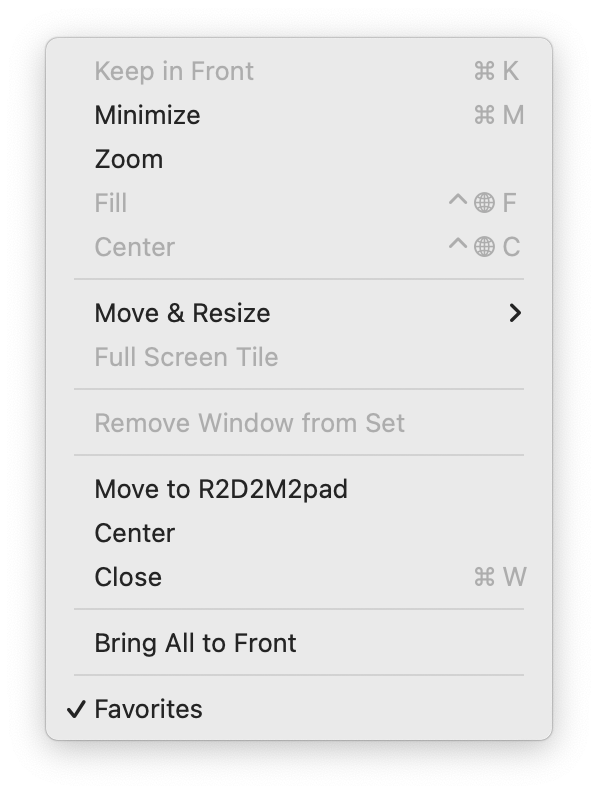
The Window menu is the standard macOS Window menu, and it's used to manage Usher's windows. There are no custom Usher commands in this menu, but if you've set up an iPad for Side Car use, you can use the menu item to send Usher's window to the iPad.
Or use the entry to move Usher's windows around, though we think we have a better tool for that task.
Help
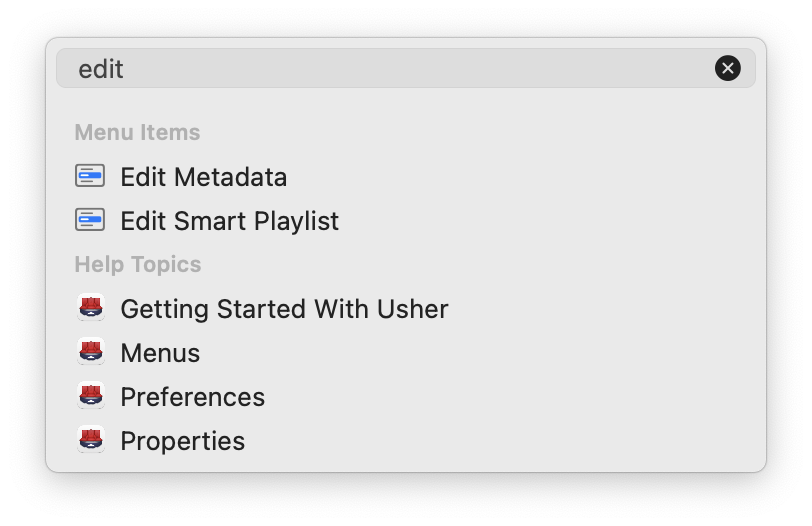
This was probably the very menu you used to get here, so it's clear you know how it works. You can also search for commands in Usher's menus by typing in the Search box—hover over the Help row just above this text to see that in action with the word edit.
Notice that the search also searches within help, which means the Help menu is a great way to find where in help to go to get help with whatever you need help with…got that?
Contextual Menus
Usher has a number of useful contextual menus, and here are details on where to find each and every one of them, and what they offer.
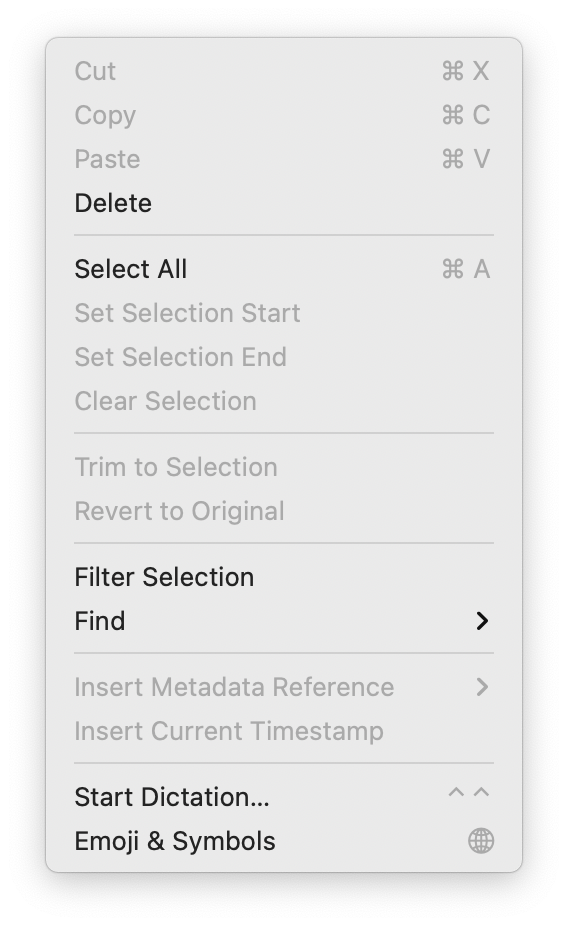
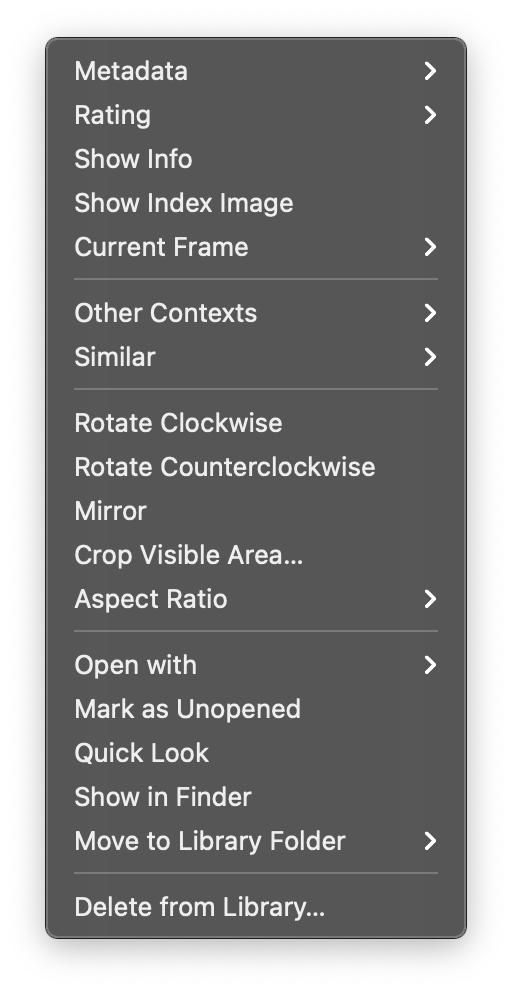
Content Area
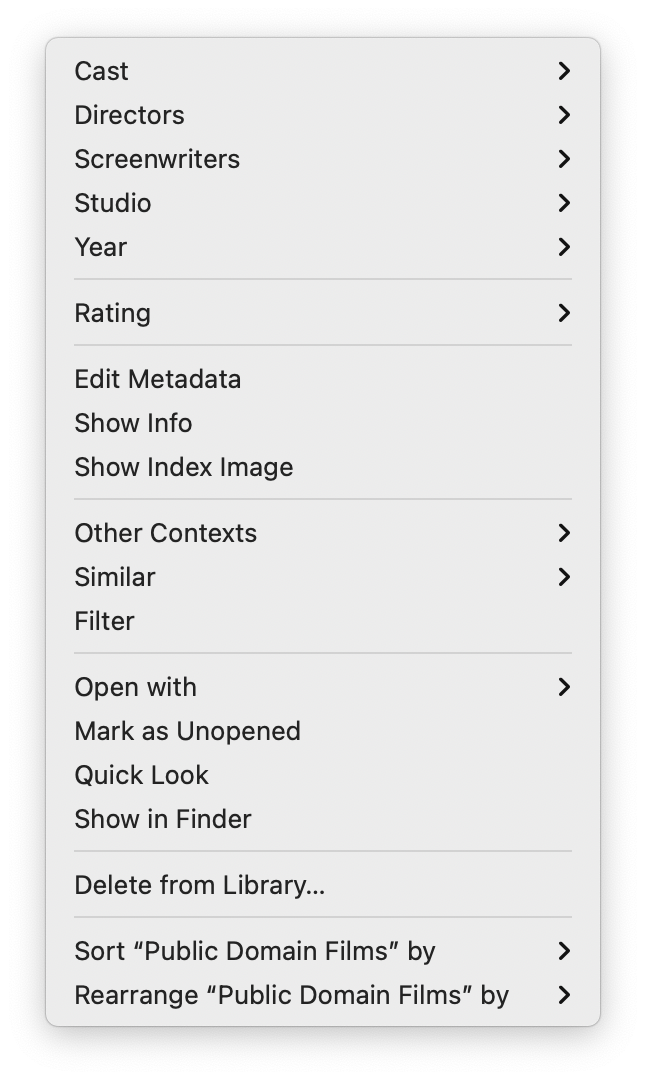
When hovering over an entry in the main Usher window, Control-click on that entry to open its contextual menu. (In Preview and Cover view modes, you can also click the small circular icon at the top left of the hovered image.)
Many of these commands replicate entries from Usher's menus and have been previously covered in this chapter. However, some can be found only here. Here's what each of those contextual-menu-only commands does:
-
The , , , , and items will reflect the properties you use in your library ( will always be there). This section provides fast access to view, change, or set these properties for the selected media file(s). Each will display a submenu showing the currently set value(s), along with other possible values, if you wish to add to or change the existing value(s).
-
displays a submenu showing which playlists and Smart Playlists also contain the selected media file(s).
-
displays a submenu that drills down into your properties—the same ones shown at the top of the menu—and finds other media files that share the chosen criteria. For example:
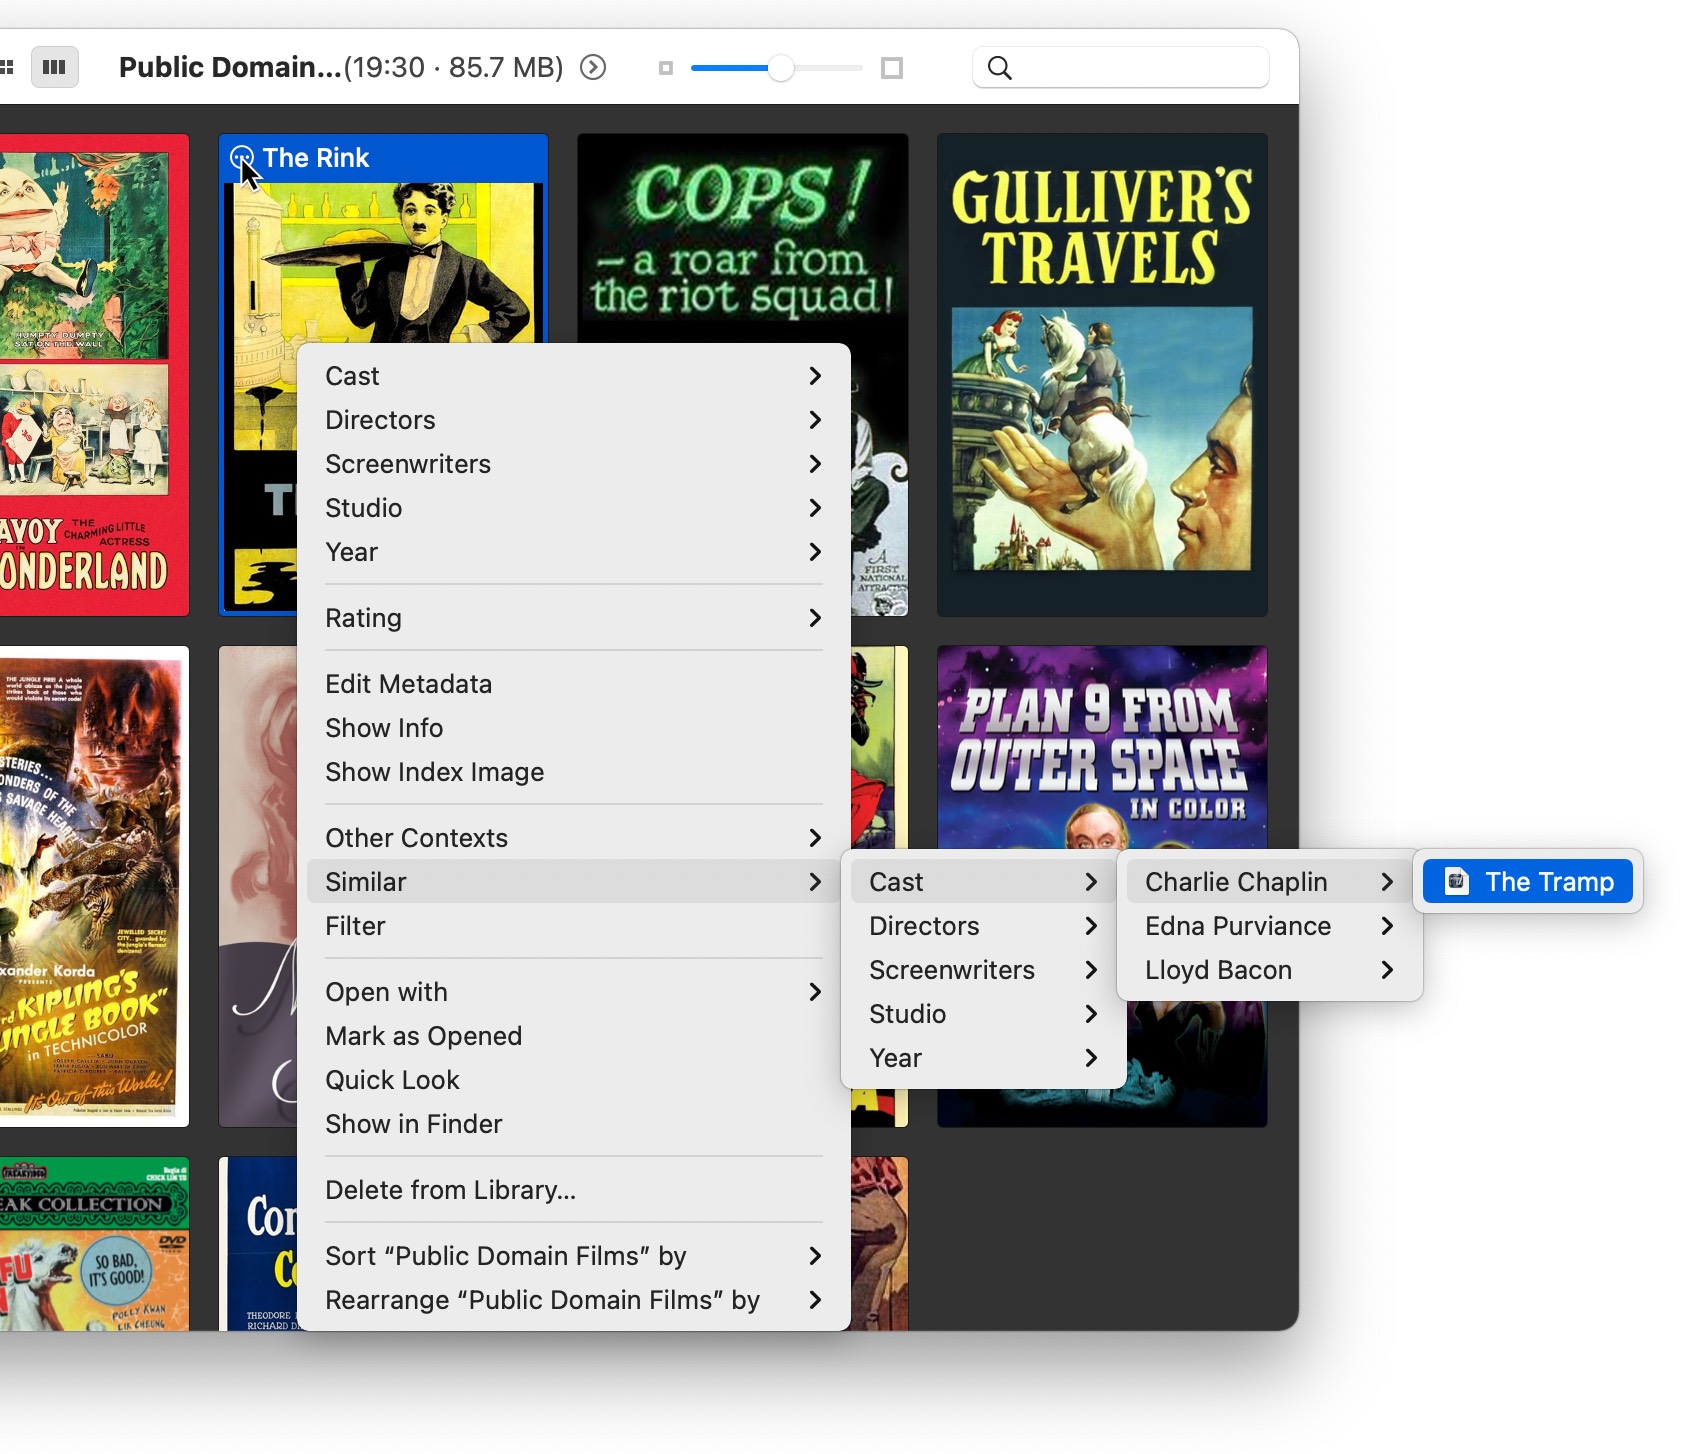
In this example, Charlie Chaplin stars in both The Rink and The Tramp—and selecting The Tramp in the submenu will open the video.
-
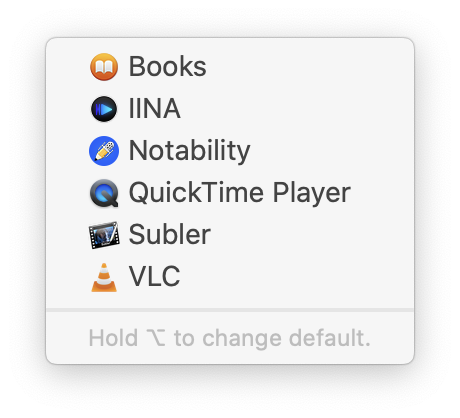
The menu can be used to open a media file in another app—either one time or permanently.
When selected, a submenu opens, similar to the one on the right—the exact contents of the menu will vary depending on which apps you have installed.
Some of the entries you see may make no sense—Books and Notability clearly can't be used to play back a video file. Because Usher can manage many media types—including PDF and text—the list you see here is provided by macOS based on matching Usher's ability to open those files in addition to your video files.
But you're not stuck with those weird entries forever. With the menu onscreen, press the Control key, then select the newly-visible Filter item, and you'll see a dialog where you can choose which apps to list:
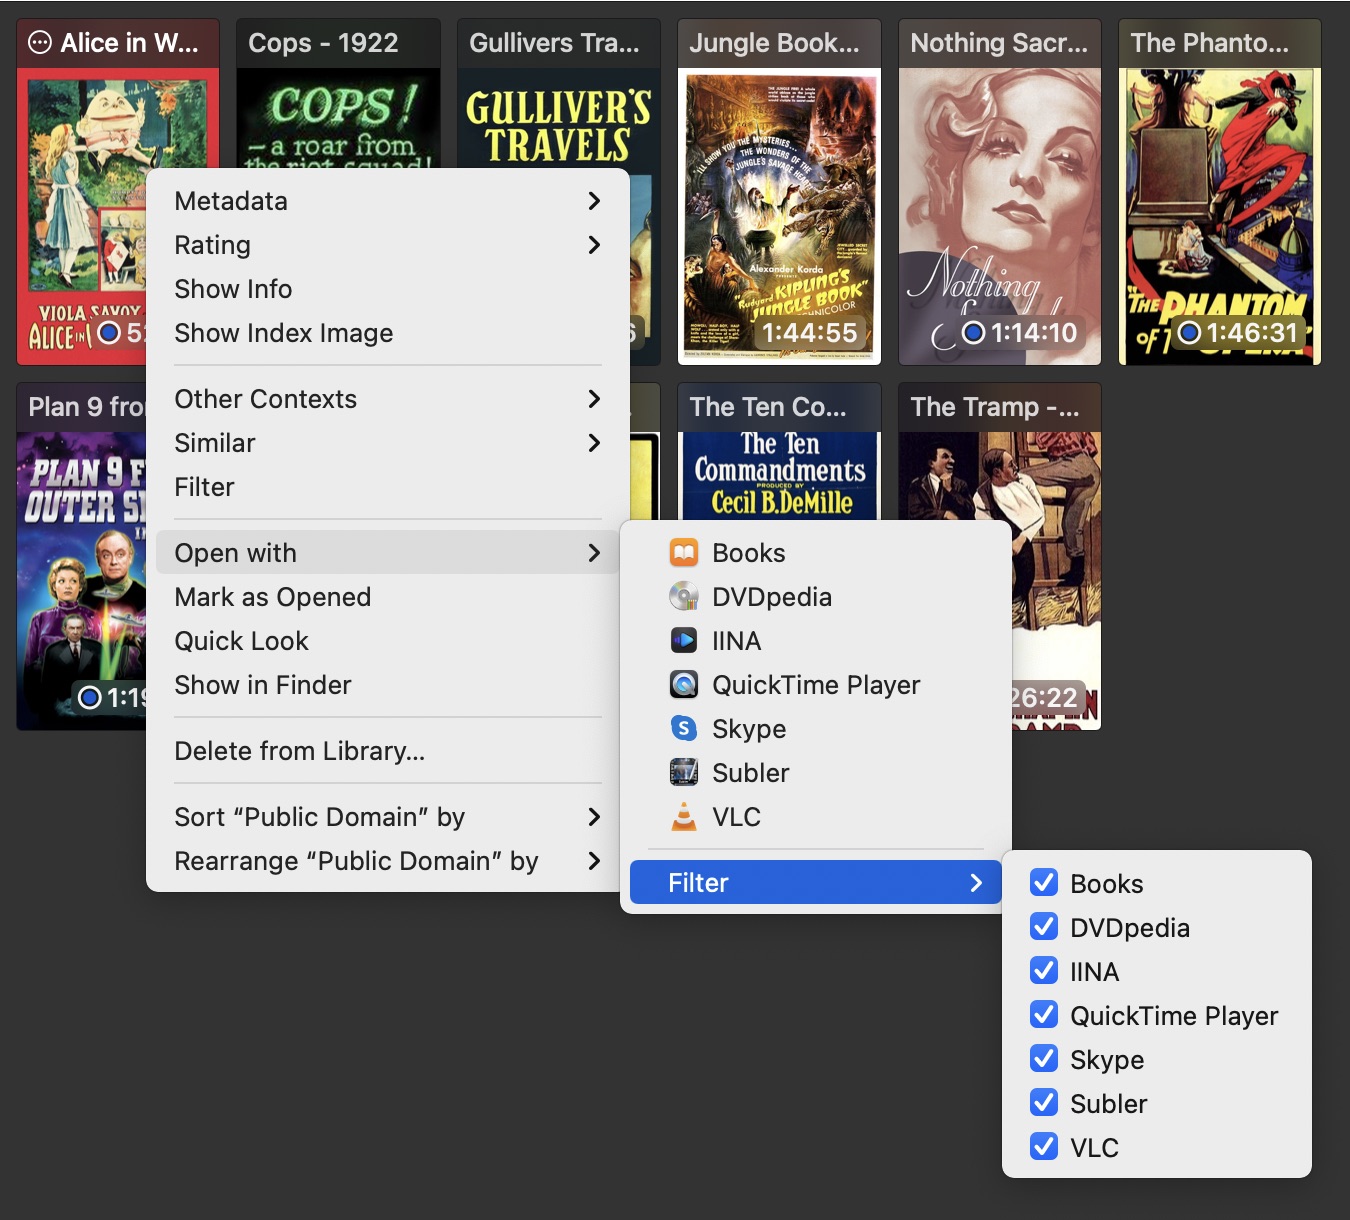
After you've filtered out what you don't want to see, select an entry in the list to open a video—once—using the chosen app. See the Advanced section of the Settings chapter for more ways to control the Open With menu.
If you'd like to permanently change which app opens when you play back the selected file, hold down the Option key with the contextual menu open— will be replaced by . Whatever you select from the submenu will then always be used to play back the media file.
The remaining items in the contextual menu are self-explanatory (or have been previously explained).
Things do change a bit if you've selected (using Command- and/or Shift-clicking) more than one thumbnail. The contextual menu is shorter, as not all options make sense when applied to more than one video—you can't , , or use , for example. But you gain access to , , and .
Content Area Background
If you right-click on an empty section of the content area, you'll see this sorting contextual menu. This is also available as a submenu in the content area contextual menu, but if you just want to change the sort, this one may be easier to get to.
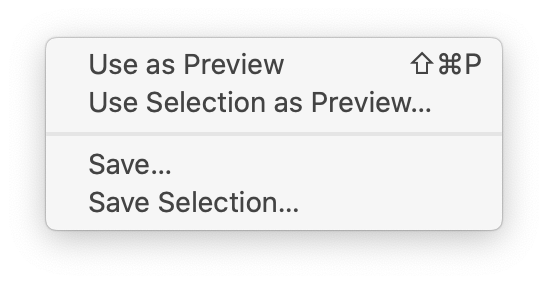
Image Index
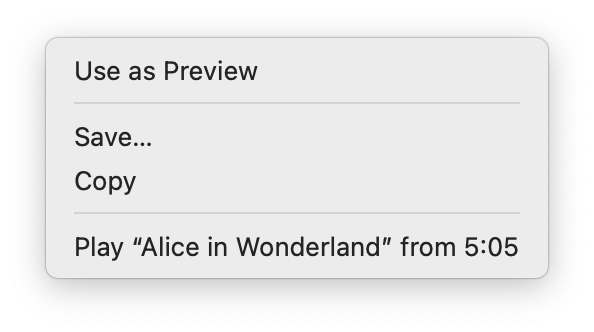
Right-click any image in the Index Image view, and this contextual menu appears to let you easily use that image as the video's preview image, save or copy the image, or play the video from the current frame.
Video Player
This contextual menu is almost identical to that of the content area, but there are a few changes…
-
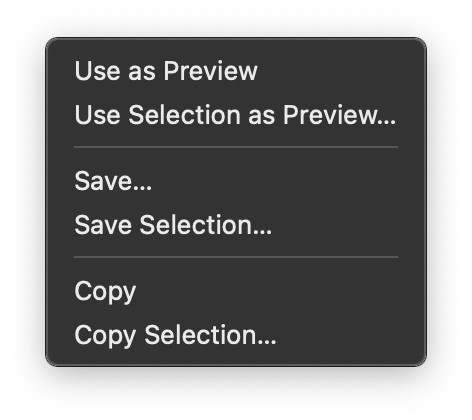 The menu item opens a submenu, as seen at right, that lets you use the current frame (or a selection from the frame) as the preview image, and you can save or copy the entire frame or a selected portion of the frame.
 -
The menu items from down to each apply the named actions to the open media file. For more on what you can do with the menu, see the View menu section of this help.
-
Some menu items that make no sense when viewing a media file—sorting and rearranging, for example—have been removed.
Note that this menu is always dark, not light.
You can also get to this menu by clicking the circular icon at the top right of the playback window. If you do that, and then use the menu item, the pop-up menu will change a bit, putting the aspect ratio controls at the top of the menu.
Select one of the predefined ratios—or manually resize your media file, and the top line will change to . If you choose that entry, then your manually defined aspect ratio will be the media file's defined aspect ratio, and the aspect ratio will be relocked.
Video Player Time Slider
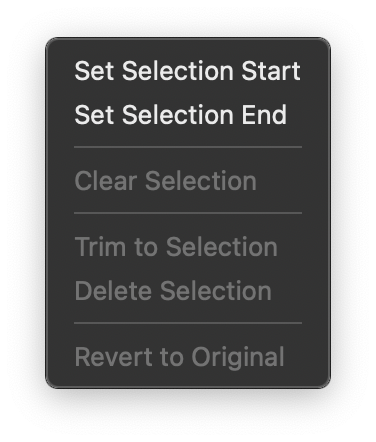
When you right-click on the video player's time slider, this contextual menu lets you work with selections in the video—mark the start and stop point for a selection, clear those markers, trim to or delete the selection, and revert to original.
Note that this menu is always dark, not light.
Sidebar
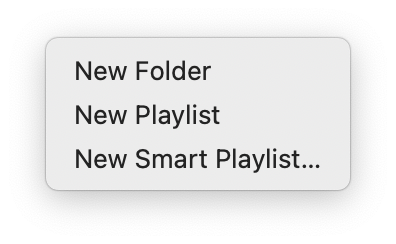
As in Photos or Music, control-clicking on an empty area in the sidebar presents a contextual menu to let you quickly create a new folder, playlist, or Smart Playlist.