

Smart Playlists are one of Usher's most useful tools for organizing your media file collection. Just like Smart Playlists in Music, Usher's Smart Playlists use a set of rules to define the content of the playlist, which gives you an infinite variety of ways to manage your media collection.
When you create a new Smart Playlist, here's what you'll see:
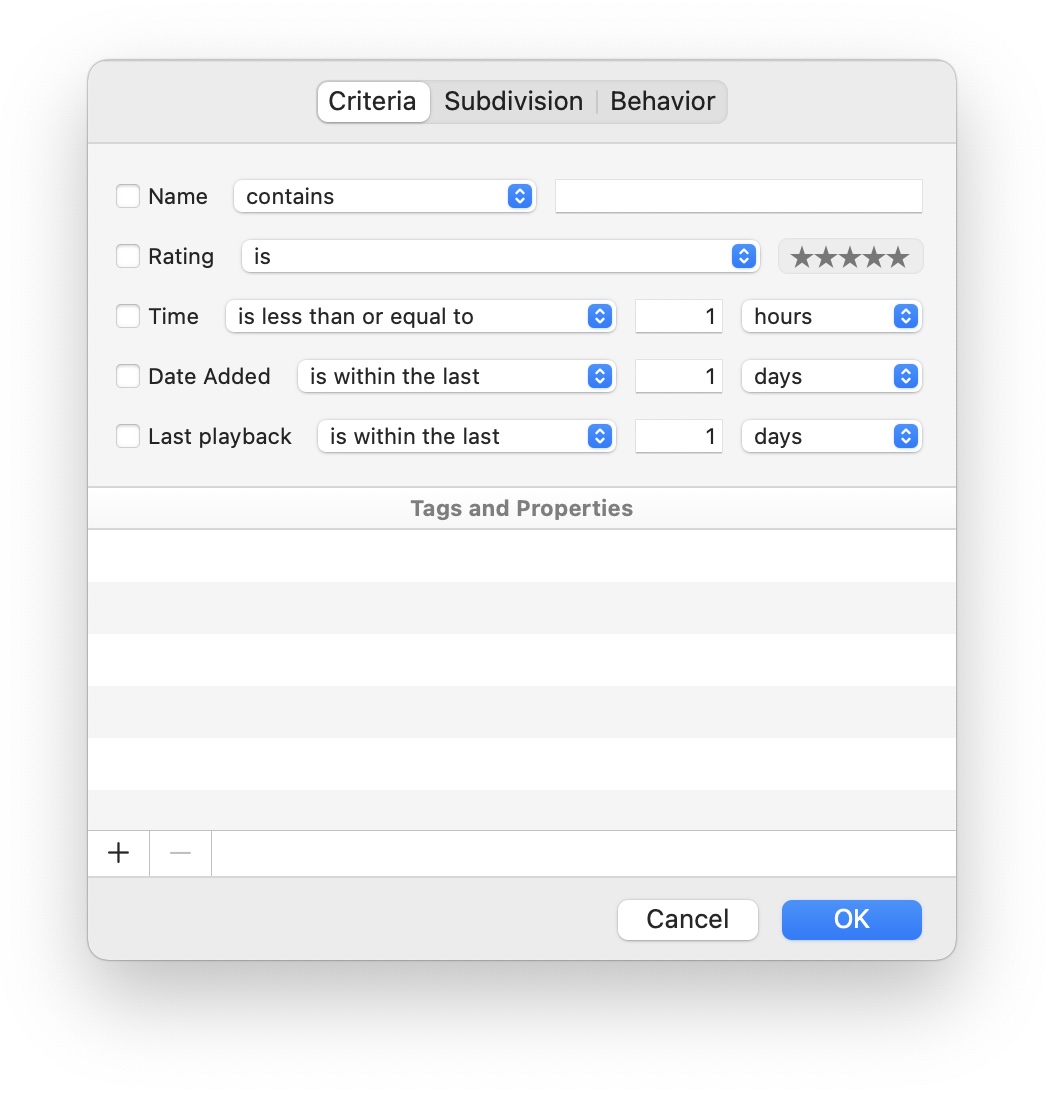
The Criteria tab is where you'll set up the rules for your Smart Playlist; the Subdivision tab controls how matching media files are (or are not) split within your Smart Playlist, and the Behavior tab controls playback behavior.
Criteria tab
The top portion of the Criteria tab allows you to use any of the specified items (Name, Rating, etc.) as selectors for your Smart Playlist. For a simple Smart Playlist, these may be more than enough. As an example, this Smart Playlist will always contain media files you've added within the last two weeks, but have not watched in that same two-week time period:
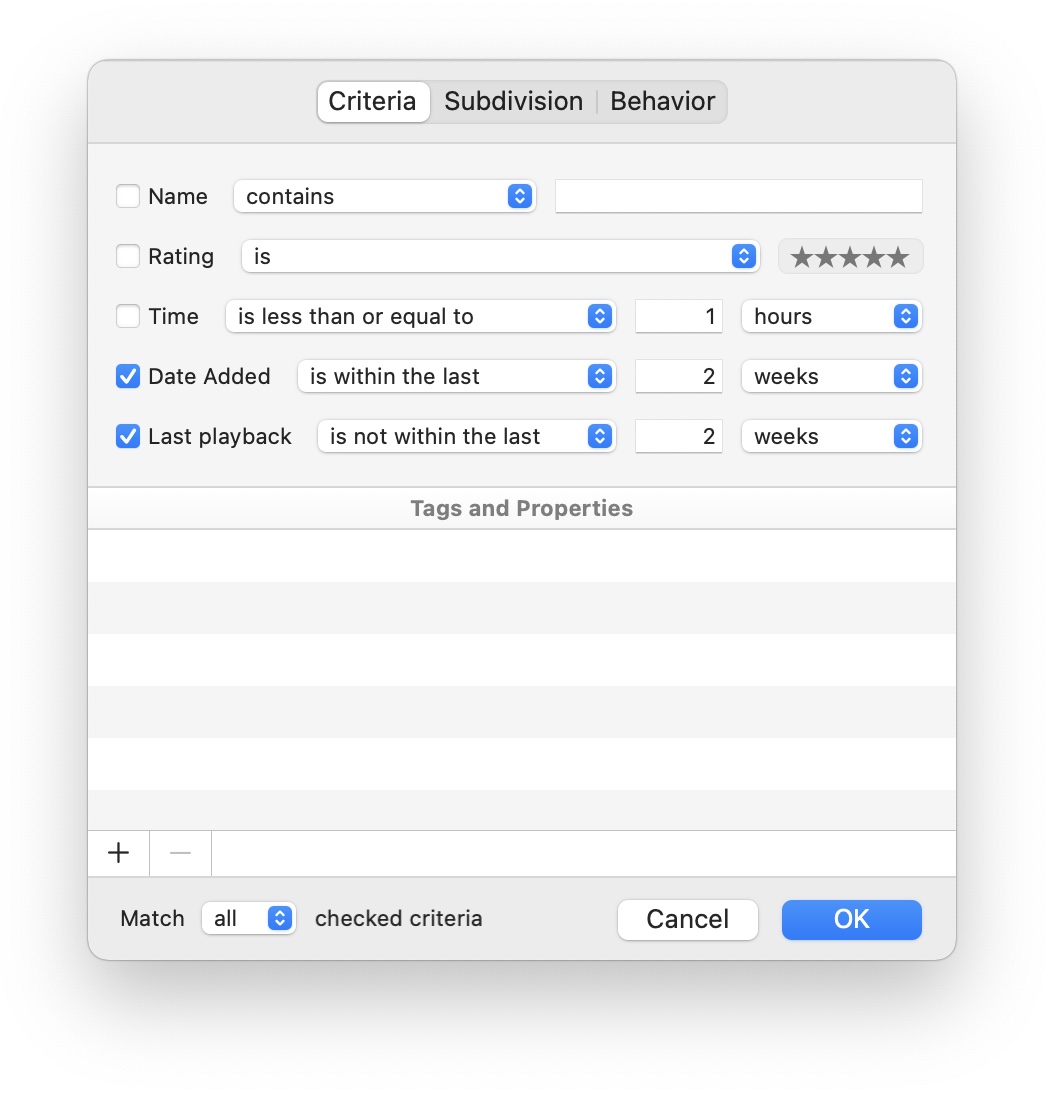
Note the new "Match [all | any] checked criteria" item that appears (near the bottom of the window) once two or more criteria are defined—use this pop-up to control whether your Smart Playlist uses "and" logic or "or" logic to define matches.
The lower section pf this window—Tags and Properties—is where you can create really powerful Smart Playlists. You can use any of your media files' defined Metadata values in this section to create a Smart Playlist that exactly matches your needs. For example, this Smart Playlist would select movies with a Michael J. Fox in the Cast list, and that were directed by Robert Zemeckis:
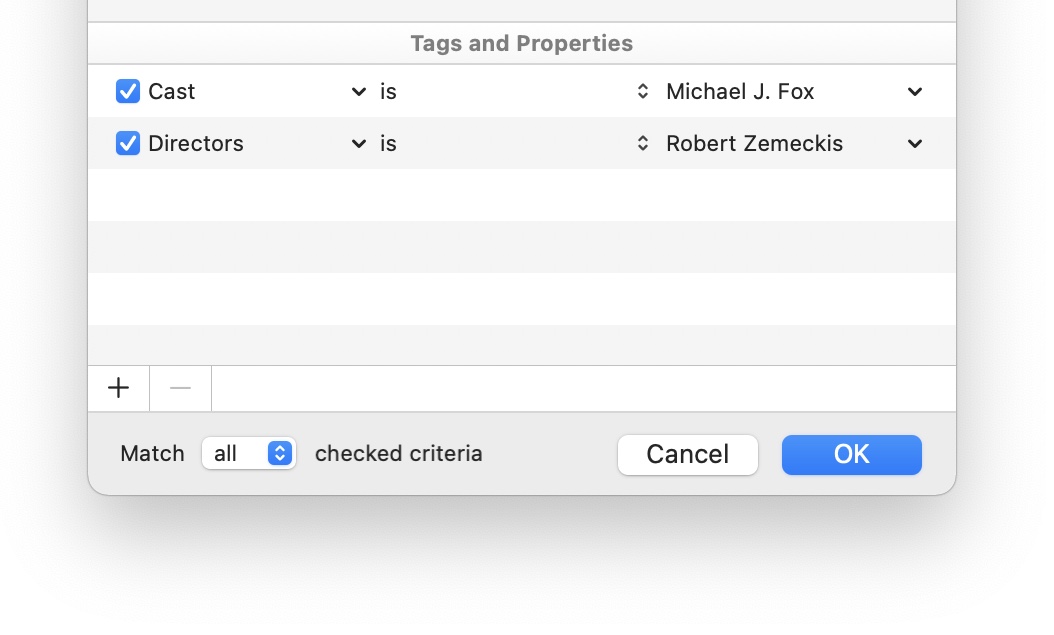
To use your tags and/or properties in a Smart Playlist, click the plus sign at the lower left corner of the interface; this will insert a row containing your first property item. Once the row has been added, you can change the property, its conditions, or its defined match values, simply by clicking the indicator next to each of those elements.
As an example, assume you'd created a property named MPAA Rating, and set it up with the USA's MPAA rating system. If you select MPAA Rating in the leftmost column of the Smart Playlist window, you'll see the following options in the center and right columns:
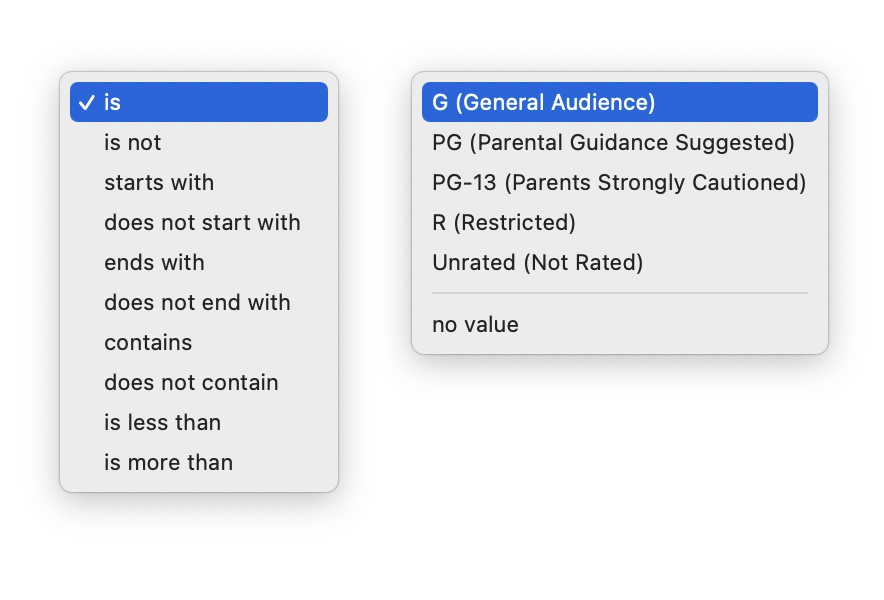
The choices in the leftmost column above are fixed, and the rightmost column's options will reflect the values you've applied to that property for various media files. You can also use Tags in your Smart Playlist; just choose Tags from the left-hand column's pop-up menu, then select one of the existing tags from the right-hand column's pop-up menu.
Usher creates a special Source property when you enable support for any of the external sources listed in the External Media tab of Usher's settings. When enabled, videos from those sources will have an associated value in the Source property—Photos or Movies, for example.
You can then use these values in a Smart Playlist to find, for instance, all movies from the TV app in a Smart Playlist: Source — is — Movies. Or TV shows from the TV app: Source — is — TV Shows. Want to see movies and TV shows in your Smart Playlist? Just enter the Source tag twice in your playlist definition:
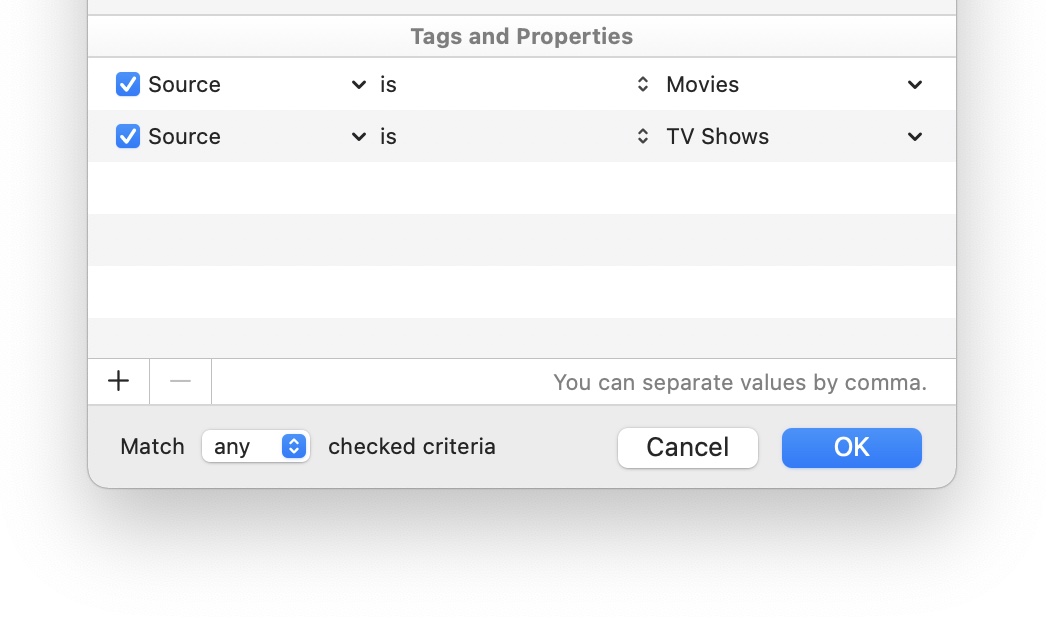
Just make sure the "Match [any • all] checked criteria" pop-up menu at the bottom is set to any not all, so that you find "or" matches, not "and" matches.
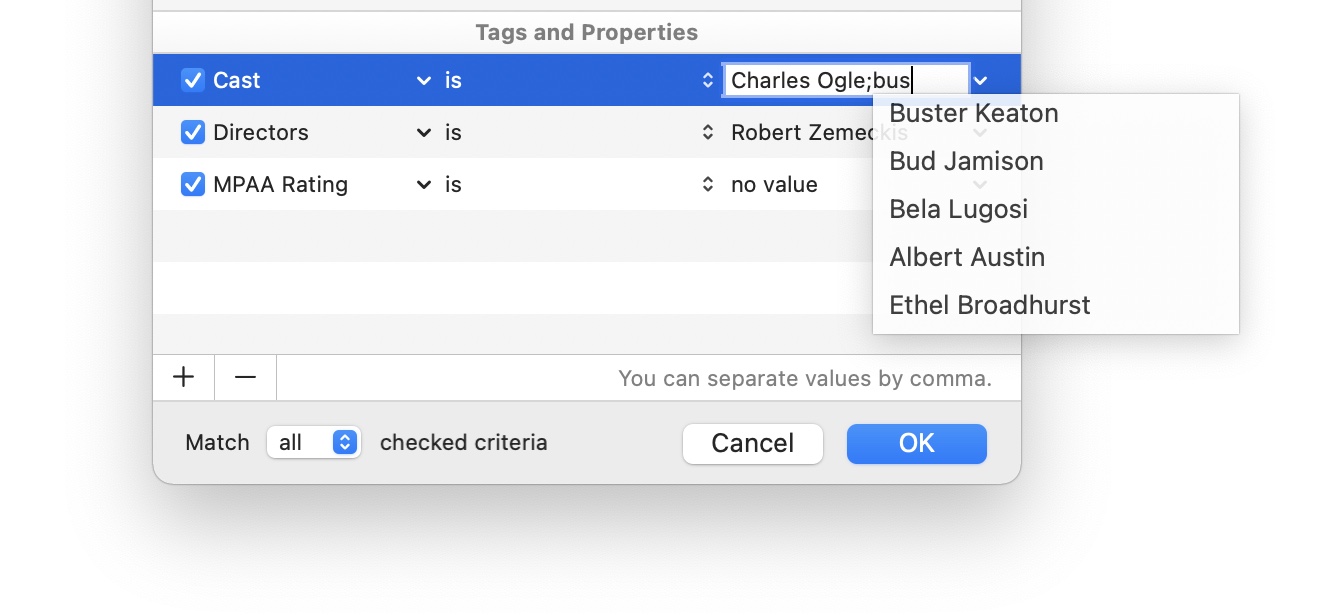
What if you want to filter on more than one value per property? For example, a Smart Playlist that finds all media files that have two actors you like in the Cast property. You could create another entry for the same criteria, with a different value, but there's an easier way. Instead of clicking on the drop-down triangle to set the value, click once on the no value text, then move your mouse a bit (as when renaming a file in Finder).
This will create a text box you can type into, and you can enter multiple values, separating each with a semicolon. As you type, Usher will show matches on the fly, making it simple to pick the values you'd like to use:
Subdivision tab
The Subdivision tab is where you'll find the real power of Usher's Smart Playlists—subdivisions can automatically group your media files based on the values of certain tags, properties, or information about the files.
As an example, the following structure was created with one subdivided Smart Playlist:
(This Smart Playlist will be explained in more detail below; it's shown here just as an example as to what's possible.)
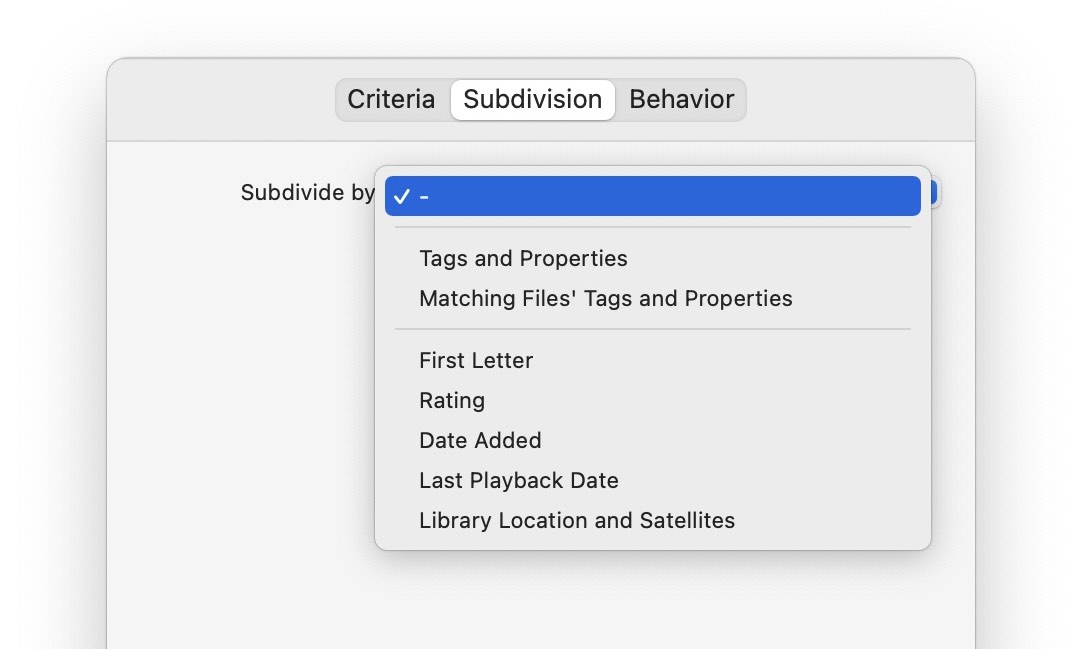
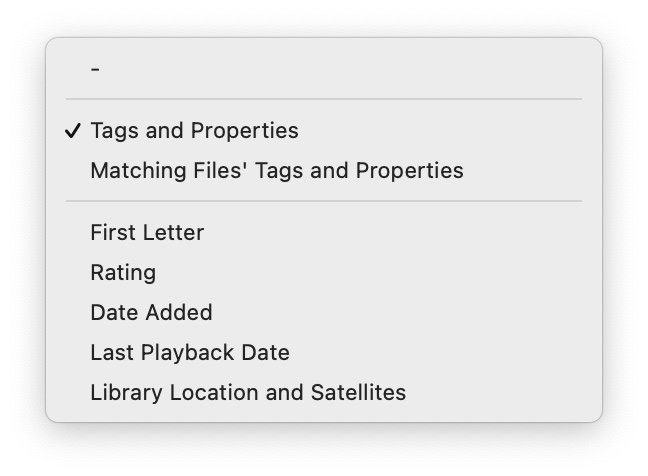
After creating a Smart Playlist and clicking on the Subdivision tab, you'll be greeted by a mostly-empty box with a single pop-up menu labeled "Subdivide by," and which is currently set to not do any subdividing. Click the drop-down menu, you'll see a list of choices as to how you'd like to subdivide your Smart Playlist's media files:
Before discussing each of these ways of creating subdivisions, it's important to understand how to control the subdivisions you'll create.
Controlling Subdivisions
When you choose a subdivision method, the window displays settings that control that subdivision. These settings are the same for each subdivision option, with the exception of Tags and Properties, which has one additional option (which will be covered in a bit). Here's what those common settings look like, and what each one means…
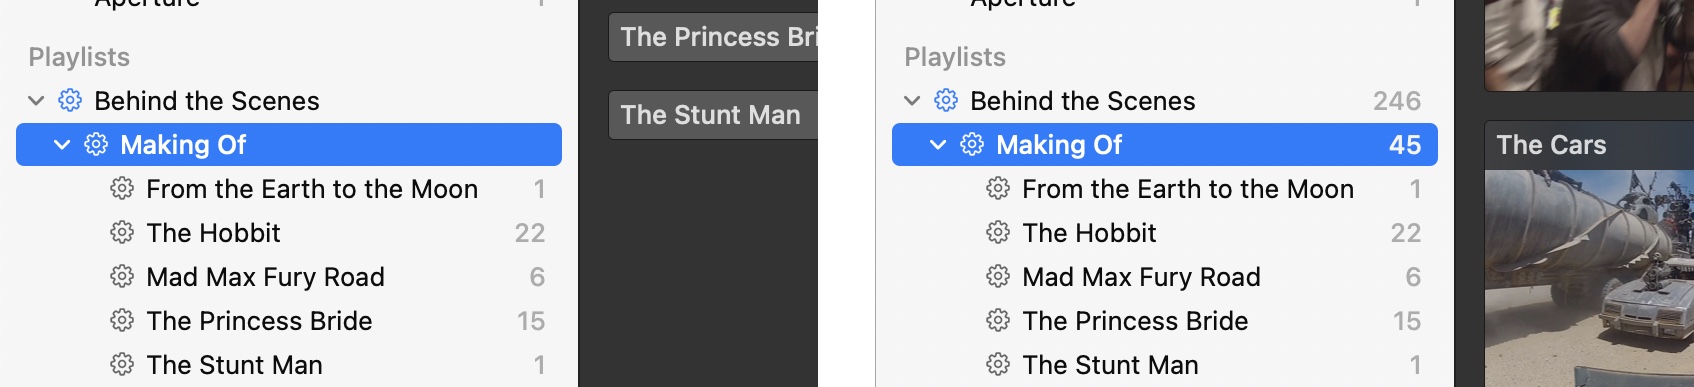
Fan out This setting controls what you'll see when you select the top level entry for your Smart Playlist in Usher's sidebar. When disabled (the default), you'll see one of two things. First, the main Usher window may be blank, displaying a message telling you how many subgroups are in your top-level Smart Playlist. That's what you'll see unless you've enabled the Show nested groups [above|below] thumbnails option (in Appearance settings).
With that setting enabled, you'll instead see a clickable folder for each subdivision in the main display area, as seen in the leftmost of the below images.
With the fan out setting enabled, you'll see the folders (if you've enabled that feature), plus thumbnails for all media files from all of the chosen Smart Playlist's subdivisions (the right image in the screenshot); you'll also see the total file count in the header for the Smart Playlist.
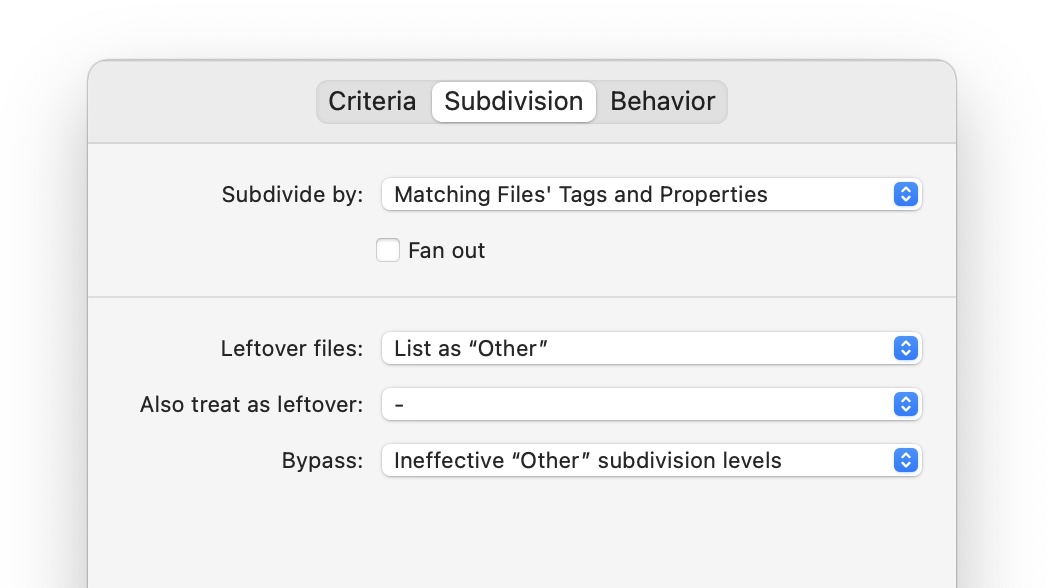
Leftover files If you create a Smart Playlist that (as an example) selects all files in your library, but then subdivides by some property that doesn't exist for every file, this setting controls how Usher handles those non-matching files.
The default, List as "Other", is to create an entry labeled "Other" as the last subdivision, and show all such files in that subdivision.
If you select List on parent level, then all non-subdivided files will appear at the top level of the Smart Playlist, as they do when you enable the "Fan out" setting.
Finally, choosing Ignore will do just that: Any non-subdivided files will simply be ignored—you won't see any sort of entry for those files in the Smart Playlist.
Also treat as leftover Use this setting to create a minimum file count for each of your subdivisions—click this menu item, and a pop-up menu will let you choose a number of files, from one to nine, that Usher will use to determine the minimum size for a subdivision.
To put it more plainly, if you set this pop-up to Subgroups with up to 4 files, for example, then any subdivision that would have four or fewer files won't exist. Instead, its files will be classified as leftovers. (And whether you see those files or not is dependent on the setting you choose for Leftover files.)
Bypass This setting controls what happens if you have ineffective subdivisions—that is, subdivisions that don't really subdivide anything. It defaults to off, so you'll see ineffective subdivisions by default. But if you set this option to Ineffective "Other" subdivision levels, then any such Other subdivisions that aren't required will be suppressed.
Similarly, set it to Any ineffective subdivision level to apply the same logic to all subdivisions.
Now that you know how to manage subdivisions, here are the various ways you can create them…
Subdividing
To subdivide a Smart Playlist, you need to decide how you'd like it to be split, and you do that using the Subdivide by pop-up on the Subdivision tab. There are seven choices (in addition to not subdividing):
Here's how you can use each of those options to create useful Smart Playlists.
Tags and Properties
Assuming you've been using Usher's tags and properties to add metadata about your media collection, this simple-appearing option on the subdivision tab offers a ton of power—it will help you slice your collection in almost any way imaginable.
When selected, you'll see all the same options as described above for controlling your Smart Playlist, plus one new one, Hierarchy:

If you leave the Hierarchy box empty, Usher will select all media files that have tags and/or properties for inclusion in your Smart Playlist—here's one such subdivided Smart Playlist:

Each defined property appears on its own row, and can be opened to see the assigned values for that property. All tags are consolidated and presented under the Tags entry; expand that entry, and you'll see one row for each tag you've used on your media files.
The Hierarchy text box lets you take subdividing to the next level. Recall the example subdivided playlist from earlier:
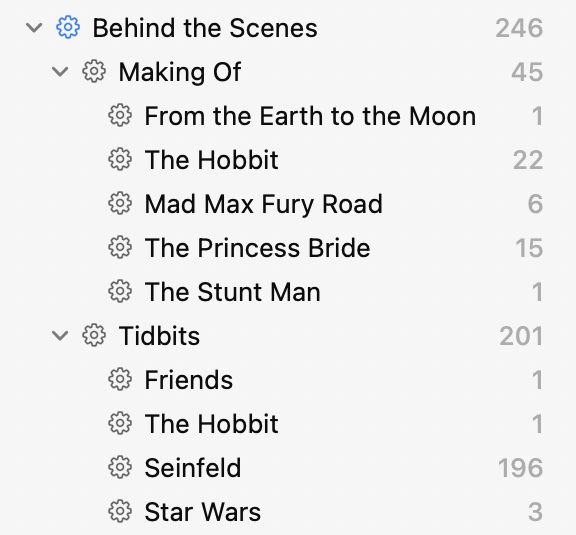
The multiple levels in this Smart Playlist come courtesy of the Hierarchy field; the setup looks like this:
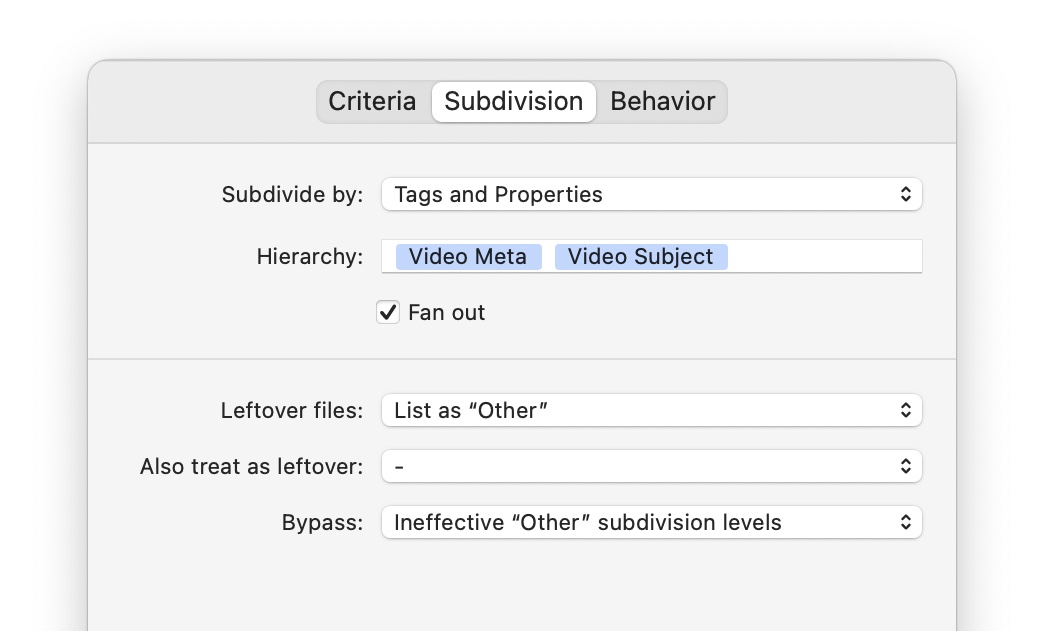
Video Meta and Video Subject are two properties that were added to the Usher library. The Video Meta field contains values like "Making Of" and "Tidbits," while the Video Subject contain the media files' titles. With these two properties in the Hierarchy field, Usher subdivides the Behind the Scenes Smart Playlist, grouping things by the Video Meta property, and then by the Video Subject field.
The end result is a Smart Playlist sorted into subgroups based on the type of "behind the scenes" feature it is, and then by what movie it came from.
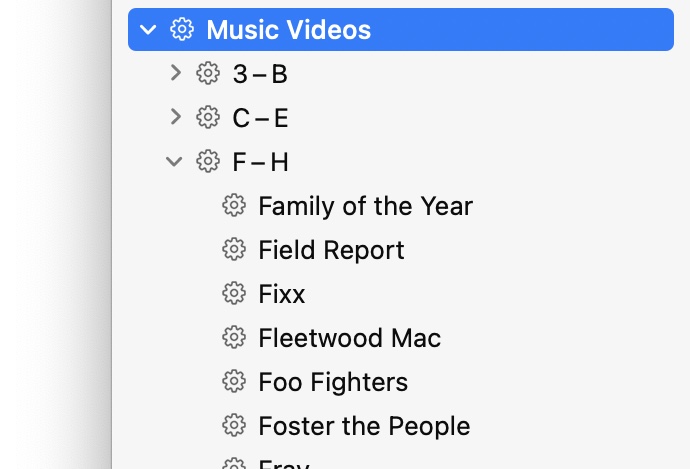
While these hierarchical subdivisions are useful, they can quickly get out of hand. Consider this simple Music Videos Smart Playlist:
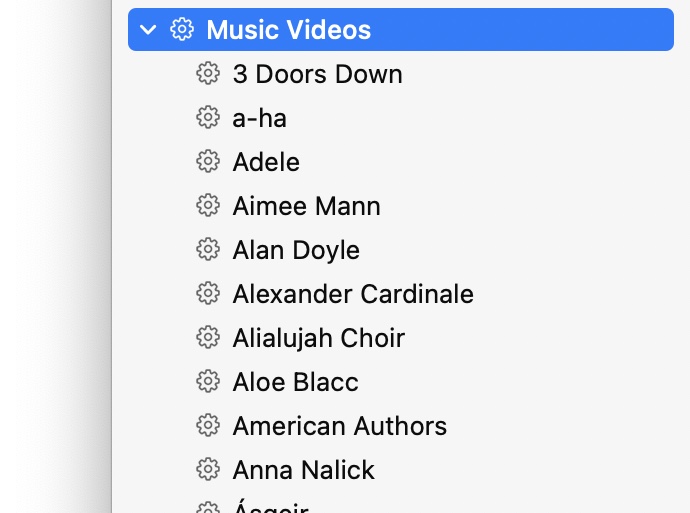
Each video has an artist's name, recorded in a property named Performer; the above Smart Playlist was created by adding Performer to the Hierarchy field. But with hundreds of performers, this list goes on for quite a while, completely filling Usher's sidebar.
Follow along now as this simple playlist takes a journey that transforms it from an unruly mess of entries into a well-organized and easy-to-use Smart Playlist. How? By using the Hierarchy field's special powers.
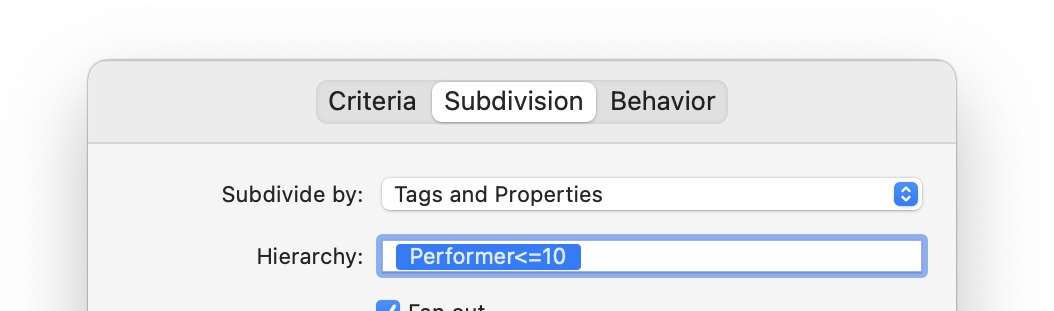
The first special power allows you to specify a maximum number of subdivisions for the Smart Playlist. You specify the limit using the following format, by typing directly in the Hierarchy box: Property Name<=limit. For this Smart Playlist, Usher will create no more than 10 subdivisions with Performer<=10 in the Hierarchy box:
With that in place, the Smart Playlist now looks like this:
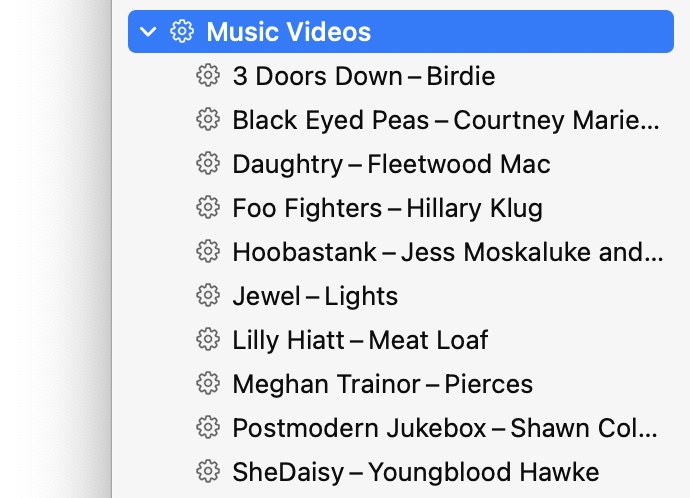
Now all the performers are lumped into one of those 10 subgroups. That's better, but it's somewhat hard to quickly scan the list, given the variable name lengths. Enter the second special feature of the Hierarchy input box: Character limits.
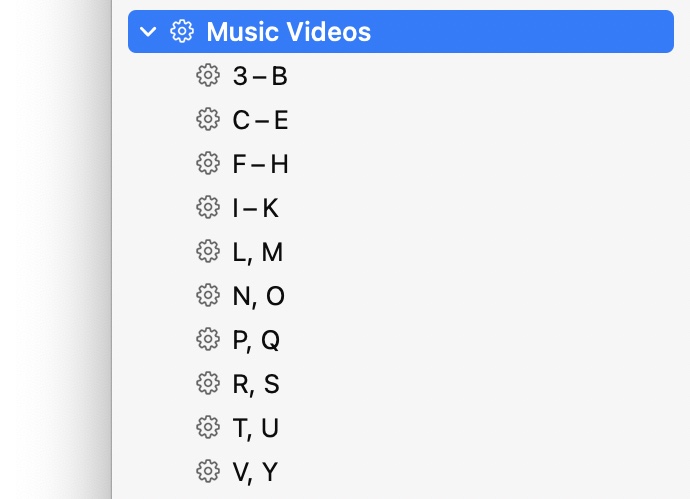
You can limit how many characters Usher displays with a modification of the previous syntax: Property Name<=chars<=limit. For an alpha-sorted Smart Playlist like this one, a single letter will be most readable, so we'll use Performer<=1<=10, which creates this Smart Playlist:
Click into any subgroup, and the main Usher window will display all the entries in that subgroup. But what if you wanted finer-grained control—the ability to choose a performer directly from the sidebar? You can do that, too, thanks to Usher's support for repeating properties in the Hierarchy input box.
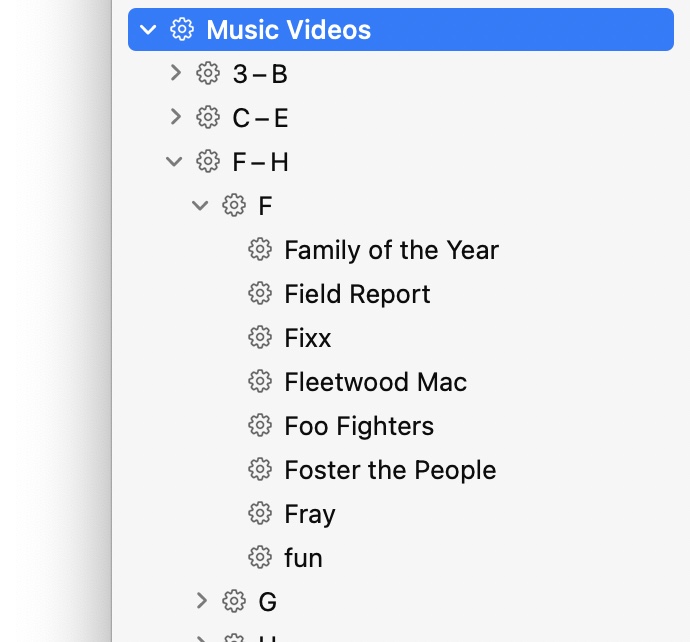
With the Hierarchy box set to Performer<=1<=10,Performer, the Smart Playlist now looks like this (with one subgroup expanded to show how it looks):
And this is nearly perfect—you can easily select a single performer from an easily-navigated Smart Playlist. Why only almost perfect? If a given subgroup has a ton of entries, the original problem returns: There will be too many entries to easily scroll through in the sidebar. For example, although cropped out of the screenshot, the F-H category contains over 30 videos.
What's the solution to that problem? A second level of character and depth limits on the Performer property. This will force Usher to further subdivide the already subdivided Smart Playlist. For instance, this Hierarchy input box construct tells Usher that you want a maximum of 10 one-character subdivisions at the top level, then a maximum of five one-character subdivisions, and finally, the full name of the performer:
Performer<=1<=10,performer<=1<=5,Performer
And this final construct gives us this Smart Playlist:
Each letter of the top-level group is now split into its own subgroup, limiting the number of entries that appear in the sidebar. This is just one example of what you can do with character and subgroup limits on the Hierarchy field, but hopefully it gives you a sense of some of what you can do with it.
This subdivision method behaves similar to the Tags and Properties option if you leave the Hierarchy field empty, except it will only include subdivisions that have a value for at least one file in the Smart Playlist, as defined by the rules on the Criteria tab.
Using this option can eliminate a lot of useless "Other" subgroups that might otherwise show up.
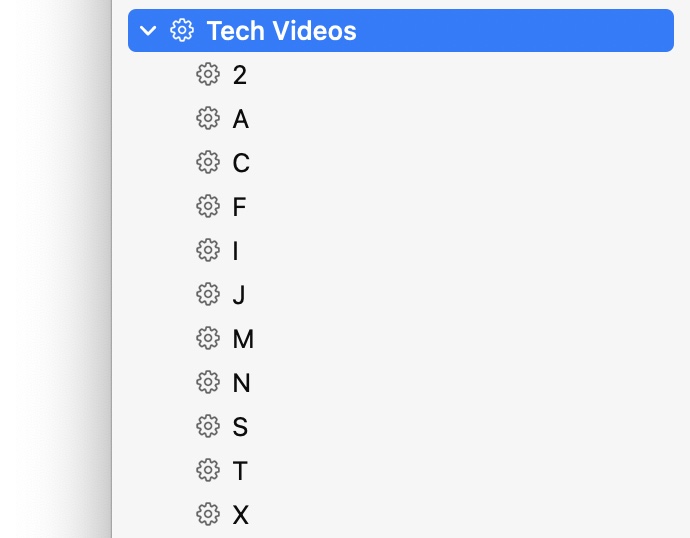
Subdividing by First LetterSet this pop-up to subdivide by First Letter, for instance, and Usher will automatically create subgroups based on the first letter of each media file's name. Depending on how you name your media files, the results may or may not be useful, but here's how such a Smart Playlist would look:
Shockingly, this will create subdivisions based on the ratings you've assigned to your media files.
Subdividing by Date Added
As it says, this will create a Smart Playlist that's subdivided by the date you added media files to Usher's library:
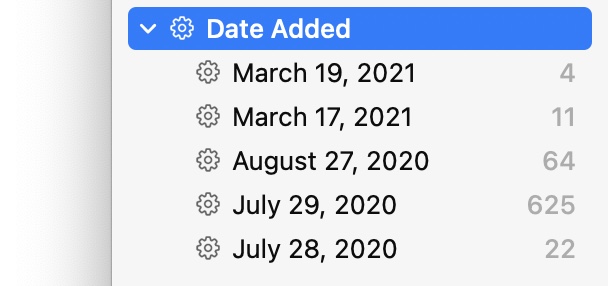
By default, the groups will be in date ascending order; to reverse that, select the Smart Playlist's top level (Date Added in the above screenshot), then choose → → , and it will reverse.
Last Playback DateThis, too, does exactly what you'd expect it to do. And as with the Date Added option, you can reverse the order by changing the sort. There's also a non-date category, Never, which will include any media files you've never looked at or watched.
Library Location and SatellitesIf you have a large, complex Usher setup, consisting of a library and one or more Satellites, this smart playlist will show you which media files reside in which locations.
Behavior tab
At present, there's only one option on the Behavior tab:
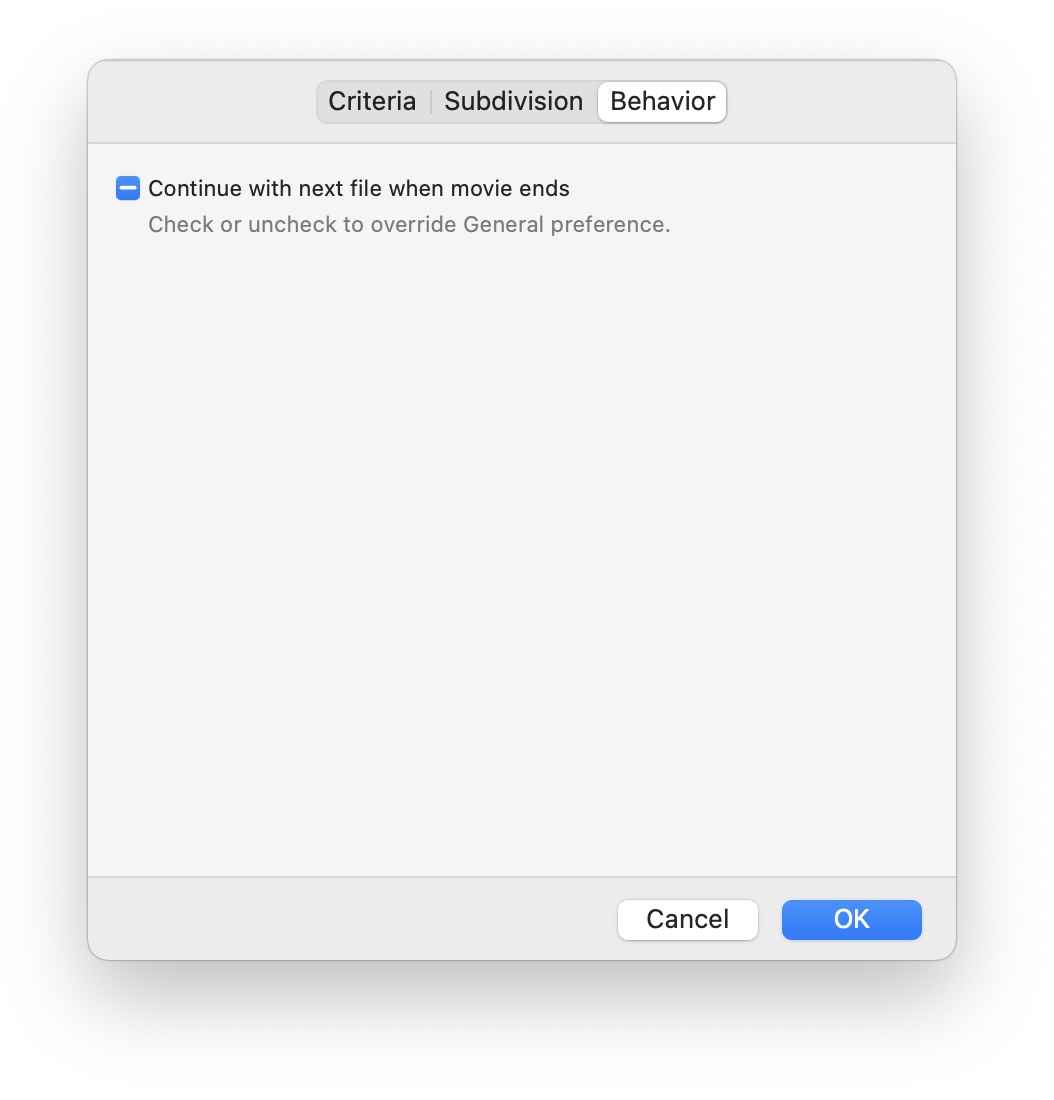
By default, Smart Playlists will obey your settings for what to do when one file ends. If you'd like to override that, click the Continue with next file when movie ends checkbox to choose one of its two additional states: Unchecked (don't continue) or checked (do continue).
In the future, there may be more Smart Playlist-specific overrides here. But so far, it's just the one.