

Time Sink 2.1 is out for both App Store (hopefully out now or very soon) and direct customers (definitely out now). This release has one very important fix for macOS Catalina users, as well as one directly-related new feature.
The “fix” (though it wasn’t anything in our code that was broken) is that Time Sink can once again see and track individual windows in macOS Catalina.
When macOS Catalina was released, it contained new security restrictions, and one of those restrictions is that an application is not allowed to see window titles unless the app is registered as a screen recording application. So that’s basically what Time Sink does: It registers as a screen recording application, but it does not record your screen. (Note: Due to App Store restrictions, the App Store version of Time Sink does this slightly differently, though the end result is the same: Trackable window titles but no screen recording.)
Please read the remainder of this post for specific instructions on how this feature works for direct and App Store versions of Time Sink, as the initial setup process is slightly different for each version.
So what about the new feature?
When we discovered we needed to ask for screen recording permissions, it dawned on us that while it’d be silly to make a real-time movie of a full day in front of your Mac, it might be interesting to create a time lapse of a day’s work, using a series of still images. So that’s exactly what we added: timed screenshots.
On the Export tab of Time Sink 2.1’s prefs, you’ll find a new “Auto-save screenshots” option, which is disabled by default. Enable it, specify how often to take a picture and how many pictures to take, and start working. After you’ve accumulated a number of screenshots, you can use another app (iMovie, perhaps) to create a time lapse view of your day from those screenshots.
Please note the following: Screenshot capture is disabled by default, and the images are saved locally and never transmitted. If you do decide to use this feature, you are in charge of how often Time Sink takes a screenshot, and how many shots it saves.
Here’s how to track window titles in macOS Catalina using Time Sink 2.1—please read the instructions specific to where you purchased the app.
Direct Purchase Customers
Here’s how to let the direct version of Time Sink track window titles in macOS Catalina:
- Launch Time Sink, and you should see this dialog (on first launch only) so that you know exactly why Time Sink is asking for screen recording permissions:
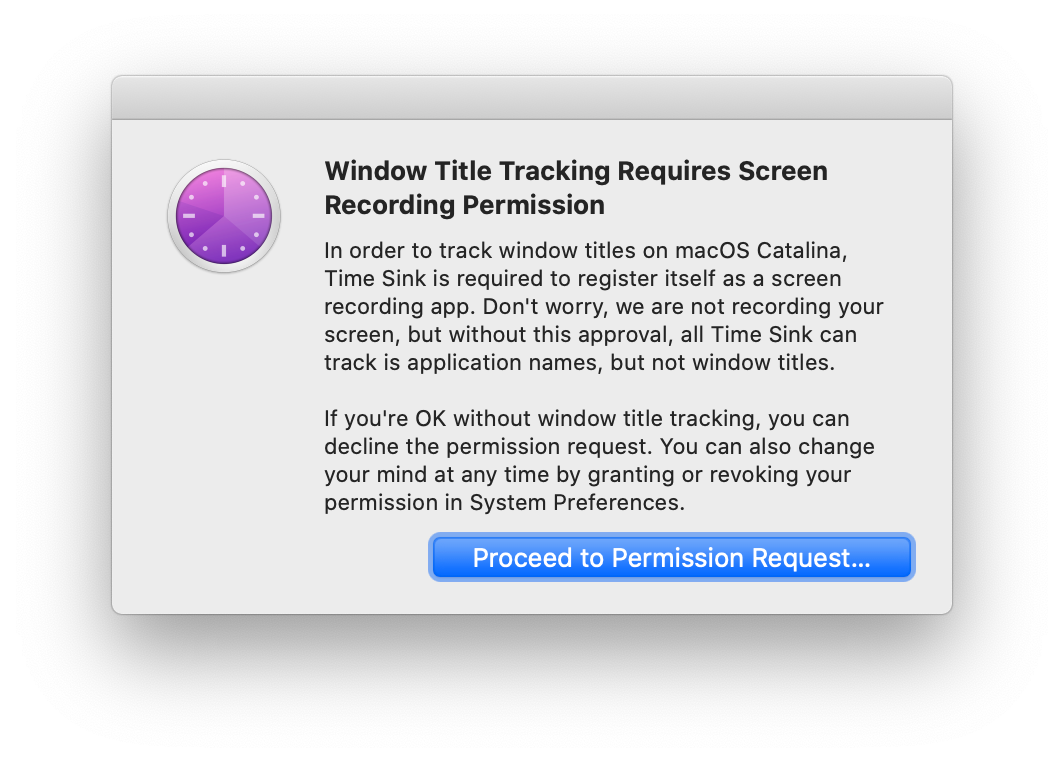
- Click Proceed to Permission Request, and you’ll see the standard macOS Screen Recording dialog.
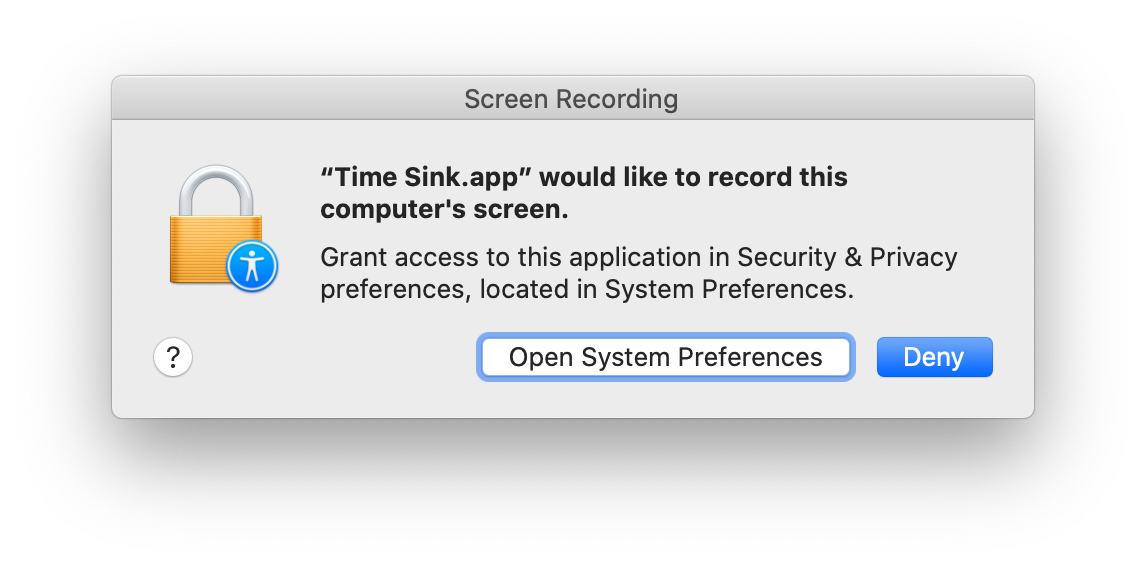
(If you can’t see the dialog, it’s possible it opened behind a Time Sink window; move them around to find the macOS dialog.)
- Click Open System Preferences in the macOS dialog, and you’ll be taken to the Screen Recording section of the Security & Privacy > Privacy System Preferences panel. (If, for some reason, the button doesn’t take you there, just manually navigate to that location.)
- Check the box for Time Sink, and you’ll see one final dialog:

- Quit Time Sink using the Quit Now button, then relaunch it, and you should see that the app is tracking window titles.
App Store Customers
The App Store version of Time Sink uses a different method of enabling window title tracking, due to App Store restrictions. This leads to a slightly different first run process, at least at the beginning:
- Launch Time Sink, and open its Preferences (Time Sink menu item > Preferences).
- Click the Export button in the Preference window’s toolbar.
- Click the “Auto-save screenshots with…” checkbox at the bottom of the window; this will add a second line containing a box to set the screenshot limit:

From here on, the instructions are the same as with step two for direct customers: Once you see the standard macOS Screen Recording dialog, follow the above directions from step three on.
Very important: You do not need to leave screenshot recording enabled. If you don’t want Time Sink saving pictures of your screen, return to Time Sink’s Export preferences and uncheck the “Auto-save screenshots with…” checkbox. This will not disable window title tracking.
The App Store rules don’t allow us to automatically do this for you (which is basically what we do in the direct version), so you have to manually enable screenshots to trigger the macOS Screen Recording approval dialog. Once the permisson is granted, though, you can disable screenshot recording.
Wow!
Thank you! This saved my life. I was worried I have to go for a new app!
While this solved the problem, I noticed that Dark mode does not work [MacOS Catalina user here]. What gives?
Dark Mode doesn’t work because it’s not there yet: Time Sink doesn’t support Dark Mode at present.
-rob.