

Remember last week, when we posted a very detailed writeup that explained to how create Quick Actions for Name Mangler 3.9 and newer? Well, we have found a much simpler way to get this done, thanks to Apple’s Shortcuts app—and to our user Eric, for spurring us on to find a simpler solution.
Here’s how the Shortcut looks (click to see the full Shortcut):
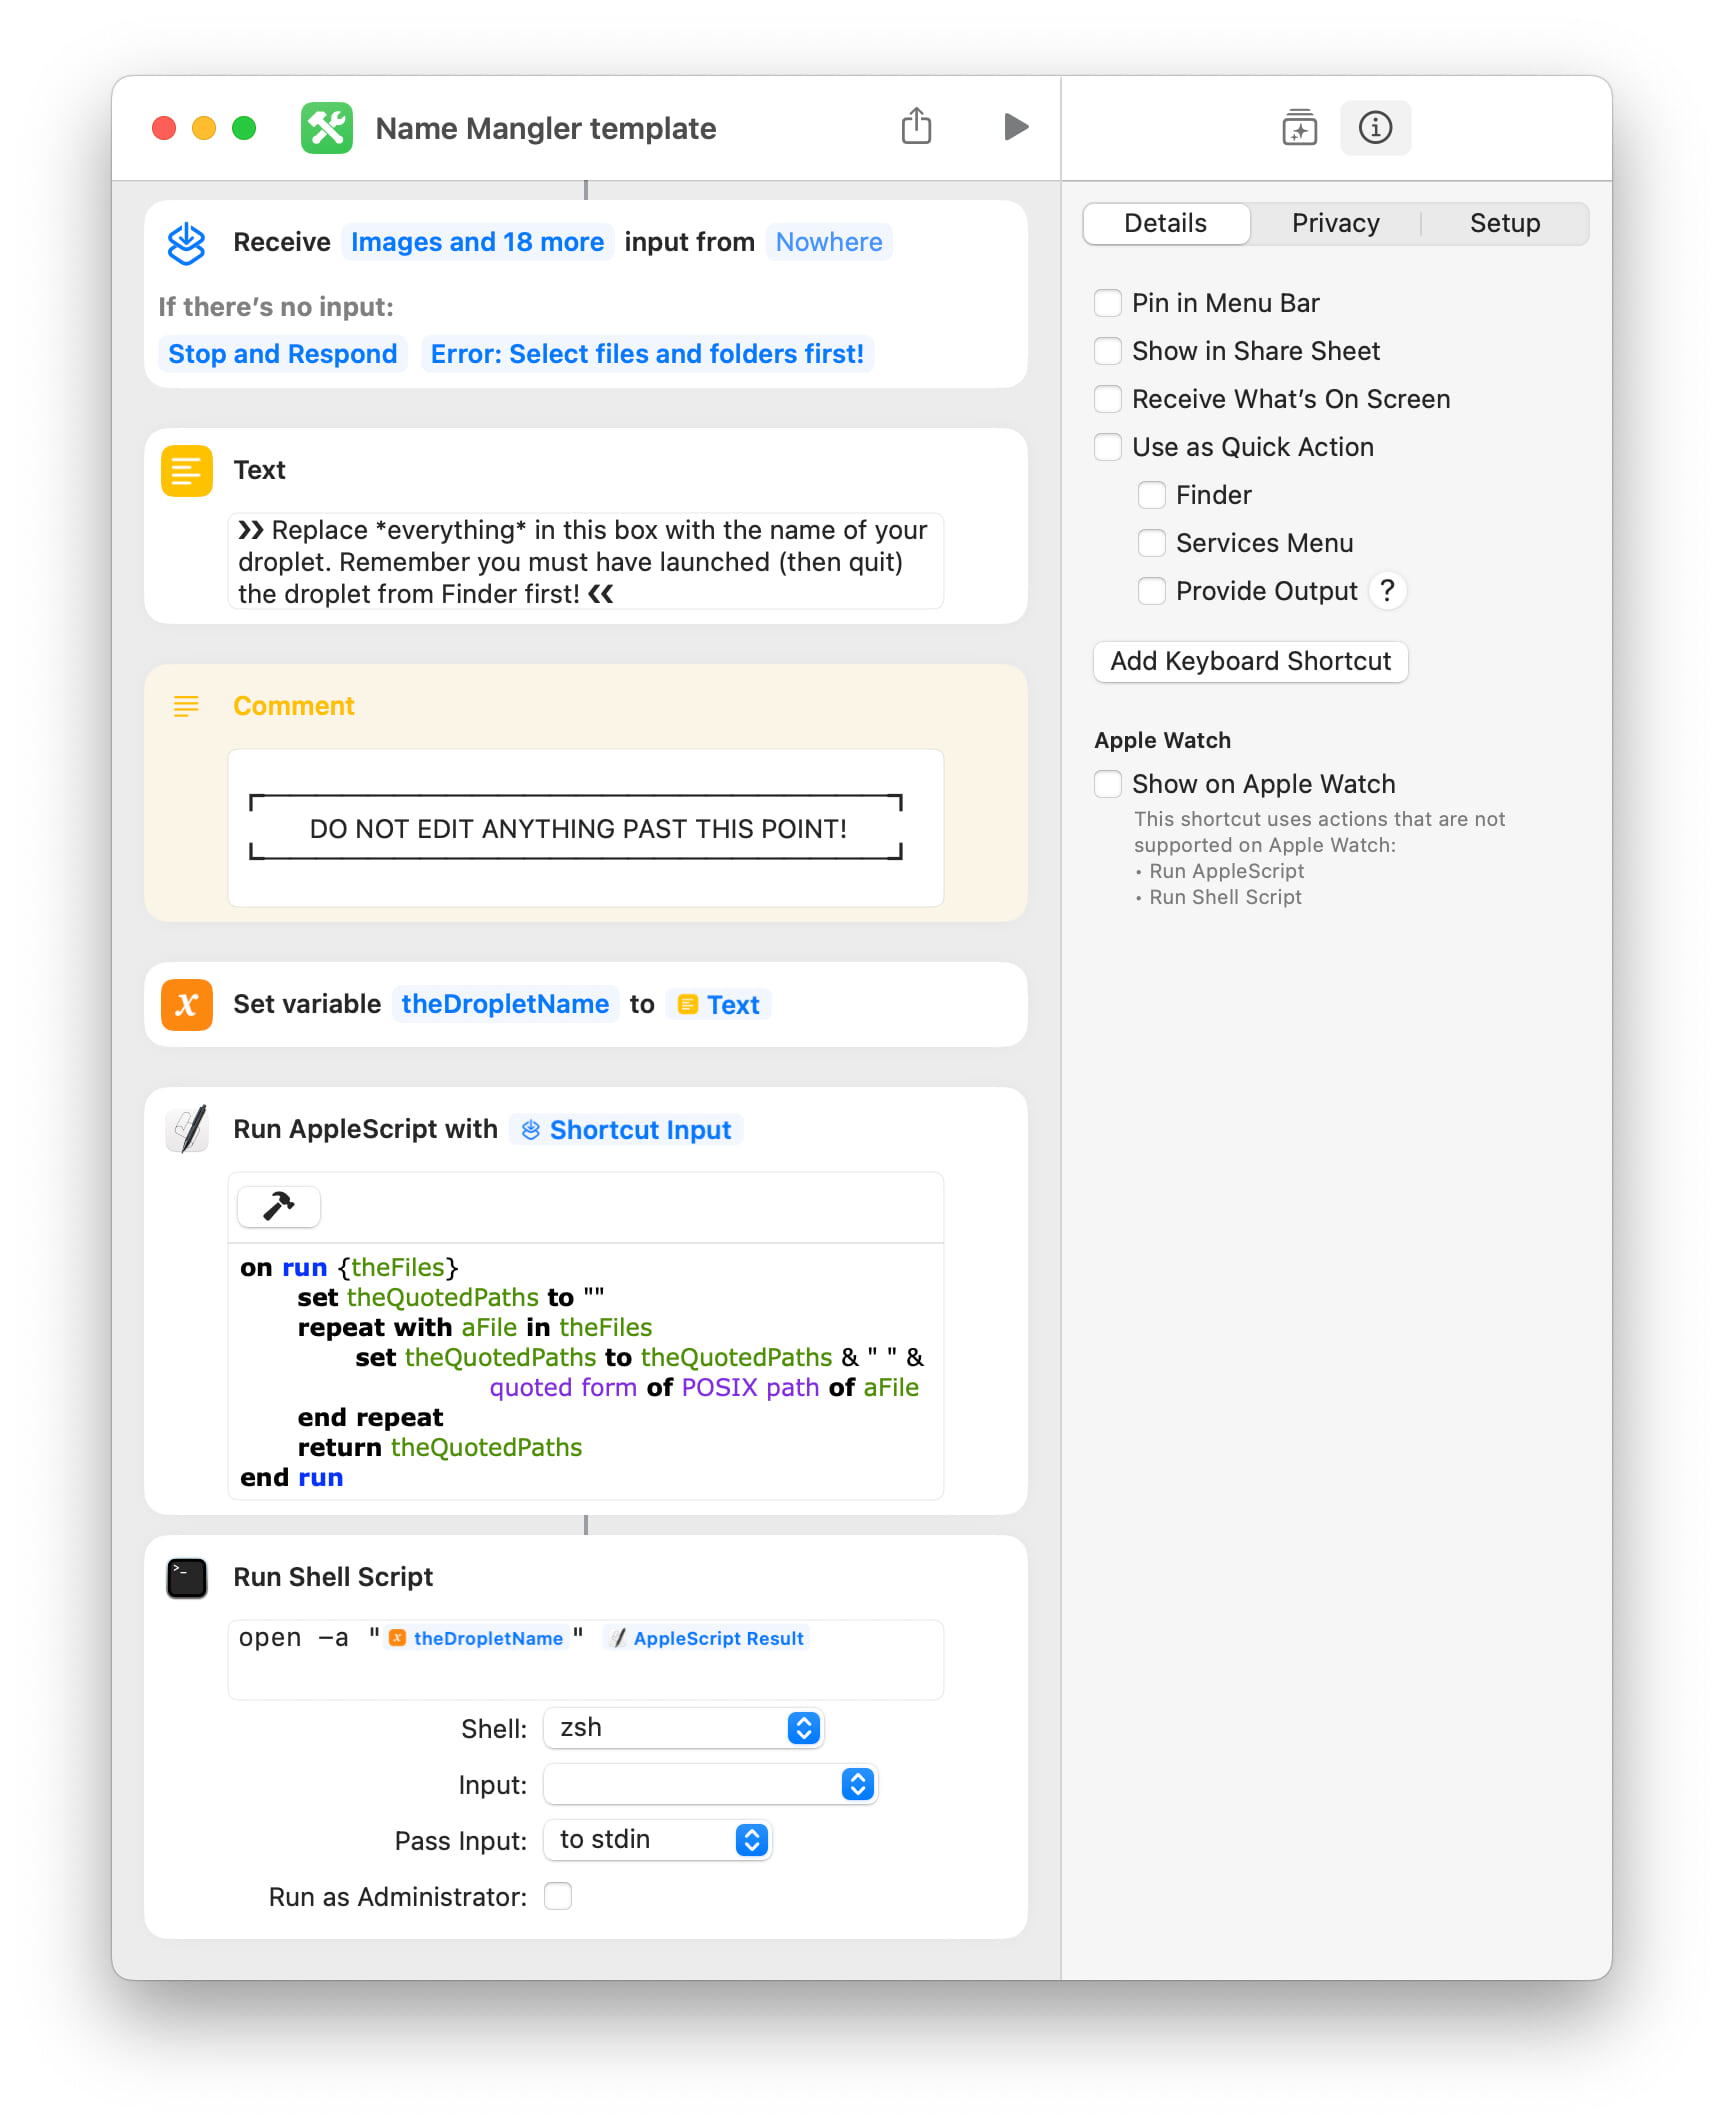
Apple’s Shortcuts app not only makes it (much) simpler to create Name Mangler Quick Actions, but you can also access them from Finder’s Finder → Services menu. Or run them from the menu bar. Or via a keyboard shortcut. Or use all of the above methods at once. And if you want to share your Shortcuts with others, it’s as easy as a couple of clicks.
We’ve created a template that requires a few simple edits in Shortcuts, and is then ready to go for your own use. Here’s how to get going…
(If you need more details on these steps, you’ll find them below in separate expandable sections.)
-
Create a Name Mangler droplet, save it to a system-recognized Applications folder (see details below for more on that), and open it once—the save location and launching the droplet once are critically important, or your Shortcut won’t work.
- Install the Name Mangler template Shortcut.
-
Duplicate the Shortcut (via copy and paste or contextual menu), and edit the duplicate—keep the original around as a backup in case something gets messed up. There are only three things to change in the duplicated Shortcut, as indicated by the brightly-colored boxes in this screenshot…
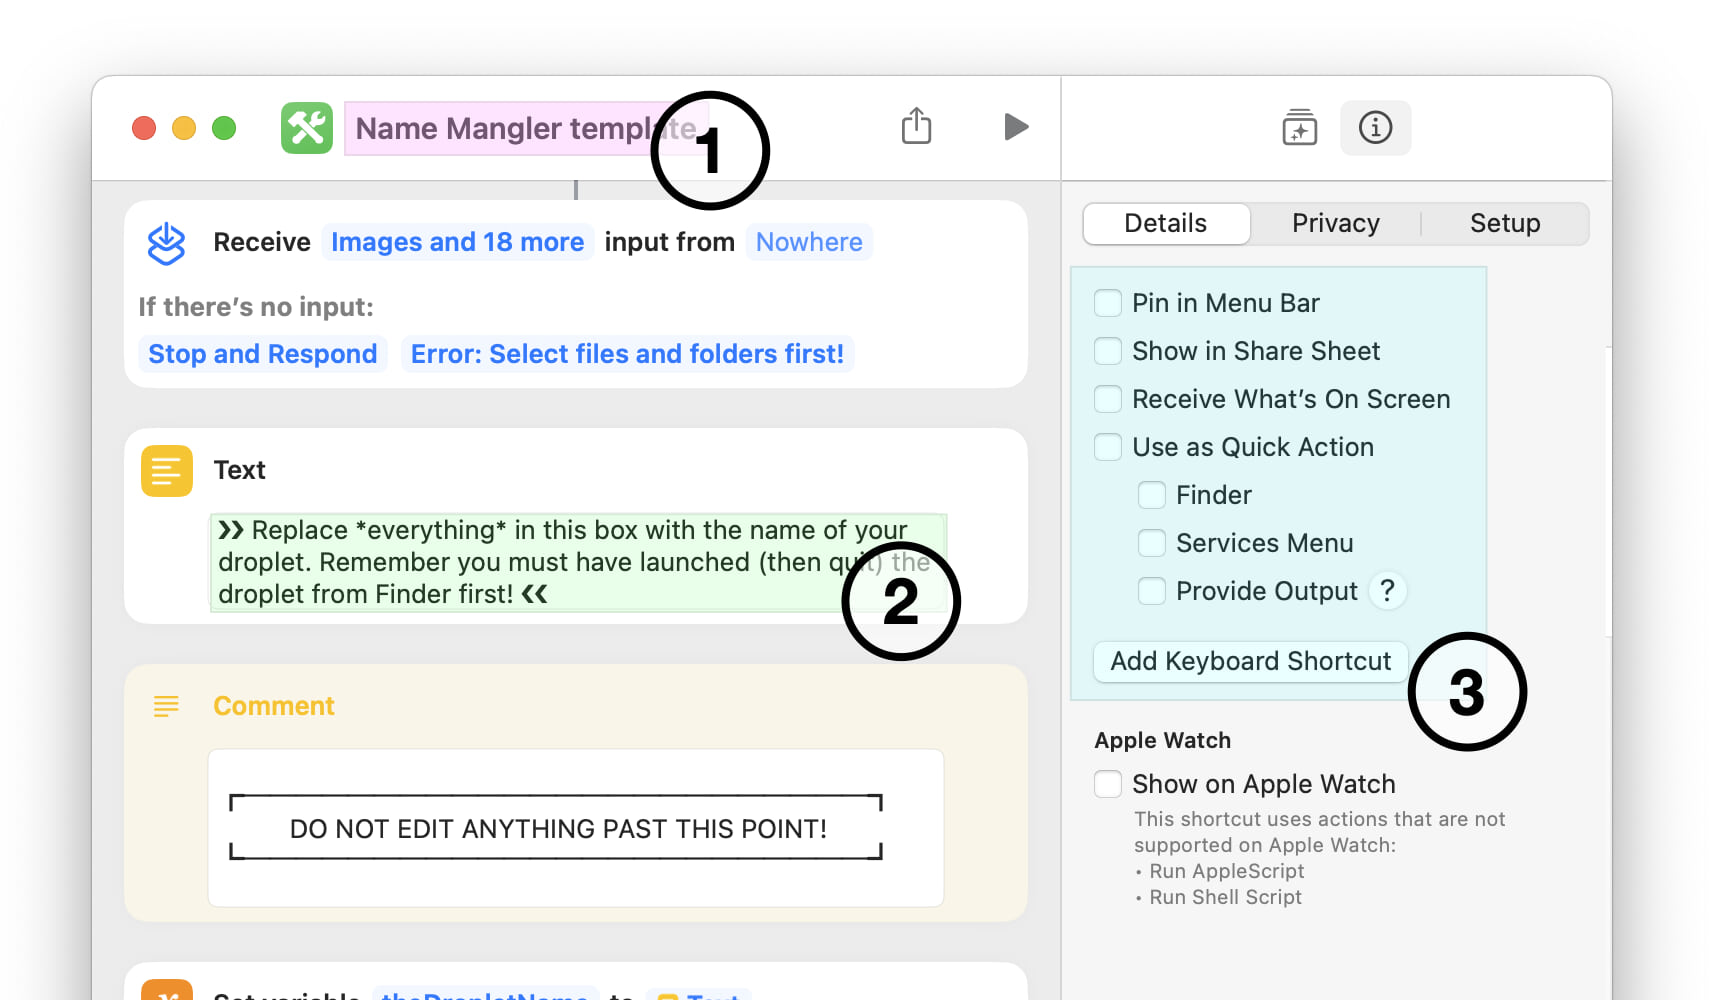
① The name of the Shortcut. This is the name you’ll see in Finder’s contextual menu.
② The name of your Name Mangler droplet. This needs to exactly match whatever filename you used when you created the droplet. Replace everything in the text box with the name of your droplet. (Do not include the “.app” extension; just insert the name.)
③ Activation methods. Choose how you’d like to activate the new Name Mangler Shortcut. Assuming you want to make it a Quick Action, there are a couple other settings to consider: The Finder and Services Menu checkboxes control where you’ll see your new Shortcut:
-
Click the Finder checkbox, and it will only be available in Finder’s Quick Actions contextual menu.
-
Click the Services Menu checkbox, and it will only be available in the Finder → Services menu in Finder. (Shortcuts cannot be shown in the Finder’s Services contextual menu option.)
-
Click both the Finder and Services Menu checkboxes, and your new Shortcut will be available in both spots.
-
That’s it—your Shortcut is now almost ready to use. The first time you use your new Name Mangler Quick Action, you’ll see some very odd looking permission dialogs (possibly in addition to the standard macOS folder permissions dialog):
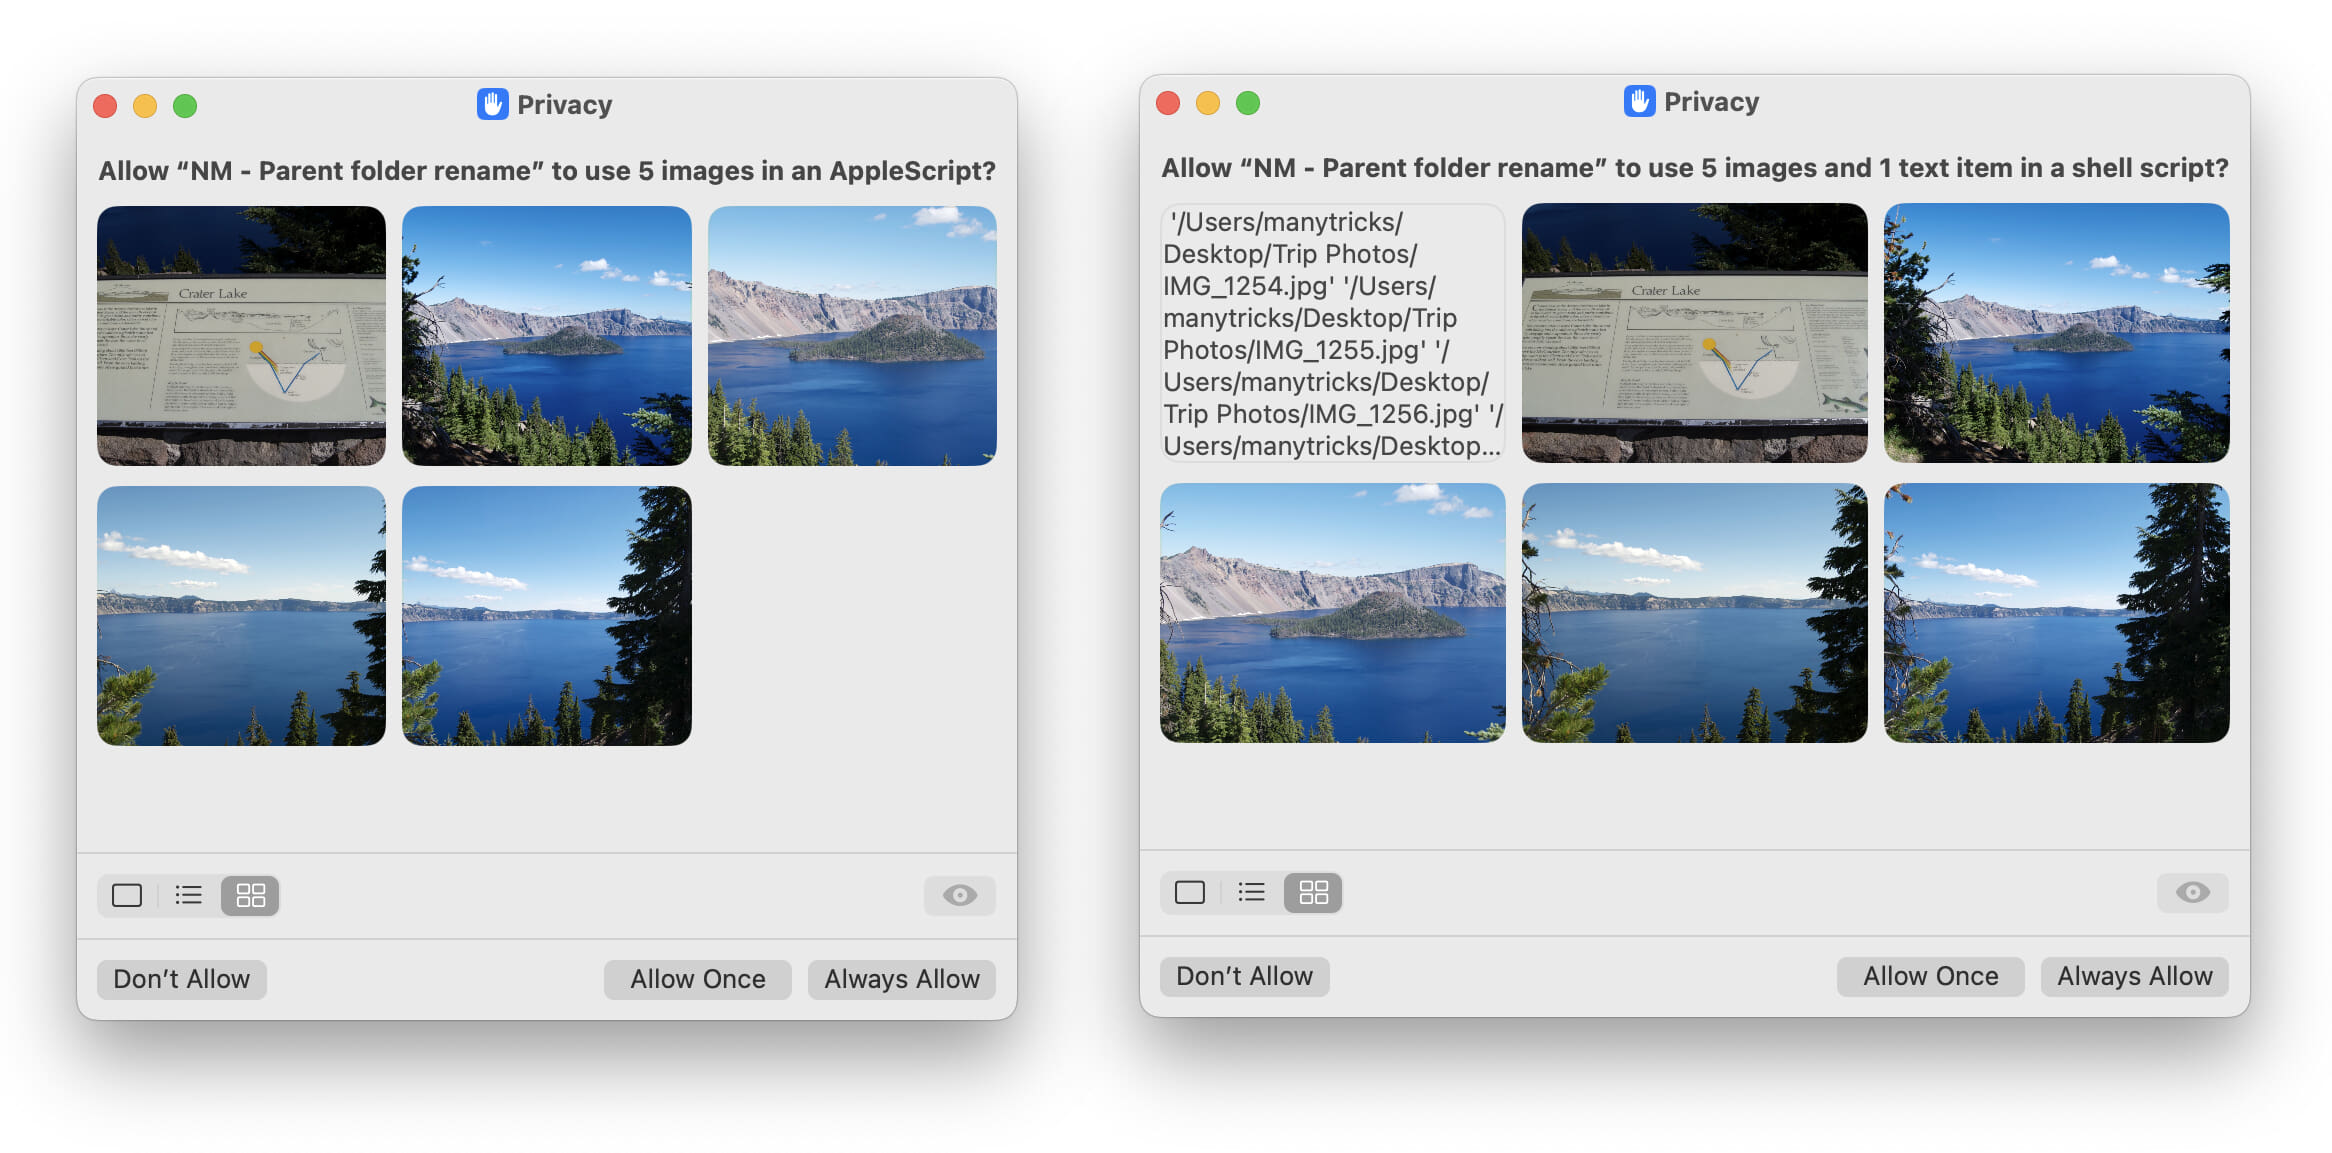
You will only see these two dialogs the first time you use a Shortcut; after that, it will just run when you re-use it. And thanks to the following little trick, you should only ever see those two dialogs exactly one time, when you run that very first Shortcut. (That is, as long as you click Always Allow on each one when they appear.) So what’s the trick?
When you need to make another Name Mangler Quick Action, duplicate the Shortcut you set up and used the first time. Because this Shortcut already has your permission to run, it seems its duplicates do as well, and so you won’t be asked again.
Putting all that together, the process for creating subsequent Name Mangler Shortcuts is very simple:
-
Create your Name Mangler droplet (save to an Applications folder, and launch it once).
-
Duplicate an existing Name Mangler Shortcut that has been granted permissions before.
-
Edit three things (Shortcut name, droplet name, and activation methods) on the duplicate.
Because you’re starting with an “approved” Shortcut, all new Shortcuts built from that one will just run, even the first time you use them. This process, while still not as simple as our previous built-in solution, is much easier than the Automator method we wrote about previously.
Now, the additional details promised earlier; expand any of these sections to read about the particular task.
Download the Name Mangler template Shortcut
After clicking the download link, your web browser may display a screen similar to this one (or it may jump directly to the Shortcuts app):
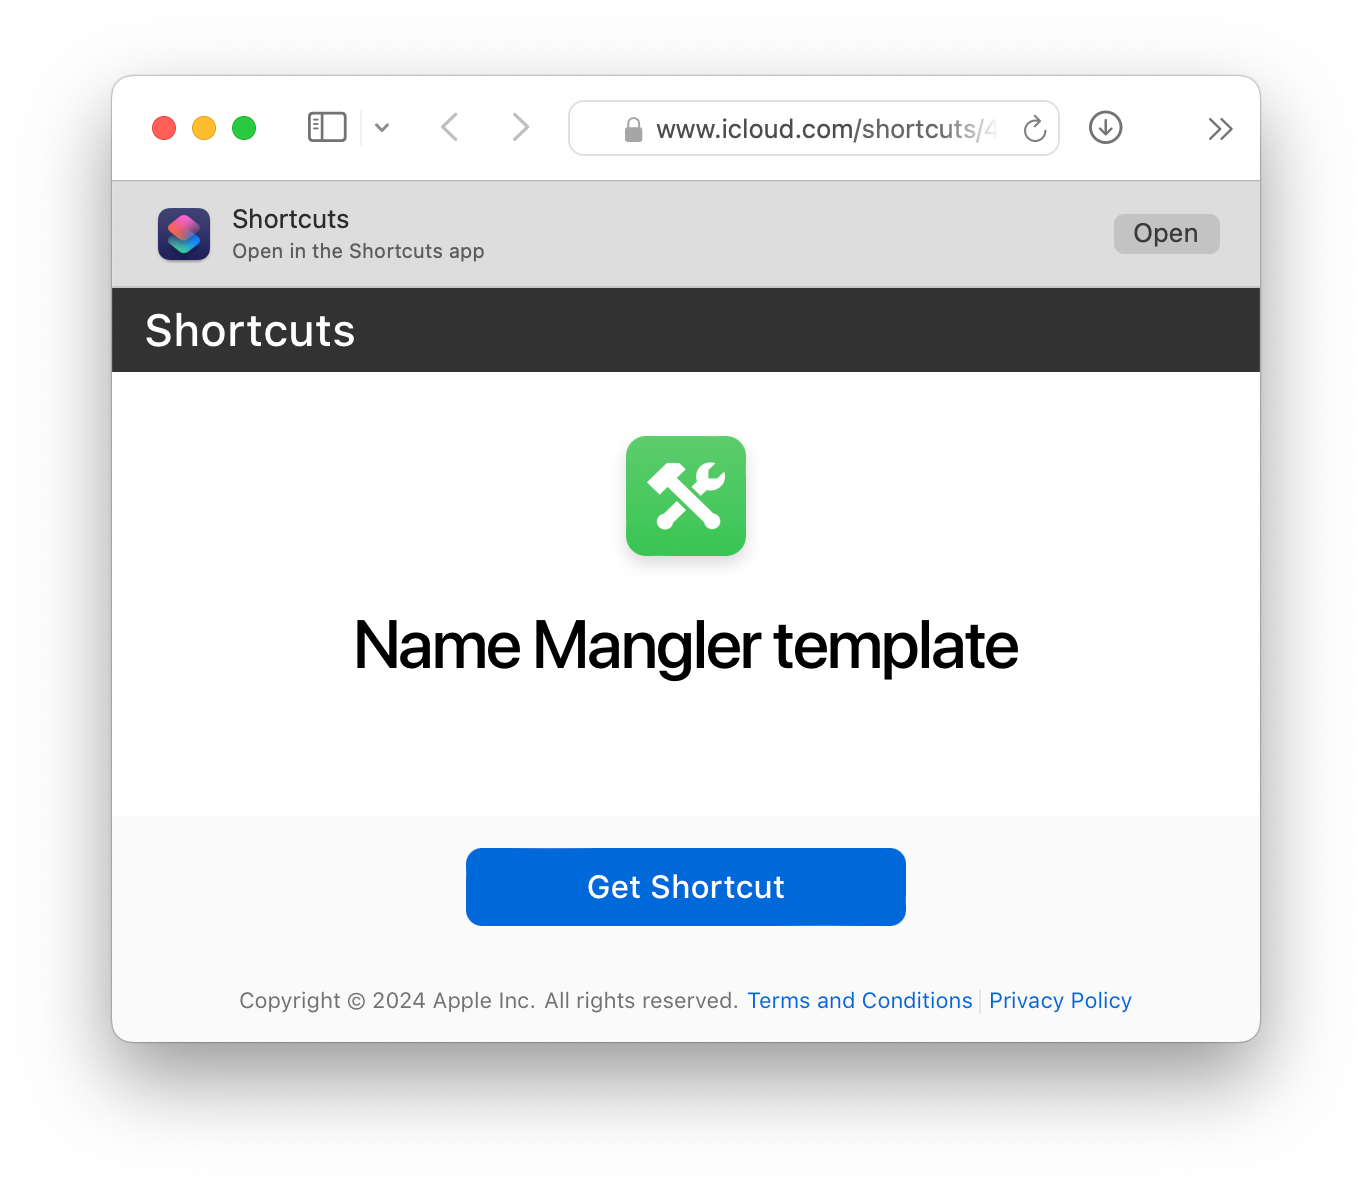
Click either Get Shortcut or the Open button above the window, and that should switch you to the Shortcuts app, where you’ll see this dialog:
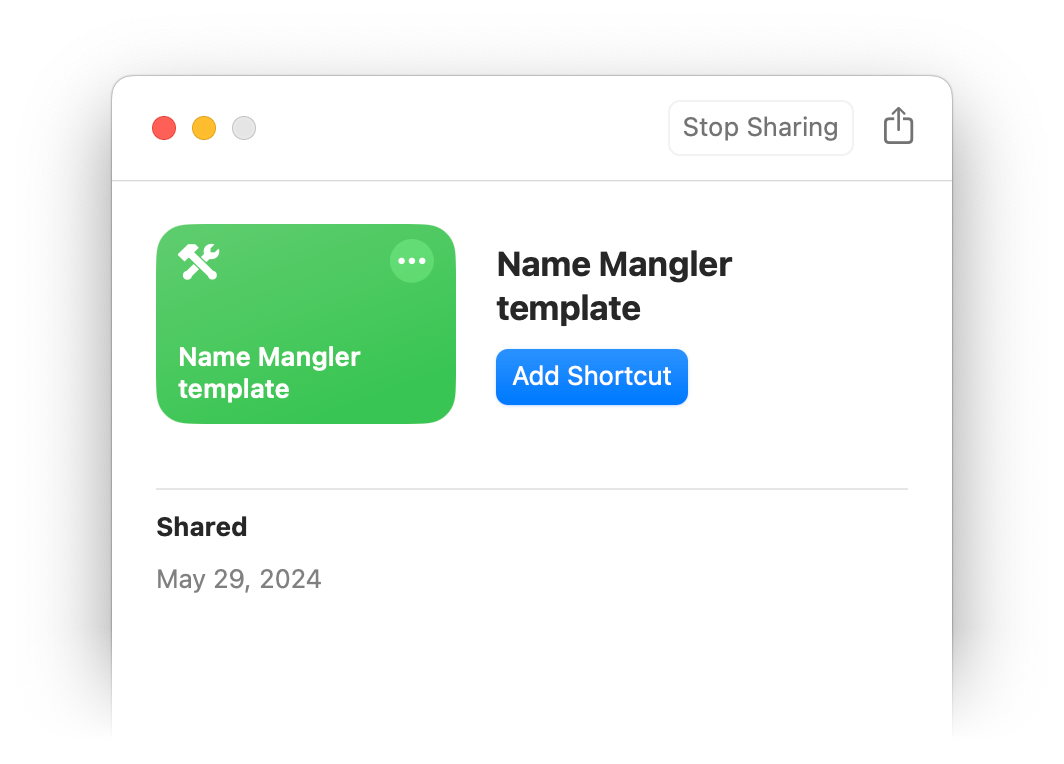
Click Add Shortcut to install the Shortcut. You should only have to do this once.
How to create a droplet in Name Mangler
Launch Name Mangler and set up the renaming action(s) you’d like to use as a Shortcut. You can use one or more actions; here’s a simple example with two actions:

Just remember that Droplets aren’t interactive, so whatever settings you choose for your action(s) are the ones that will be applied. Once it’s set up, you need to save it as a droplet (File → Create Droplet) into an Applications folder—either the main one, or one in your user’s folder, which is the recommended solution.
The name you pick isn’t important, as it will only be used in the Shortcut. However, a good descriptive name will help you keep track of your droplets, so it’s best to pick something other than “My Droplet – 003” as your naming convention. What’s more important than the name is the location where you save the droplet.
Where to save Name Mangler droplets
When you save your droplet, you must save it to an OS-recognized Applications folder. That can either be the top-level Applications folder, or (probably a much better spot) the Applications folder in your user’s folder. You may not have this folder, but if you don’t, it’s easy to create.
![]()
To create this folder, open a Finder window, and navigate to your home folder, at the level where you can see the Desktop, Documents, Downloads, etc. folders. Select File → New Folder, and name the new folder Applications. The OS will automatically apply the “this is an applications folder” icon overlay, as seen at right.
If you use macOS in a language other than English, the folder will rename itself in your chosen language—Programme in German, for example. But you need to name it Applications in order for macOS to recognize it and apply its magic.
Opening your Name Mangler droplet—especially App Store users!
It’s critical that you launch each Name Mangler droplet after you save it. Just find it in the Applications folder where you saved it, then double-click the droplet. Name Mangler will open; just quit it after it opens. This step is required as it registers your droplet as an application with the system, so that it’s avaialable for use in the Shortcuts app.
If you have the App Store version of Name Mangler, when you try to launch your just-saved droplet, you’ll see the alert on the left side of the below image. Despite Apple’s dire-sounding language, there is nothing to worry about. We store your configuration right within the droplet, so droplets can be shared among users and Macs, but doing so breaks the droplet’s code signature, which makes macOS distrust the droplet. And since the App Store build is sandboxed, we can’t suppress the dialog.
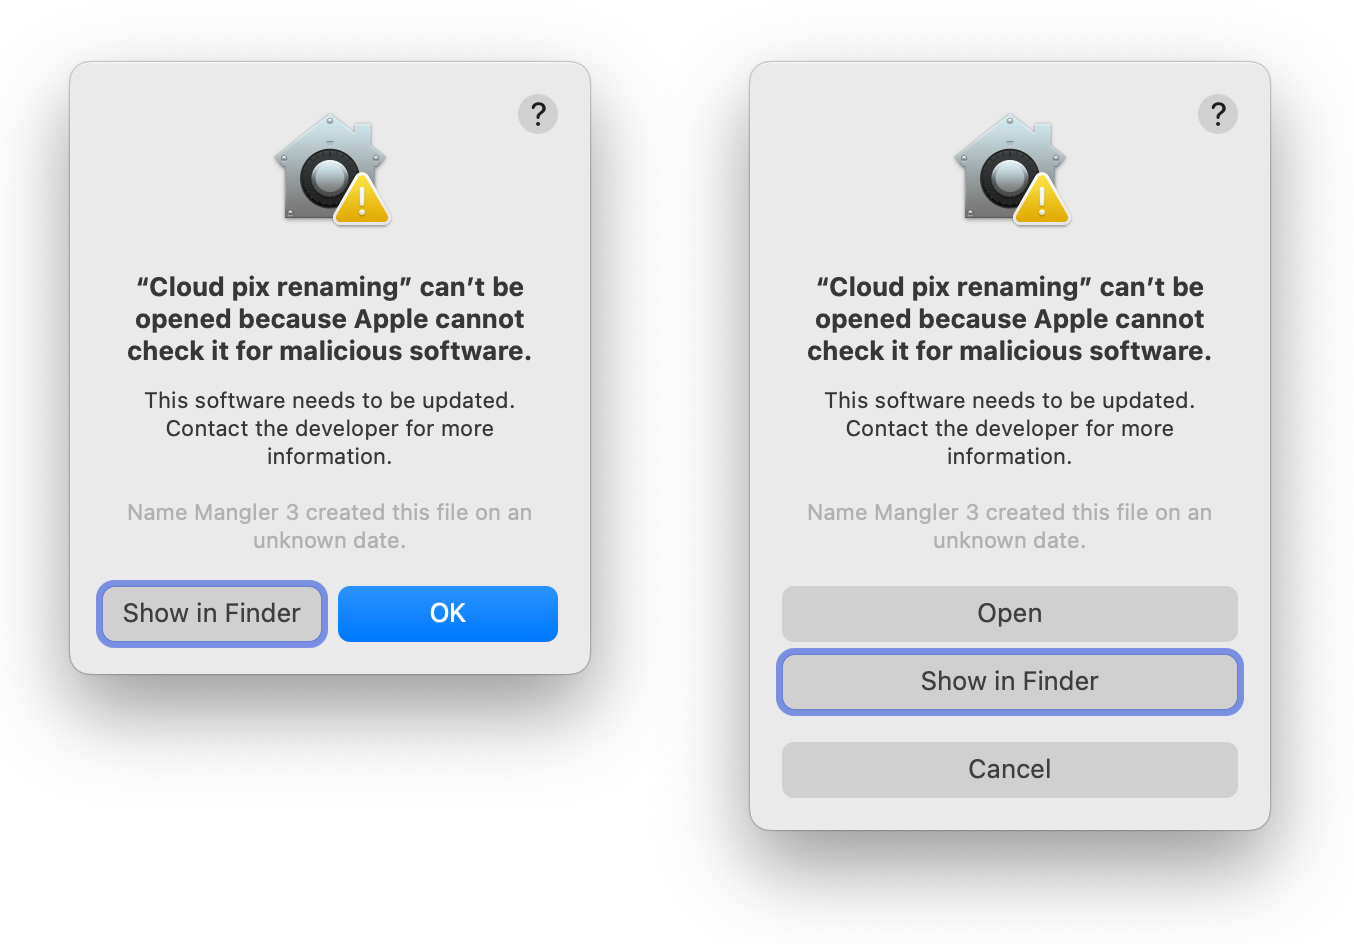
Thankfully, the fix is simple if a bit annoying: Right- or Control-click on the droplet and select Open. While this won’t actually fix things, it will get you a second dire-sounding alert, as seen on the right of the above image.
Click the Open button on that dialog, and Name Mangler will finally open and show you your droplet; you can then quit Name Mangler.
You are still welcome to use the Automator method, of course, but this Shortcut is easier to set up, easier to use (with multiple activation methods), easier to share, and easier to re-use for additional Shortcuts. If you still have questions after reading this, please reach out to us on Discord or via our ticket system.