Moom 4 is available now, and requires macOS 10.13 or newer. Moom 4 is priced at $15, and existing (Mac App Store or direct) Moom 3 users can upgrade for just $8. Please see How Can I Buy Moom 4 for details on purchasing—especially if you’re an App Store customer, as Moom 4 is only available directly from Many Tricks. (New App Store customers who have just bought Moom Classic in the App Store qualify for Moom 4 upgrade pricing. The total of the App Store and upgrade purchase is the same $15 as new direct customers pay for Moom 4.)
It may have been a long time coming—over 12 years since Moom 3’s release—but we think Moom 4 was well worth the wait. During those years, we’ve been listening to all your input, as well as learning more about what we can do with windows on macOS, and Moom 4 reflects that feedback and learning. It’s both the same app you’ve known and used since its initial release in 2011, and an entirely new app that offers a number of new window management tools.
What’s new?
So what’s new? A slew of stuff! If you enjoy reading long lists, take a look at the release notes, which detail all the changes. It’s an extensive list.
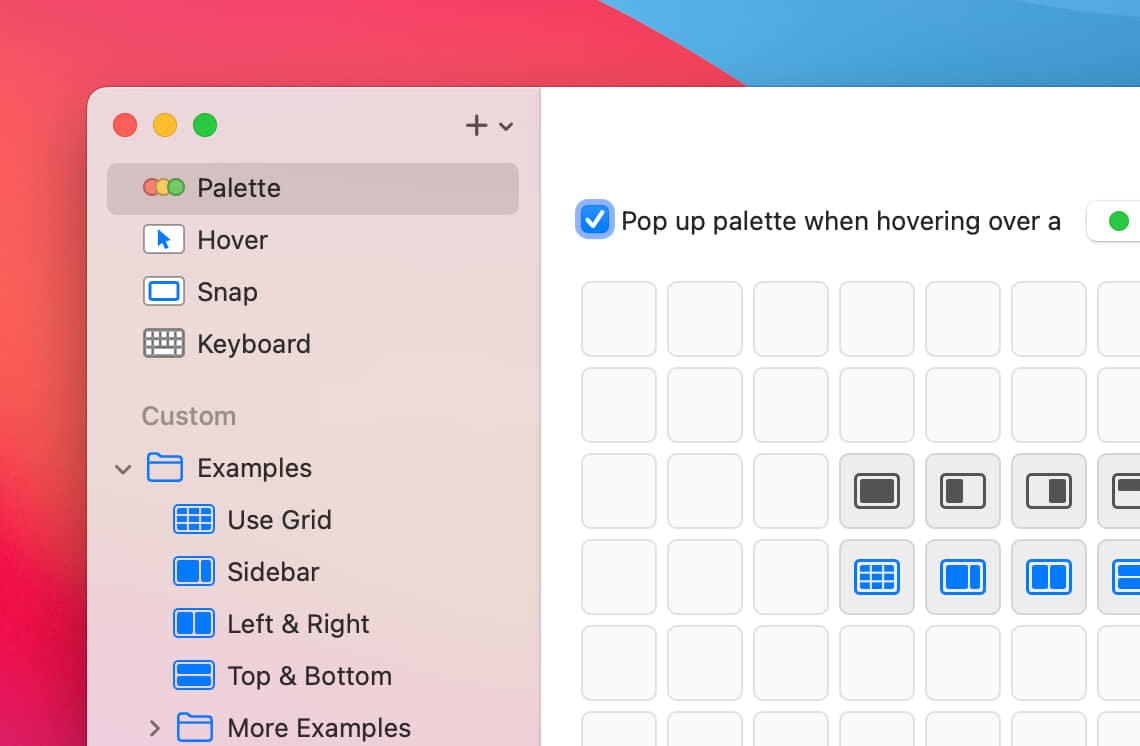
Focusing on some of the more major changes and new features, Moom 4 has a completely revamped user interface designed to help you get the most out of Moom. Gone is the multi-tabbed non-resizable window, replaced with this new resizable window (click for the full experience):
Just by glancing at that window, you can probably spot at least a few of Moom 4’s new features:
- The pop-up palette is both customizable and expandable, supporting up to 61 of your own custom actions.
- You can use folders (and folders within folders) to organize your actions.
- There are some icons in the palette that don’t look like the usual custom actions. That’s because you can put Move & Resize (formerly known as Move & Zoom) actions, saved layouts, folders, and a new Use Grid button into the palette. And folders in the palette act as drop-down menus showing their contents, meaning that the previously-mentioned 61-action limit isn’t really a limit at all.
- Every custom action can be renamed, not just saved layouts.
- You can have the palette pop up when hovering over any of the three window control buttons, not just the green one.
- You can resize the pop-up palette, from really very small to bordering on gargantuan. Pick the size that suits your eye.
- You can control the click behavior of the button on which the pop-up palette appears. Never use full screen mode? Disable the green button’s behavior to enter full screen mode when clicked.
- There’s a section named Hover in the sidebar which isn’t there in Moom 3. What’s that all about?
But what else is new? Drop zones!
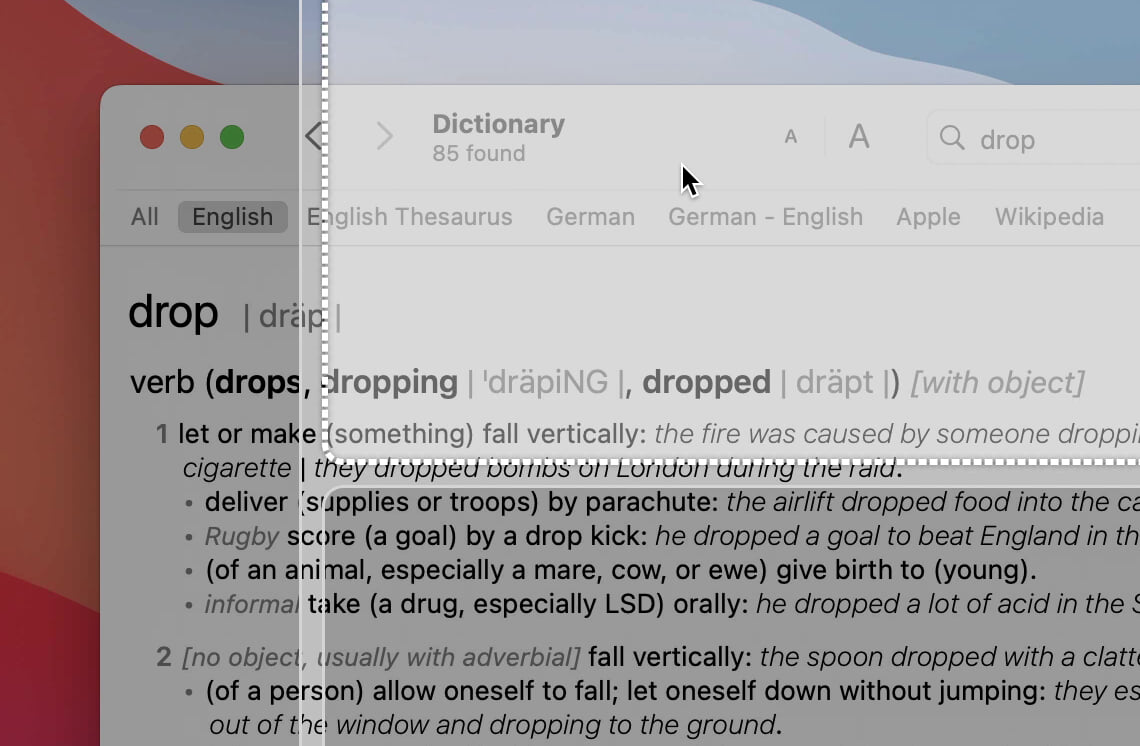
Any saved layout can be added to a screen edge in Moom’s snap feature. Once you’ve done that, drag a window onto that region, and the associated saved layout’s window locations become drop zone targets:
Move the window around, and each window location highlights; drop the window on the highlighted zone, and that’s where it goes. Watch the video.
But is there any more major new stuff?!
There is!
- That Hover entry in the sidebar? It’s an entirely new way of working with windows. By defining some modifier key combos, you can move and/or resize any window—even one in the background—by simply holding down the defined modifier key combos and moving your mouse. No more finding a window edge first, and no more click-and-drag to move or resize. Watch the video.
- Saved layouts can now be non-app-specific: The new “any windows” setting means that a saved layout with five windows in it will be applied to the five most-recently-used windows. Now you can organize open windows without caring which apps they are, or first having to set up a saved layout specific to those apps. Watch the video.
- Chains—combinations of multiple actions—now have two operating modes. As before, they can run as one command (e.g., resize this window and move it to the other display), or they can run sequentially, executing each action in the chain each time the keyboard shortcut is used (e.g., move from one-third left to center third to right third). Watch the video.
One more thing…
The last new thing we’ll cover here is an entirely new in-app help that’s also available online, for the first time ever!
Included in the online help is a What’s New chapter that provides additional details on what’s new. And while you’re there, feel free to dive into the other chapters to read up on Moom 4.
You can also visit the Moom home page to see videos of all the major features in action, and read about all you can do with Moom 4. Then download a trial version, and see what it can do for your window management needs.
We think Moom 4’s collection of window management tools is unrivaled, and can’t wait for you to try it for yourselves. And so ends the discussion of the app itself; next up are the details on how much it costs, how to buy it, etc.
How much does Moom 4 cost?
Moom 4 will cost $15 for new users, and the upgrade price is $8 for current Moom users.
Please note that our apps are not subscriptions: Once you purchase Moom, you own the version you bought, and you will receive at least one year of free updates with your purchase. Please read that link carefully—our non-subscription plan puts you in charge of upgrade costs, and encourages us to release regular nifty new features to make it worth your while to upgrade.
Also, any time you decide to purchase an upgrade, you get all prior upgrades as well as an additional year of free upgrades. And remember, as this is not a subscription, at no time will Moom stop working: It’s your fully-owned app.
Where can I get Moom 4?
Moom 4 is only available directly from Many Tricks; it is not available on the Mac App Store. If it were our choice, it would also be in the Mac App Store, but it’s not our choice.
Why isn’t it in the Mac App Store? Because the Mac App Store does not allow apps that aren’t sandboxed. And Moom 4 cannot be sandboxed, as its use of the Accessibility API makes that impossible. So how was Moom 3, which also uses the Accessibility API, on the Mac App Store? Simple: Moom 3 was in the store before Apple required all Mac App Store apps to be sandboxed, so it was allowed to remain in the store, as long as we never added new features.
If Apple ever changes the rules, we will submit Moom 4 for Mac App Store review, but until/unless those rules change, you can only get Moom 4 directly from us.
How can I buy Moom 4?
Buying Moom 4 varies a bit depending on whether or not you’re a current Moom user, and if so, where you bought Moom 3.
Brand new Moom user
If you’ve never owned Moom before, just download and install the trial version from the web site, and start using it.
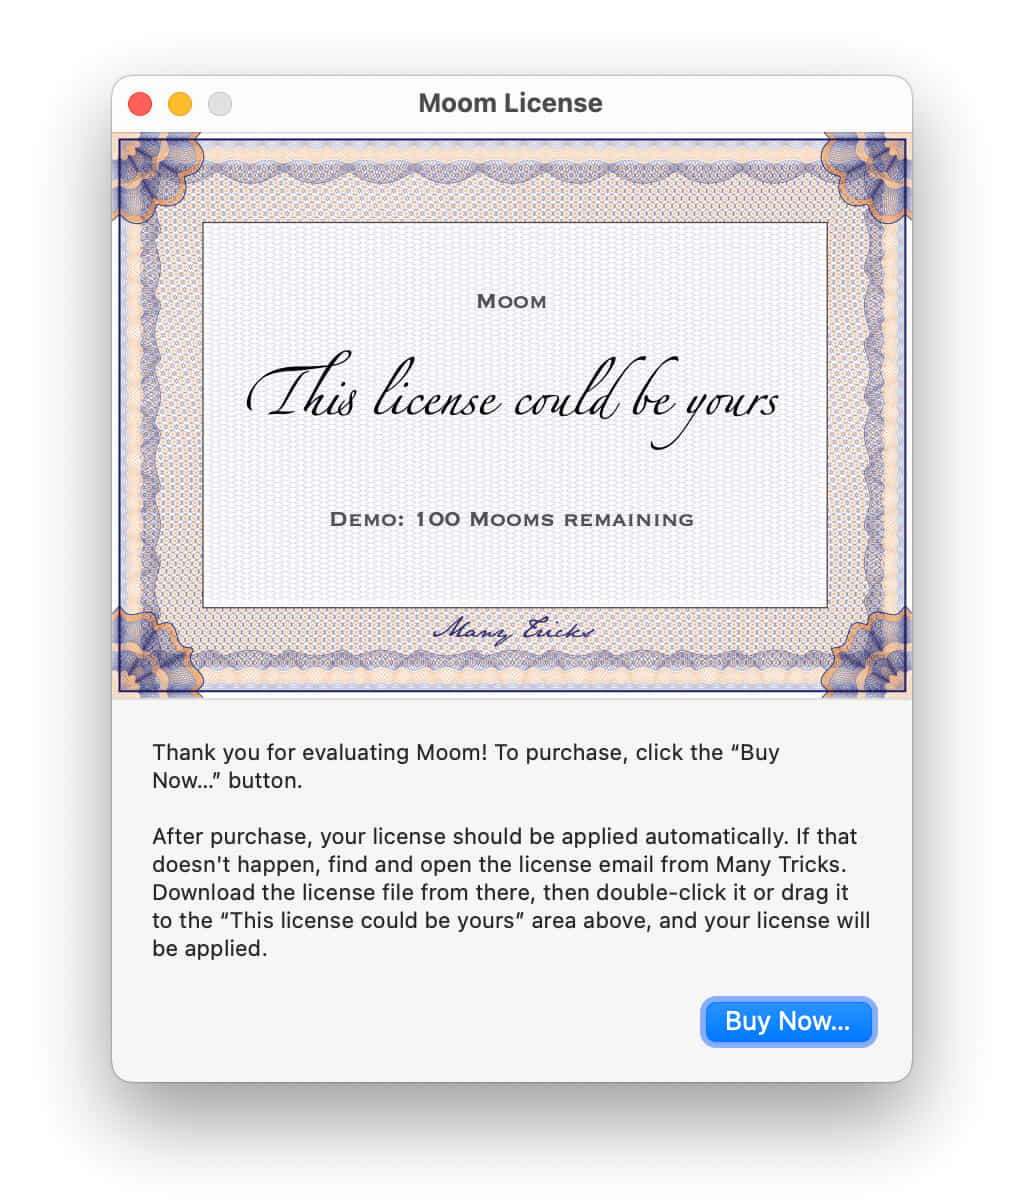
When you’re done testing, select Moom → Buy Moom… from Moom’s menu bar icon, which will open the window seen at right. Click the “Buy Now…” button to buy Moom directly within the app, and that’s that.
(You can also buy on our web site, if you prefer.)
Mac App Store Moom 3 customers
Moom 4 makes it ridiculously easy to upgrade to Moom 4 from the Mac App Store version of Moom 3, but there is one key requirement…
To receive upgrade pricing, you must have run the Mac App Store version of Moom 3 at least once on the Mac you’ll be using to do the upgrade.
You’ve hopefully been using Moom 3 on the same Mac you want to upgrade to Moom 4, so this should already be done. But if you happen to have recently bought a new Mac or reinstalled macOS from scratch, run the Mac App Store version of Moom 3 at least once!
Assuming you’ve run Mac App Store Moom 3 at least once, download and install Moom 4 (you can overwrite Moom 3, or temporarily install Moom 4 in another folder). Launch Moom 4, and then select Moom → Buy Moom from the Moom icon in the menu bar.
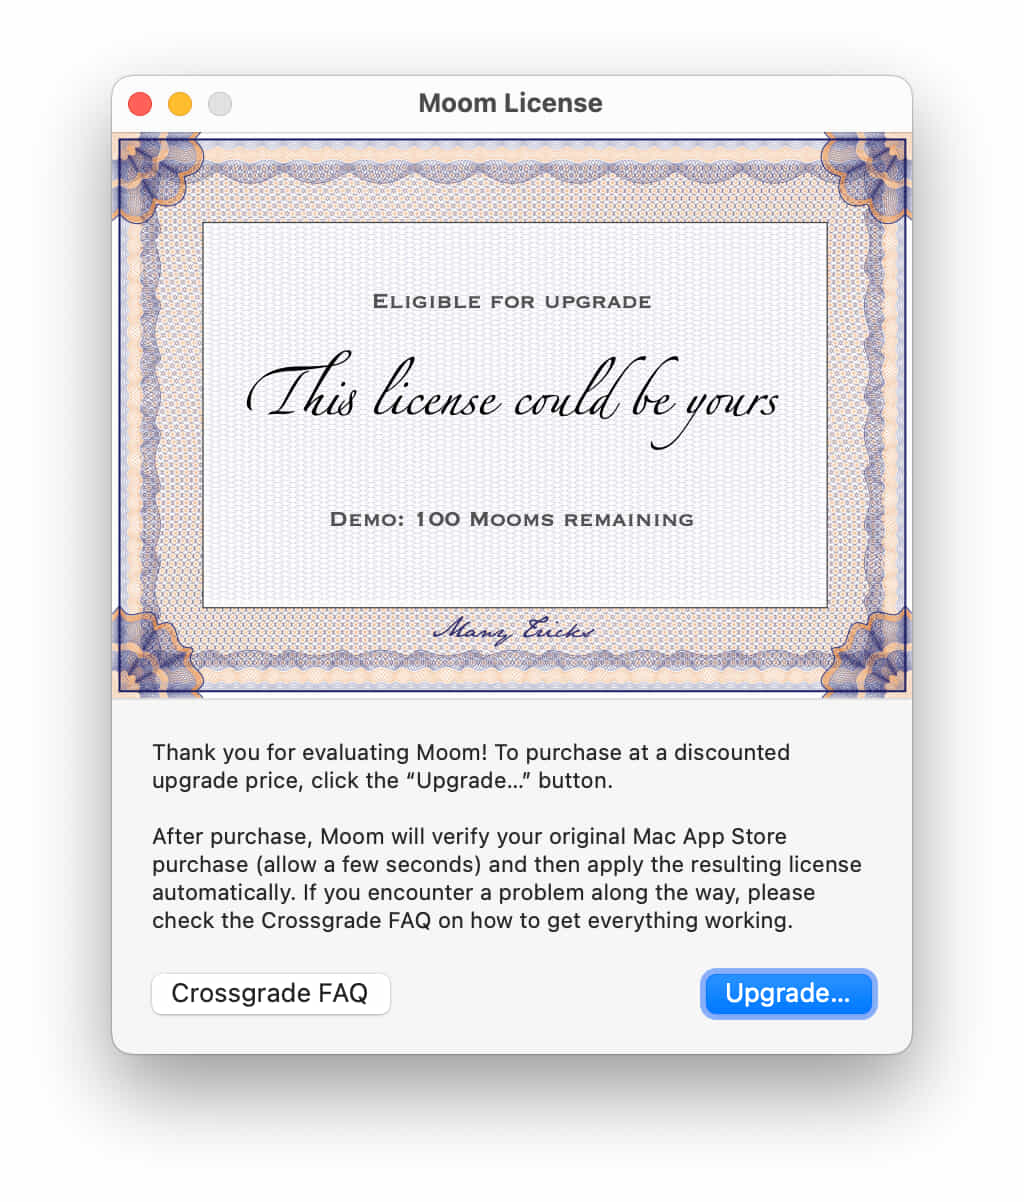
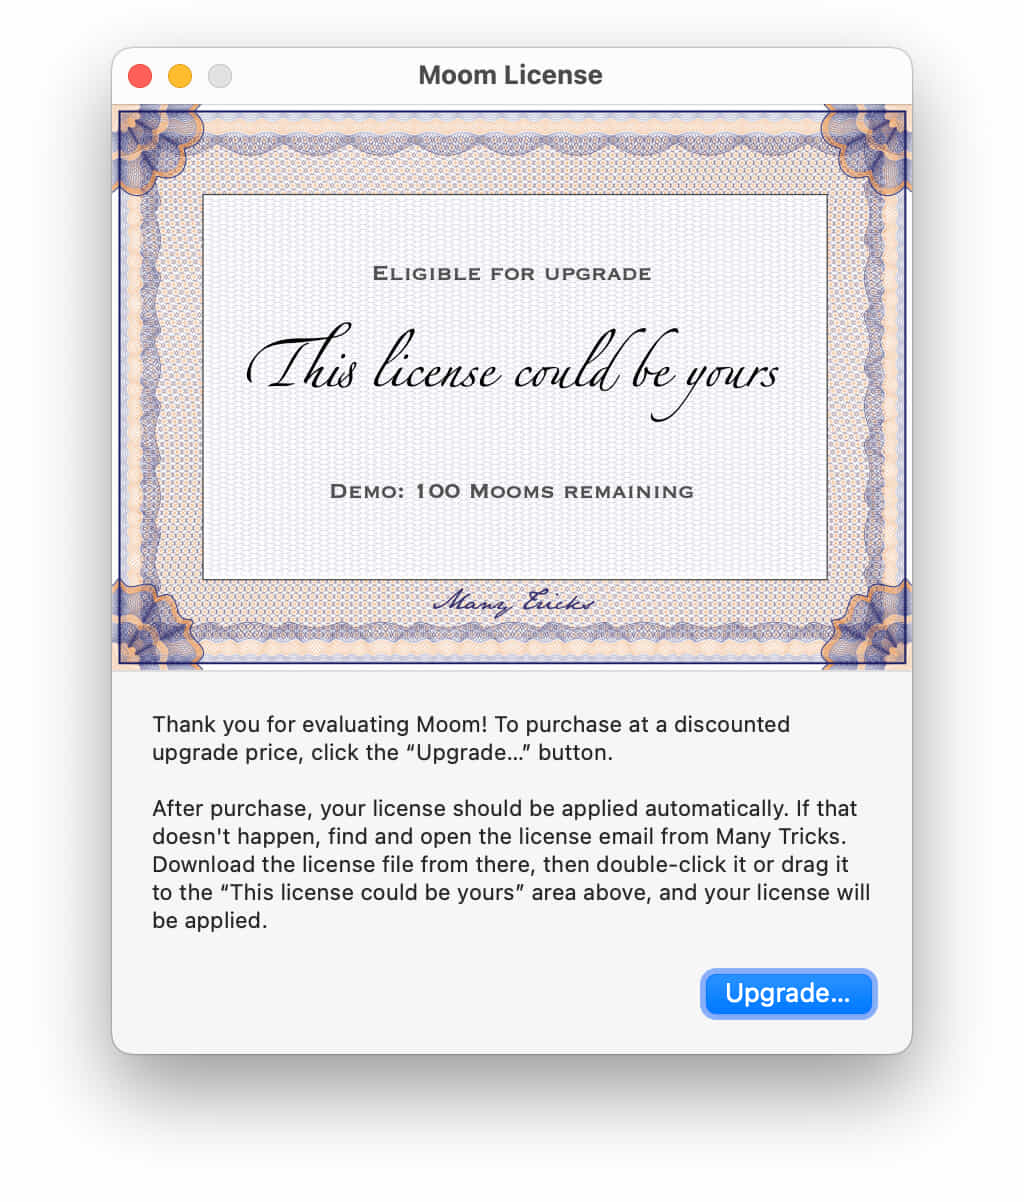
In the window that opens, as seen at right, please read the explanatory text, then click the “Upgrade…” button to purchase a Moom 4 license.
The “allow a few seconds” part is important: After purchasing the upgrade, it will appear that nothing has changed. But Moom is busy in the background, verifying your original Mac App Store purchase. After a few seconds, your license information will appear. If that doesn’t happen, please click the Crossgrade FAQ button for additional assistance.
If you purchased Moom from the Mac App Store between June 20th, 2024 and today (August 21st, 2024), you’re entitled to a free upgrade. To receive your free upgrade, please open a support ticket. You will need to attach a valid proof of purchase from the Mac App Store, showing Moom 3 and its purchase date. Once validated, we will send you a free upgrade license.
Direct from Many Tricks Moom 3 customers
Download and install Moom 4 (you can overwrite Moom 3, or temporarily install Moom 4 in another folder). Launch Moom 4, and then select Moom → Buy Moom from the Moom icon in the menu bar.
If you purchase the upgrade outside of Moom 4, you must install Moom 4 in order to install the upgrade license file: Moom 3 cannot see a Moom 4 license file and upgrade itself to Moom 4.
In the window that opens, as seen at right, please read the explanatory text, then click the “Upgrade…” button to purchase a Moom 4 license. (You can also buy the upgrade on our web site, if you prefer.)
If you purchased Moom from us between June 20th, 2024 and today (August 21st, 2024), you’re entitled to a free upgrade—and you don’t have to do anything to get it! Your existing Moom 3 license works, and the Moom → License window should show you as a fully licensed Moom 4 user.
Regardless of where or when you bought Moom, if you have any troubles with the purchase process at all—or while using the app—please use our support system for further assistance.
 Many Tricks

I’m a Linux-Awesomewm/Mac/Windows-Powertoys user, and have been using moom for past 10 years.
It is the best window manager in Mac I’ve tried so far!
In a world of everything becoming subscription based, moom is so nice to offer a one time purchase.
Upgraded the moment seeing the popup.
Thank you so much for the kind words, and for the upgrade!
-rob.
Found out via mjtsai and immediately bought the upgrade. Hover is phenomenal. Thanks!
(Upgrade) instabuy!
I’ve upgraded to newest version! Thanks to not switch to subcription. Would love to use moom also on windows PCs.
Thanks for the upgrade, and we agree with you on subscriptions. As for Moom on PCs, it’s not something we’ll ever do, as neither of us are Windows users, and we *really* don’t want to get in the Windows tech support segment, which we would have to enter even if we hired someone to write the app.
-rob.
Congratulations on releasing the new version! I’ll hit my 10-year anniversary with Moom in October, and couldn’t imagine using a Mac without it.
Stuck with 3.0 for many years despite the app evolving much.
Seeing 4.0 so glad I did – just awesome …
I would like to get the Moon 4. I have Moom 3 for many years. How do I get the Moom 4.
Either install Moom 4 and use the in-app upgrade purchase, or buy the upgrade on our web site. The post above describes how to do either. If you’re having trouble, open a ticket on our system:
https://manytricks.com/support
-rob.
Congratulations on Moom 4.
Thank you for allowing a NO subscription, you propose good business so that buyers have it forever and also if they want to update, let it pay, and also your new job will be rewarded financially.
Thank you for this great application, Moom 4 is the best of all!!!!
I will recommend it to everyone I know who uses Mac.
Good job!!!
THANK YOU!!!
Instant upgrade. If you use large screens, or multiple screens, Moom is essential.
Congratulations on the release! How does/will Moom 4 work with the [Stage Manager](https://support.apple.com/en-us/102355)?
The same way Moom 3 worked with Stage Manager: Not at all, because Apple doesn’t allow us to interact with it. We can’t even tell when it’s active, unfortunately. So whatever you see is what you get, because we have no control over it.
-rob.
I purchased Moom 3 in 2016 and use it all the time!. Thank you for Not going to a subscription! I decided to purchase a new license instead of upgrading, just to help support your awesome program just al little bit more. :)
Moom 4 looks like an incredible update, thank you.
I also have a feature request. Would you consider adding an “Always on Top” / “Float” toggle that I could apply to a given window? It would be awesome to be able to add it to the command palette.
Unfortunately, we can’t: Only the app itself can make its windows float (and it needs to have code to support that feature). Moom uses the Accessibility API to have the system move and resize other apps’ windows, but we can’t modify how those windows behave.
(In the “bad old days” of Mac OS X, this was possible through something called code injection, which was the ability of one app to modify another app’s code on the fly…and while that led to some pretty powerful programs, it also led to lots of crashes that weren’t the fault of the original app developer.)
-rob.
Thanks for the prompt reply. I see BetterTouchTool supports this as per https://www.reddit.com/r/macapps/comments/1alpafj/comment/kpgwv5h – just wanted to flag this in case they’ve found a way to do it without relying on “bad old days” behaviour :)
I don’t know how they do it; they can’t be doing it the old way as that’s impossible now, but it’s my understanding that truly floating a window from a third party app isn’t possible. I’ll have to talk to Peter about it; if it’s possible, he’d know how. (Note: This doesn’t mean we’d necessarily add this feature right away; so far, you’re the first to request it, and we have to balance features with UI complexity. But if it’s possible, it’ll at least go on our feature request tracker.)
-rob.
Thanks for the consideration!
According to Peter, there are two ways BTT might be doing this.
The first method is via a private API—which developers aren’t supposed to use as they can change at any time and break—that can float a window, so maybe that’s what they’re using. The second method is to sort of fake it using a screenshot of the window as an overlay, but that would be tricky to both keep up to date and keep in exactly the right location at all times. We don’t know how BTT is actually doing this, of course, but Peter thinks those are the most likely methods.
So in theory, Moom could implement this via the private API, and it would work as expected.
However, we do not like to rely on private APIs in apps that we sell, because the functionality provided by those APIs could vanish at any time, leaving our customers upset at us, and us without any way to return the functionality to the app. As such, it’s unlikely we’ll add float to Moom unless/until that API becomes public, at which time it’s OK for developers to use.
-rob.
Thank you for following up Rob. As a developer myself, I wholly agree with the notion that you don’t want to rely on private APIs. Thanks!
Thanks for the great update! Updated right away without even looking at the new features, and now that I’m playing with them, I’m digging it!
And thanks for not going the insane route of a subscription for an utility like this. Top coding skills is the #1 reason I buy your apps. Respect of your users is a close #2.
Keep up the good work 😁
Just wanted to add my praise for building such a great application. Managing my windows is basically a reflex action at this poin; keep up the good work!!
I honestly wouldn’t want to use a Mac without Moom—it’s one of the first things I install on a new Mac / clean install. Hey Rob, remember when you were walking by at WW 2012 and overheard me telling a bunch of people about Moom? I still tell people about it to this day!
Scott:
Thanks for the kind words, and I have a vague recollection of that happenstance interaction! :)
-rob.
See link
I’m a long-time user of Moom, but I still believe in giving support to decent developers, so I’m going to buy the full-price version. I’ve had nothing but good experiences with Moom and with Many Tricks, so I think it’s fair that I pay for all the years of updates and development.
The new version really looks good!
Thanks so much for the support!
-rob.
Hay… congratulations on releasing the new version, can’t wait to start using it.
One question though?
I’ve recently started using two macs and have to export any changes and re-import them over on the other mac to have the same ‘muscle memory’ does v4 use the apple cloud to store it’s configuration now or will I still need to do an export/import dance?
Cheers
For now, you still have to export/import. Sync is on the to-do list, but it’s a complicated feature to get right, and we didn’t want to delay 4.0 while working on it.
-rob.
Can I install on multiple macs? I’m a Moom from Mac App Store user, always install it on all my macs. If I upgrade to Moom 4 from one of my mac, should I repurchase again for my other macs?
We allow you to use our apps on as many Macs as you (and your family) use, with just one license:
https://manytricks.com/osticket/kb/faq.php?id=6
And here’s how to copy them from Mac to Mac:
https://manytricks.com/osticket/kb/faq.php?id=2
-rob.
Moom saved me countless hours of fiddling around, it’s my favourite mac tool for over a decade. I just upgraded to support you folks <3
New update is great, and all working fine.
Is anyone using moom with Alfred? For some reason, I think Alfred is ‘seeing’ only the Moom classic layouts, and I haven’t worked out how to get it to see the Moom 4 layouts. I’ve uninstalled and reinstalled the workflow, but it’s still not working. Any tips appreciated.
We don’t use Alfred here, so we can’t offer any direct advice. If Moom’s support is built into Alfred, perhaps contact them to make sure they’re using Moom 4’s AppleScript correctly? We revised the entire dictionary in Moom 4:
https://manytricks.com/moom/help/applescript.html
-rob.
Thanks Rob,
Actually I’ve changed workflow slightly and am using hotkey combinations to activate different moom configurations at the moment. But I’ll have a forage around over at the Alfred forums as well, it might come in use at some point.
Creo que Moom fue la primera aplicación que adquirí con mi Macbook hace 10 años. Desde entonces no concibo un gestor de ventanas sin los atajos y posibilidades que me ofrece Moom, y puedo decir que es uno de los principales motivos por los que sigo trabajando con macOS.
Agradezco el esfuerzo por manteneros al margen del modelo de suscripción, mientras esto sea posible para vosotros. Por mi parte, procuraré apoyaros renovando mi actualización anual.
Muchas gracias!
Hello ! I’m excited to try Moom 4 (Moom 3 is such a useful tool that I still don’t understand how anybody ca work without it, I use it all the time). So I’m all in for the new version. But I’m in France, and Moom 4 doesn’t seem to exist on the French Apple Store. Is it coming soon ? Or should I get it directly from your site ? Is there a reason why it isn’t on the French App Store yet ?
Thanks for your answer.
Olivier
Olivier:
It’s explained in this very post that you’re commenting on:
“Moom 4 is only available directly from Many Tricks; it is not available on the Mac App Store. If it were our choice, it would also be in the Mac App Store, but it’s not our choice.”
https://manytricks.com/blog/?p=6385#wheretobuy
-rob.
Did anyone mention today that you guys and your app(s) are awesome?
I have had Moom on my Mac since November 18, 2011. This is the FIRST TIME you asked if I wanted to upgrade. And your software NEVER failed me. NEVER crashed. And even Moom 3, still works with current Mac OS (!)
So… thanks for being so awesome !