

The left-hand portion of the Name Mangler window is the file list area; this is where you'll see the files you'll be renaming, and a preview of their new names:
But there's more here than meets the eye—much more, as you'll soon see. (If you haven't done so yet, please read through the Menus section of help, in particular about the View menu, as it directly relates to what you'll see in the file list area.)
Detailed View
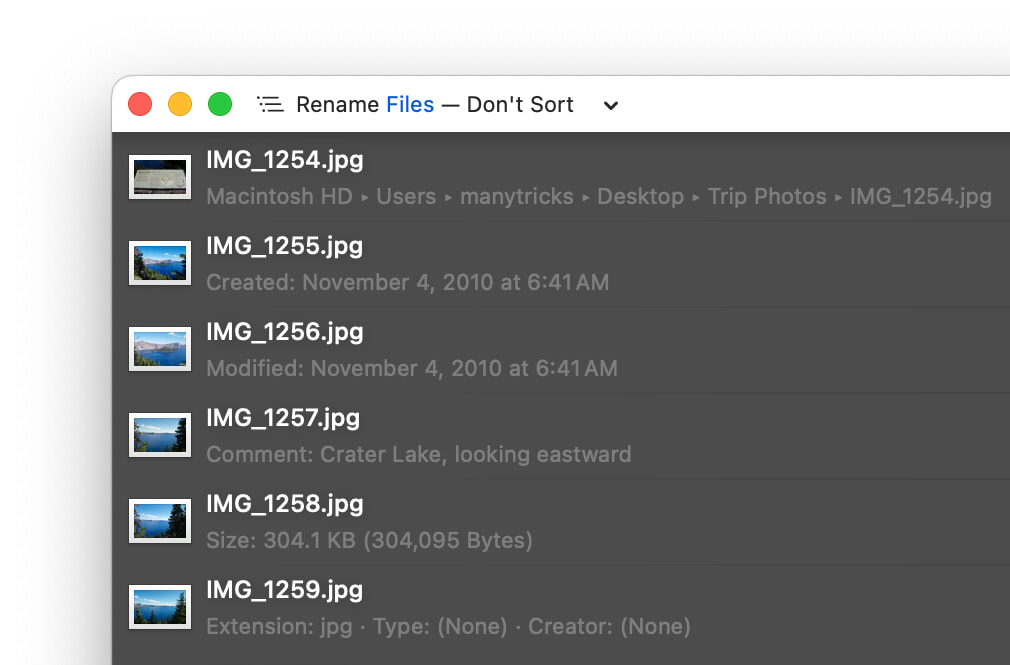
If you use the option in the menu (see Menus for more on the View menu), you'll see a two-line entry for each file. If you've got the → menu item set to , then click anywhere on a line—other than on the file's icon (see Previewing Filenames for why not there)—to cycle between the six types of available data for that file.
If you instead set → to , then you can change the displayed details by using the → menu. Note that this will change the display for all files, while you can change individual files if in mode.
Here's an example of each data type, shown on a series of files:
For users of the Mac App Store version of Name Mangler only: If you rely on comments—as added in the Get Info box for your files—be aware that Name Mangler will probably lose them during renaming operations. Due to the mechanisms available to us, we cannot guarantee that those comments will be retained in your renamed files.
Previewing Filenames
The file info area's most important role is helping you preview your renamed files before you actually rename them. At its simplest, previewing a filename involves no more work than comparing the left and right halves of the file list area, as seen in the first screenshot in this section.
You should always check filenames here before committing to a renaming action.
About the file status indicators
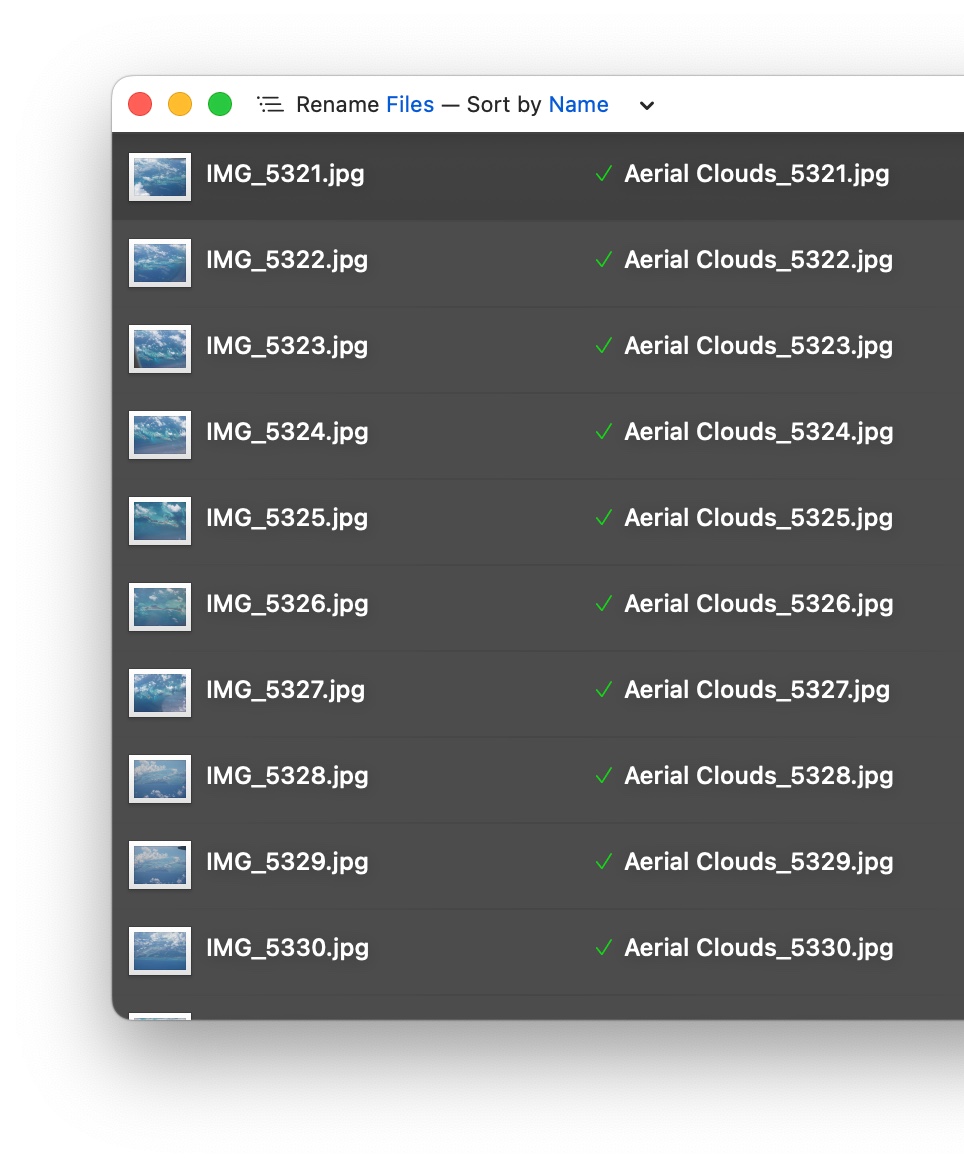
What's with that green check mark in front of the new filename? The green check mark is a quick visual indicator that there aren't any problems with your renaming action, and that your file is going to be renamed. Next to the green checkmark, you'll see a preview of the file's new name, so you can make sure your actions are doing what you intend.
If there are files in your selection that aren't affected by your current renaming actions, they'll be grayed out. The following screenshot shows examples of both the green checkmark and grayed-out files:

You may also occasionally see a red circle containing a small x, indicating that there's a problem preventing that file from being renamed. Next to the red indicator, Name Mangler will tell you exactly why the file can't be renamed.

If you'd like to see what the file's new name would be if it could be renamed, just hover over the red indicator, as shown for the first file in the above screenshot. In this case, the renaming would result in a filename that starts with a dot, making it invisible in Finder.
Because duplicate filenames are a real possibility when renaming masses of files, you may end up seeing that red circle quite a lot. But Name Mangler has a solution to the problem, by way of the "Make resulting filenames unique if necessary" Settings setting (see the Settings section of help for more on this).
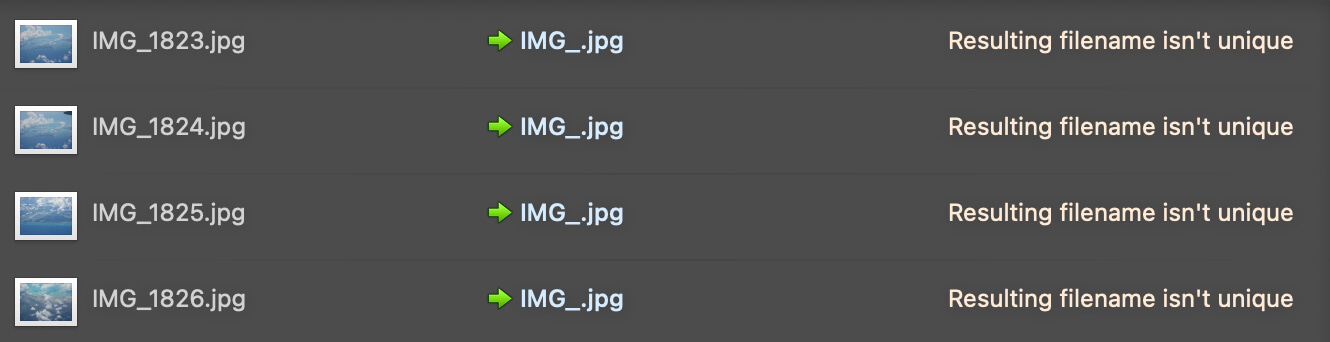
With the automatic de-duplicating feature enabled, files that otherwise would have been duplicates will be displayed with a yellow triangle. As before, there's an associated tooltip that will reveal what caused the yellow triangle to appear:

In this case, the file will be renamed, but Name Mangler is letting you know that changes have been made to the filename, in order to prevent duplicates from being created.
Preview extra long filenames
One final use for the tooltip involves extra long filenames. For those cases where your names won't fit in the available space, you can use the tooltip to see the full filename:

Whenever you see ellipses (…) in your filename, you should use the tooltip—or widen the Name Mangler window—to make sure the name is as you intended it to be.
Interim Filenames
To make it easier to work with complex multi-step renaming configurations, Name Mangler can show you the interim results at any step in the process. For instance, consider this three-step renaming action:
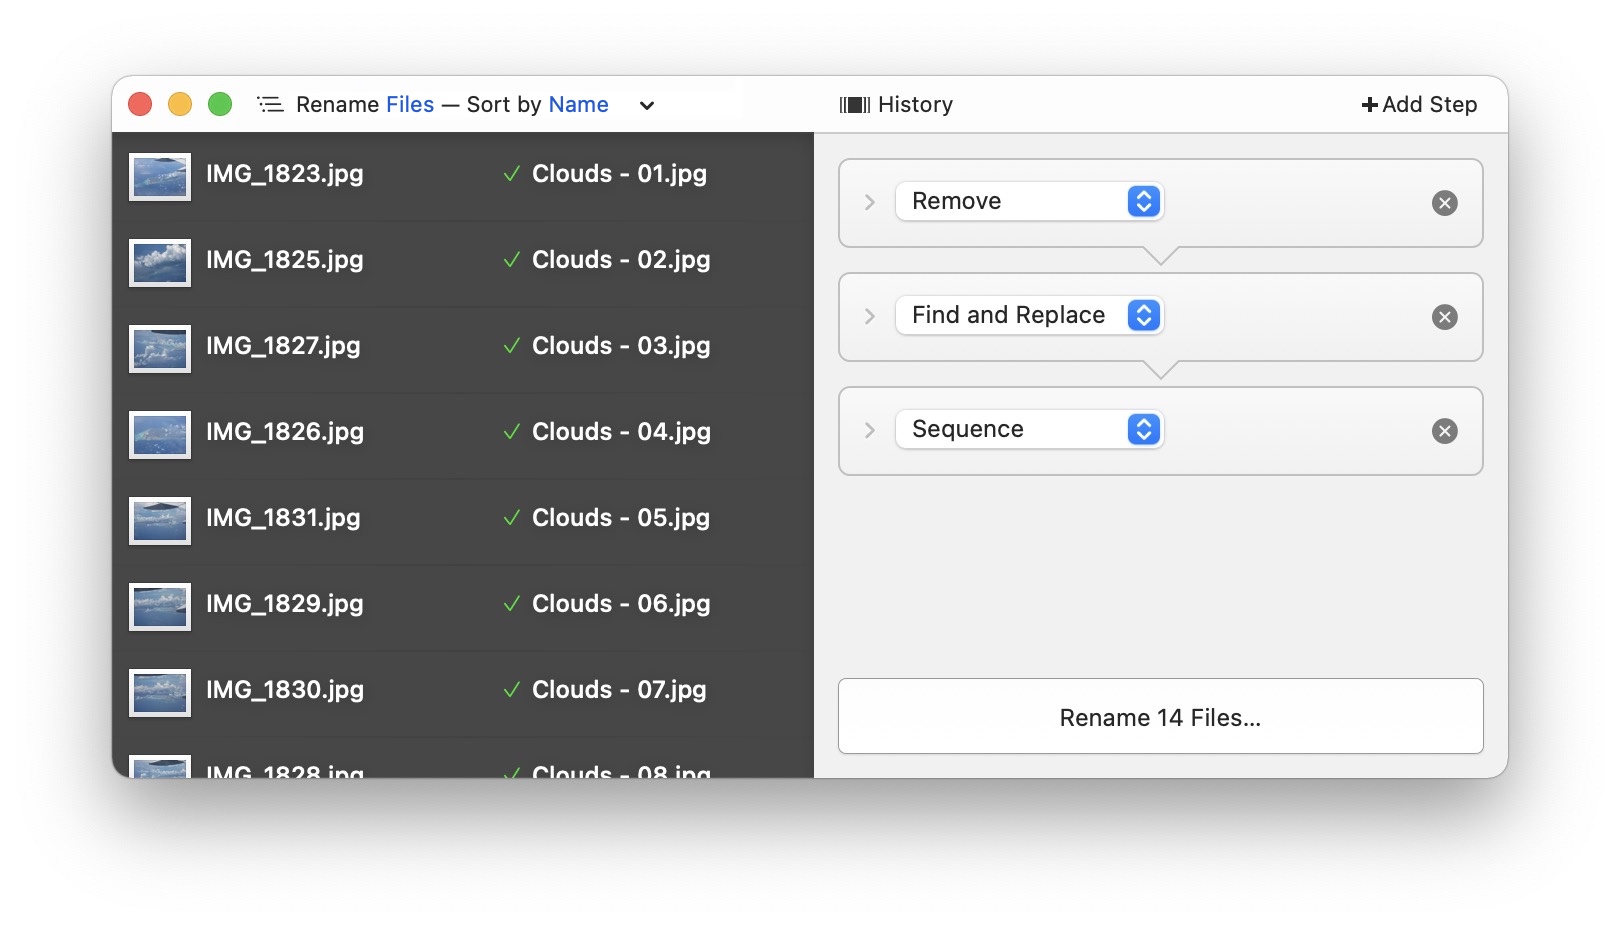
Although the details have been collapsed, these steps remove the four digits at the end of the name, replace IMG_ with Clouds, and finally, add a sequence number at the end of the filename.
Although the file list area makes it easy to see the before-and-after filenames, what if you'd like to see the results at any stage of the renaming process? It's simple; just click on any step in the process to reveal the interim filenames. For example, using the above three-step renaming, here's what you'd see if you clicked on the second entry (Find and Replace) in the list:
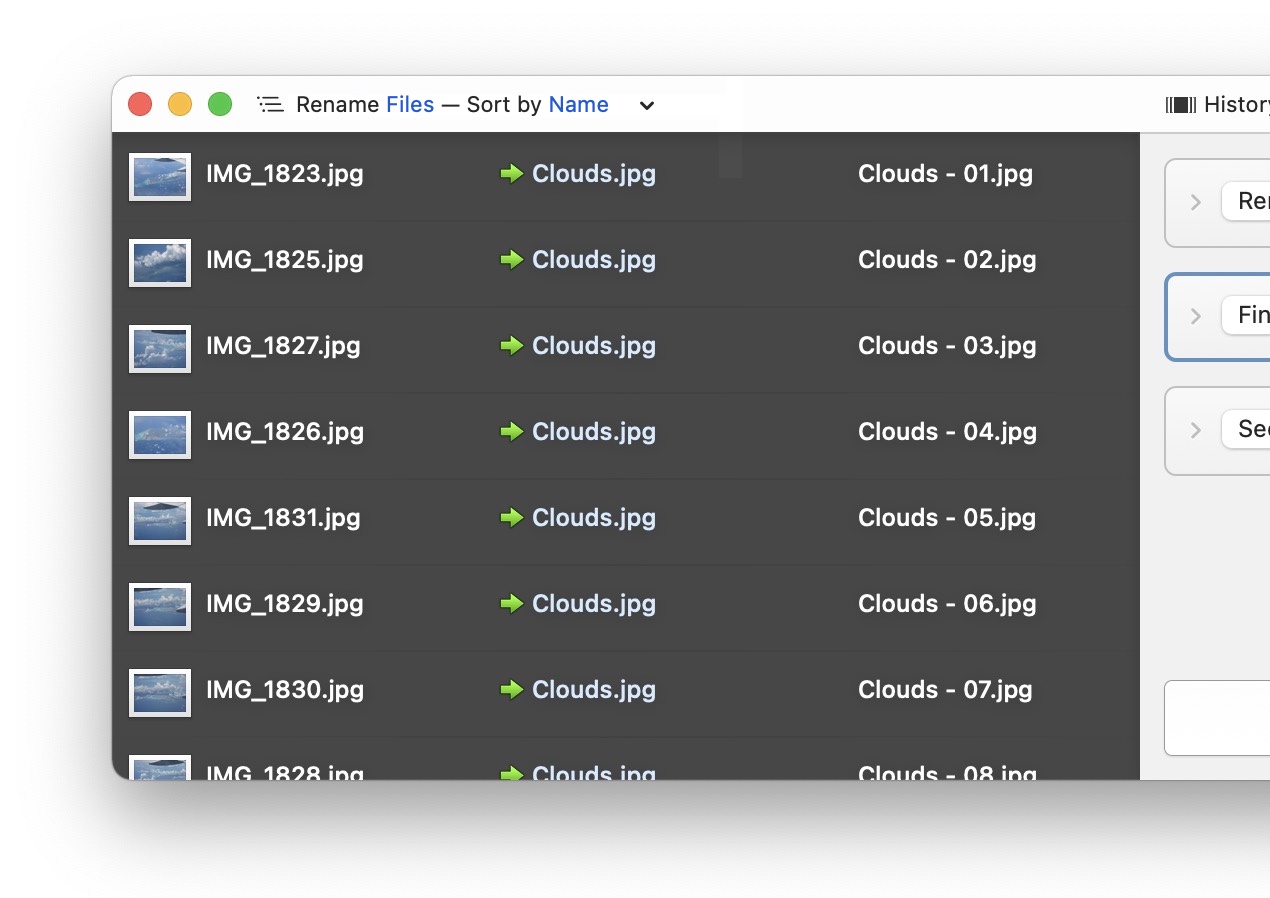
The names in the middle column represent the names as they'd appear at the selected (second, in this example) stage of the multi-step renaming process. (When viewing interim names, the colored check marks turn into colored arrows, to show the flow of names from left to right.)
There's one other situation where the interim results can be useful, and that's when any renaming task—even a single-step one—will result in duplicate filenames.
To see interim results on single-step renaming operations, you must have → (⌘I) enabled.
If Name Mangler's Settings are not set to make resulting filenames unique, and your renaming action would lead to duplicate filenames, you'll see the red circled x and text explaining why the files won't be renamed:

As explained earlier, you can hover over that icon to see what each file's new name would be, but that's a pain if you have a bunch of files to look at. Instead, enable interim filename viewing, and you'll be able to see all of the not-allowed filenames in one pass:
Of course, many (or all) will be identical, as that's the cause of this particular problem. But this also works for files that would be invisible, or any other condition that prevents a file from being renamed.
You can display interim filenames even if you set Name Mangler to make duplicate filenames unique. In that case, you'd see yellow arrows on the final filenames (indicating they'd been modified), and the interim filenames column would show the unaltered names.
The Drop-Down Menu
One of the most useful features of the file list area is hiding in plain sight, right at the top left corner of the Name Mangler window:
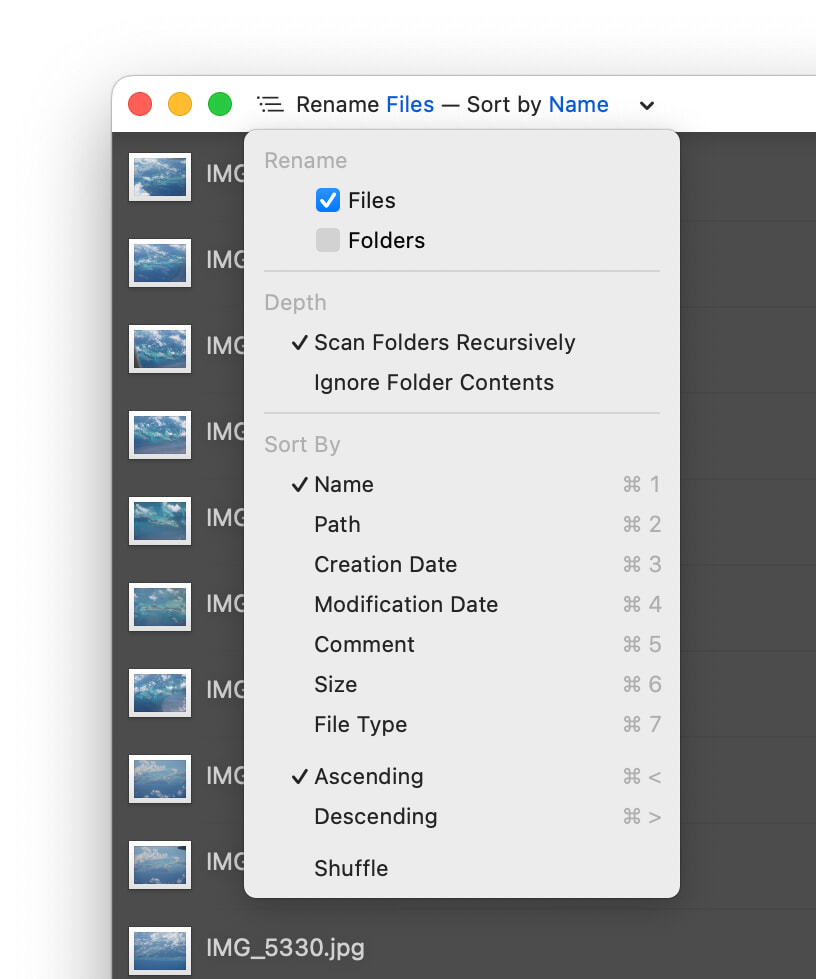
This drop-down menu controls both what you see in the file list area, and in what order those items are presented. There are three sections, as you can see—Rename controls what will be renamed, Depth controls how deeply Name Mangler looks at your files, and Sort By controls the sort order.
In the Rename area, you can choose to list just the files to be renamed, just your folders to be renamed, or both. In the Depth area, you can either scan all folders within other folders, or ignore folder contents. Finally, you can sort by any one of the listed methods—and notice that the first seven have dedicated keyboard shortcuts.
Renaming Files and Folders
The Rename and Depth sections control which files and/or folders will be shown in the file list area, and hence, renamed. If a file or folder isn't shown here, then it won't be affected by your renaming operations. You can enable or disable each of the Rename options independently.
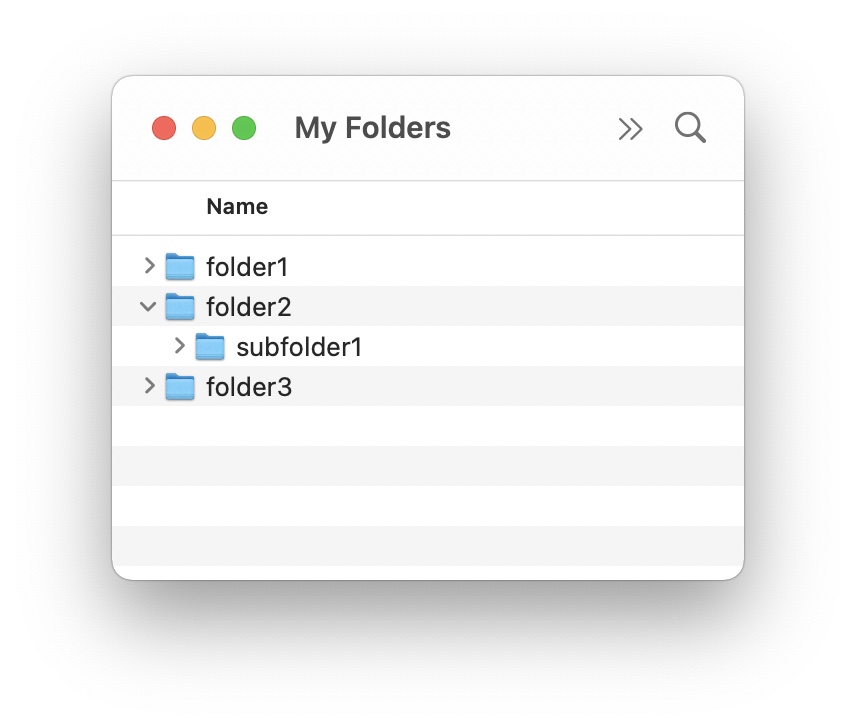
Consider the following sample folder and file structure to see how that works:
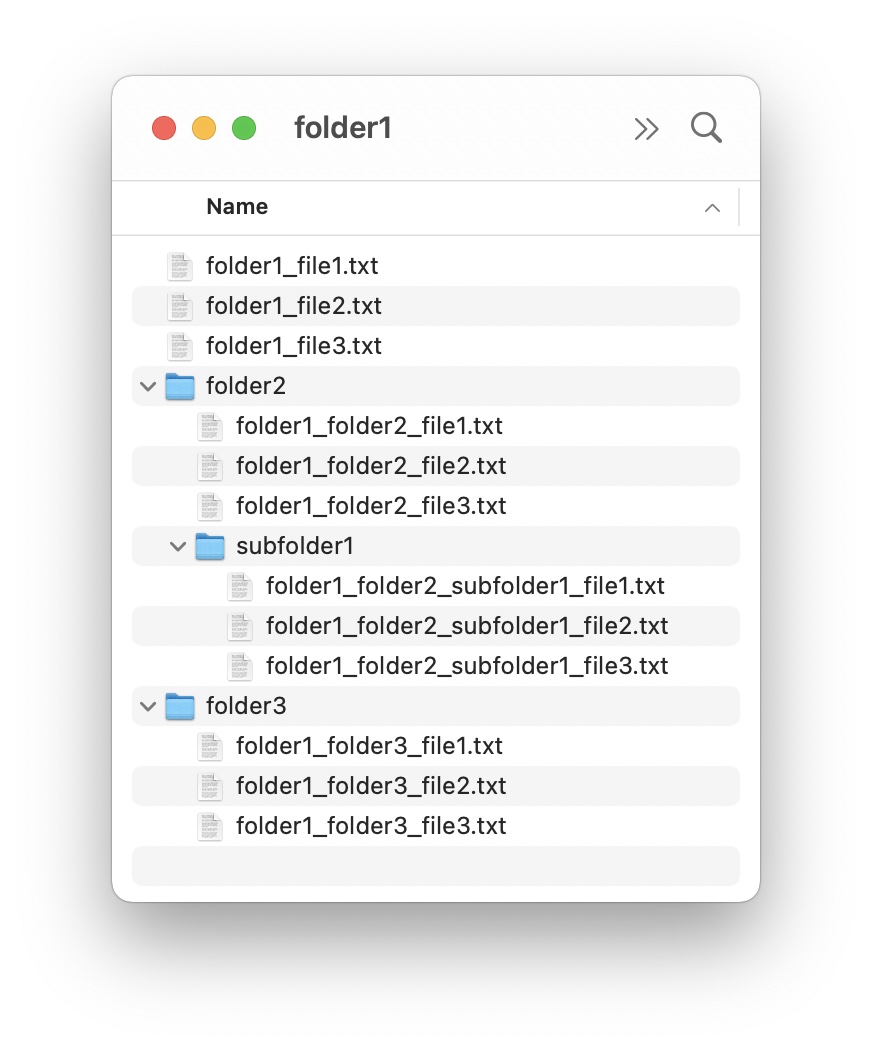
Each file has been named with its parent folder path as part of its name, just so you can easily see where each file resides when viewing the list in Name Mangler.
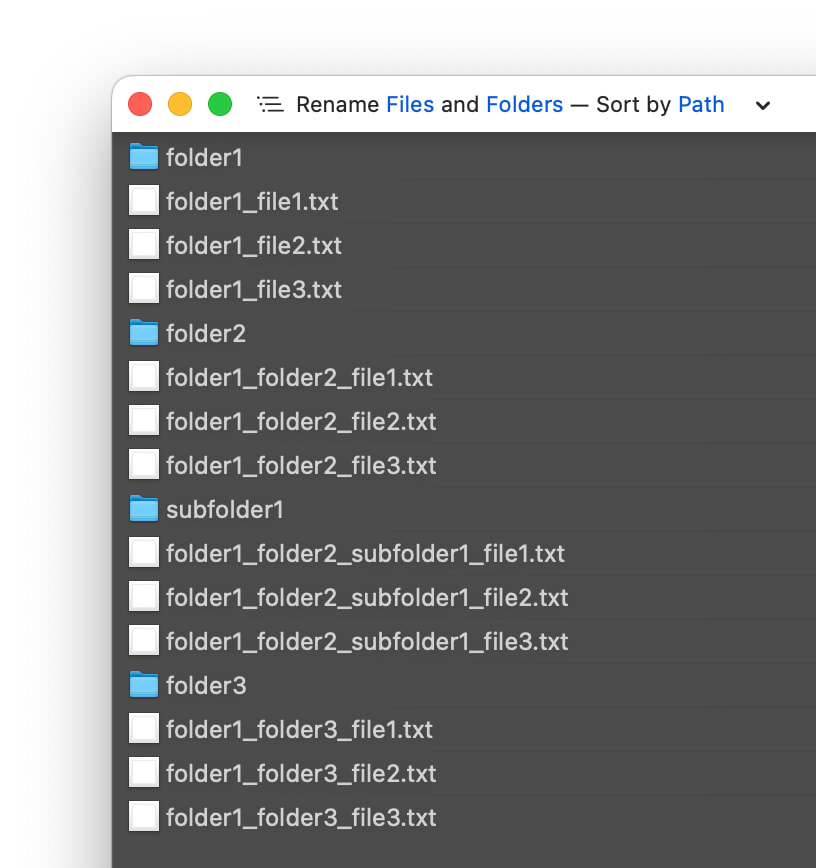
If you drag folder1 (the top-level containing folder) into Name Mangler, here's what you'll see with various combinations of List settings enabled:
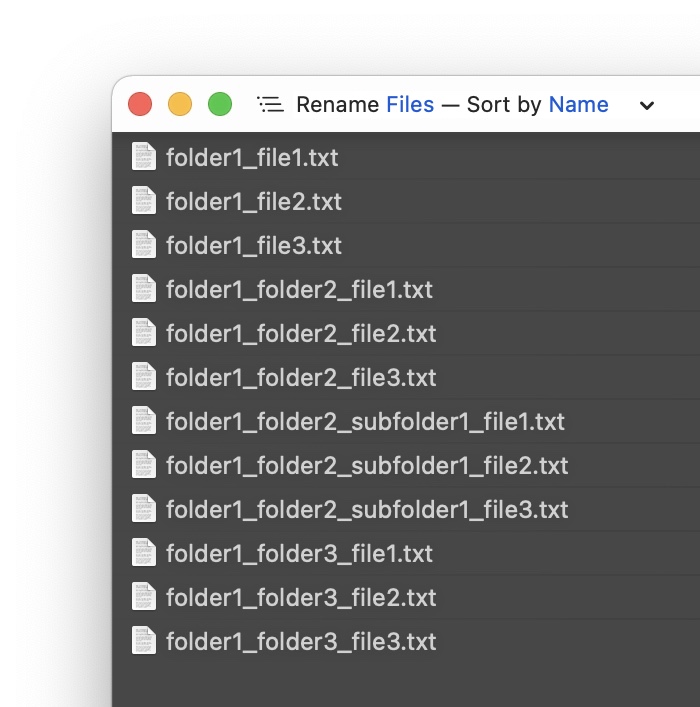
Rename: Files • Depth: Scan Folders Recursively Only files are listed, but files from all folders and subfolders are included:
Rename: Files, Folders • Depth: Scan Folders Recursively With folders now also checked, you see all the folders and subfolders, in addition to the files:
If you drag in the contents of folder1, though, the list will change slightly: You won't see folder1 in the output, because it wasn't dragged in, so it's not part of your renaming operation.
Rename: Files, Folders • Depth: Ignore Folder Contents Only one item shows with these settings: The top-level folder you dragged in, because you've told Name Mangler to ignore the contents—all the contents—of that folder:
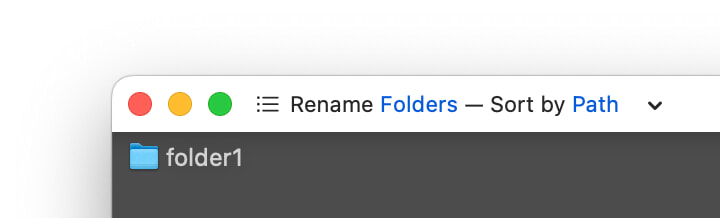
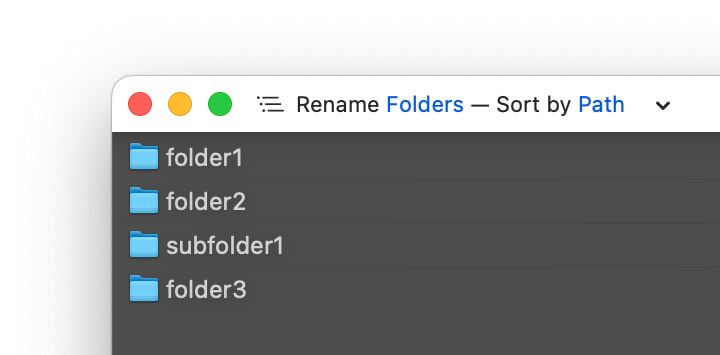
Rename: Folders • Depth: Ignore Folder Contents Listing only folders gives the same results, because even though folders was selected in the prior example, Name Mangler was ignoring folder contents, so no files were listed:
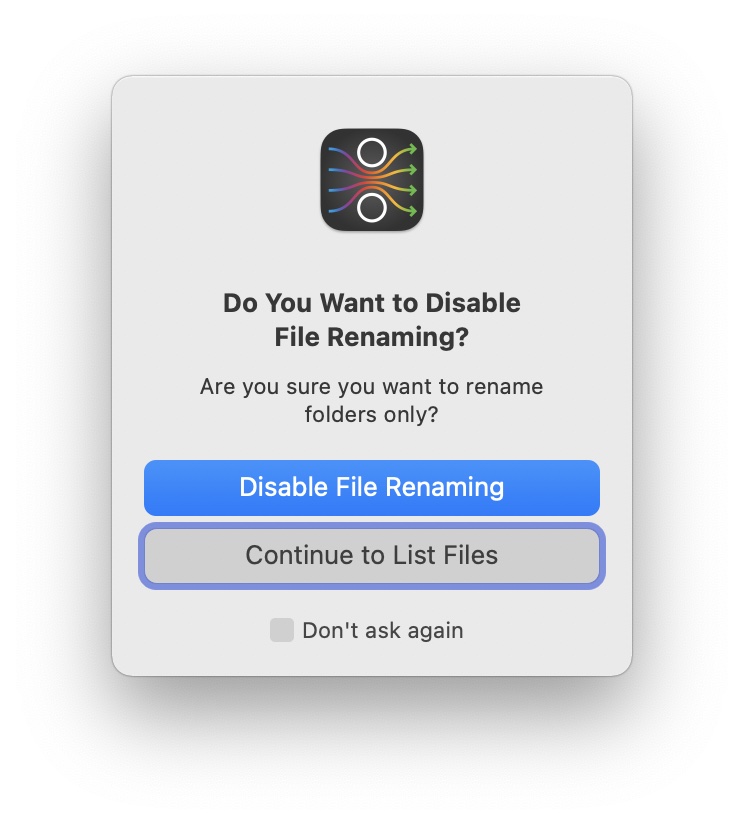
Note that when you uncheck Files in the drop-down menu, you'll see this warning dialog:
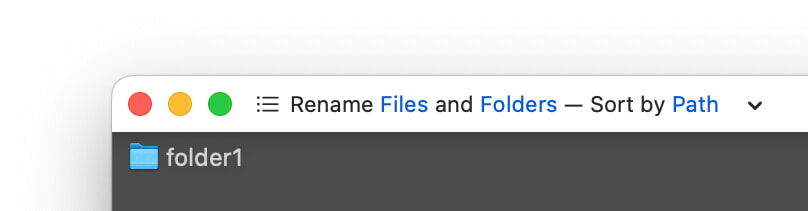
Rename: Folders • Depth: Scan Folders Recursively With Files disabled but the depth set to Scan Folders Recursively, you see just the folders and subfolders within the top-level folder:
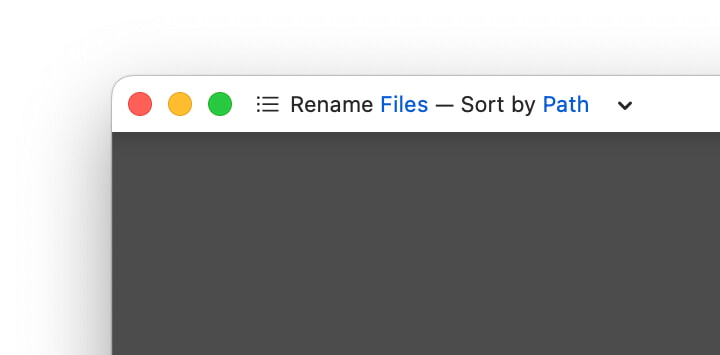
Rename: Files • Depth: Ignore Folder Contents Finally, when you ask Name Mangler to rename files, but ignore folder contents, and you dragged in a folder…well, you get nothing:
If you've dragged a folder into Name Mangler, and you're not seeing what you expect to see, make sure you haven't accidentally disabled Folder Contents in the Rename area of the drop-down.
Sorting Files and Folders
Obviously, the Sort section of the pop-up menu is used to sort the displayed file list. You can sort by any of the items shown in the pop-up menu, each of which has a keyboard shortcut (⌘1, ⌘2, etc.) that works even if the menu isn't visible.
What may not be obvious is that sort order affects renaming operations. Consider this simple folder structure…
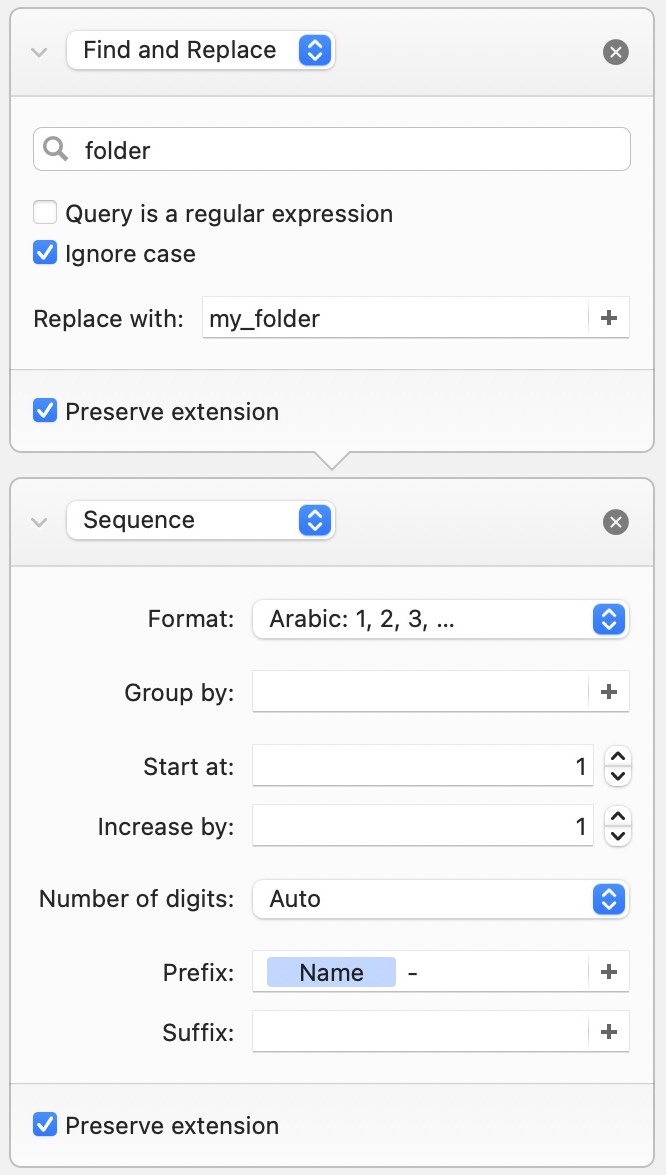
Those folders will be modified with this simple two-step renaming procedure. It first changes folder to my_folder, and then adds a sequence number at the end:
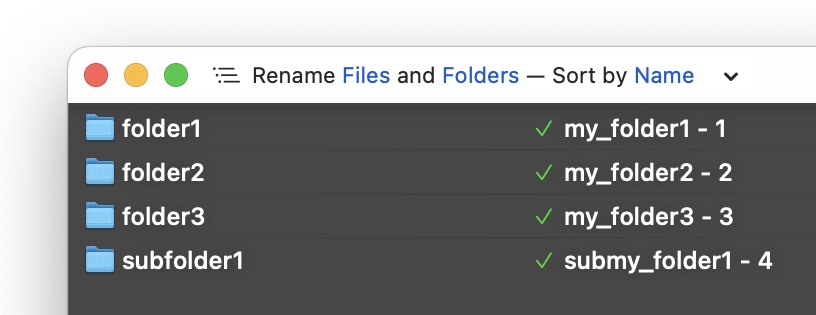
If applied against a list of folders sorted by name, this is the result:
Sort the list by path, however, and the results change:
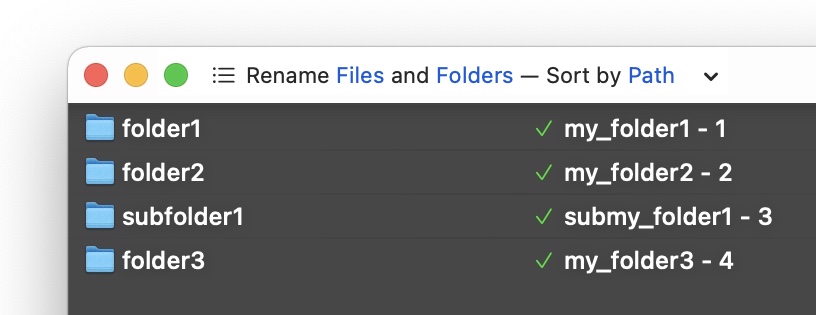
Notice that the last two items in the list have differing names under the two sort orders.
So why do the results change? Because the files are renamed in the order in which they are sorted, and the Sequence action simply places an incremental counter on each file in the list.
Before renaming files, always check the sort order to make sure your file list is sorted as you wish; otherwise, you may get unexpected results.
Shuffle sorting
The Shuffle sort option is useful if you want to randomize a bunch of files. Shuffle sort the master list, then create a renaming action that uses the Sequence option, for instance, and you'll have a numerically sequenced set of filenames in a random order.
File Previews
Name Mangler can preview any file that's supported by Apple's Quick Look. There are actually two forms of previews in Name Mangler. The first is its built-in file preview; to activate this preview, just click on any file's icon:
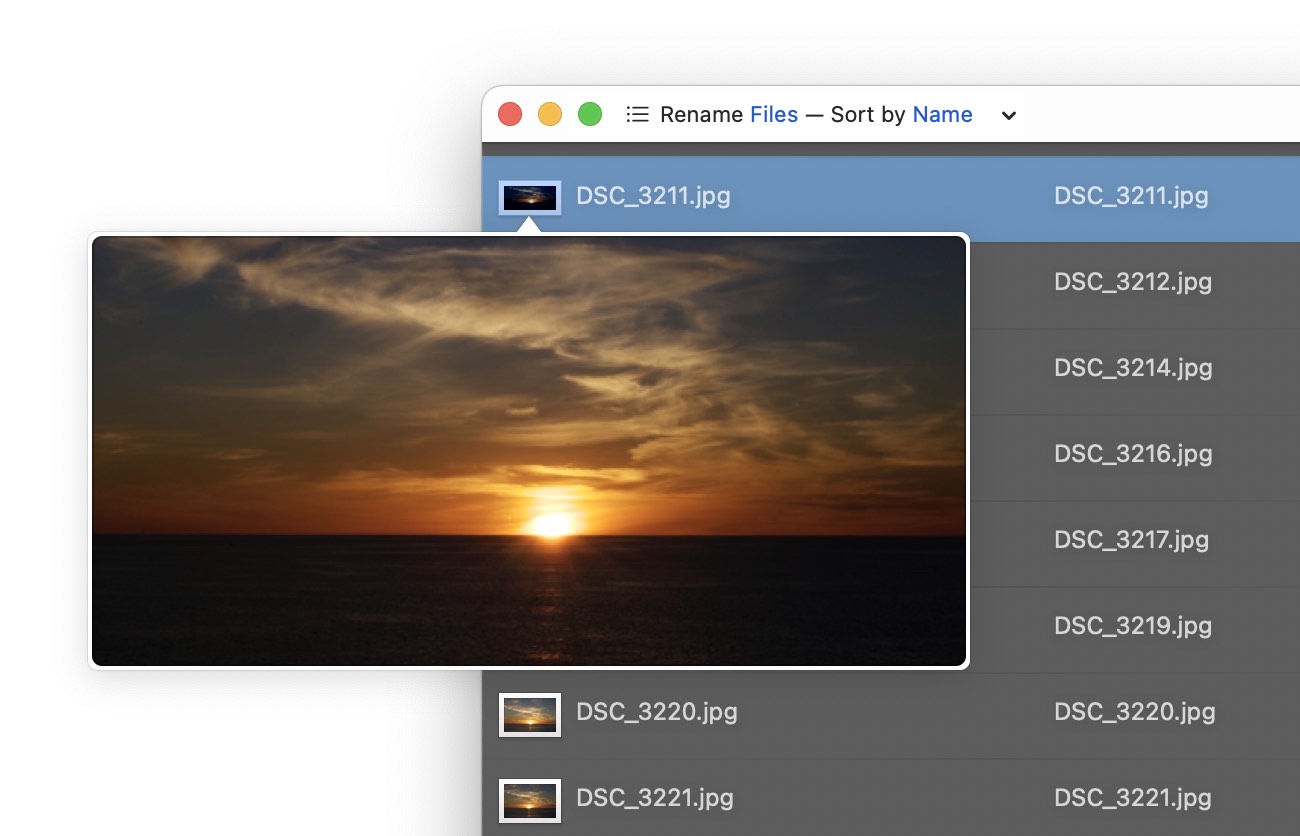
You don't have any control over this preview's position or size, but it's an excellent way to quickly double-check that you're working with the correct file.
You can set Name Mangler to show these previews on hover, if you prefer. Just toggle the setting in the Appearance section of Settings.
To make the preview go away, move your mouse horizontally off the icon. If you move it vertically instead, you'll see previews of each file in the file list.
If you want more control over the file preview—its size and position, for example—just click the file's icon while the preview is visible. This will open the preview in macOS's standard Quick Look window:
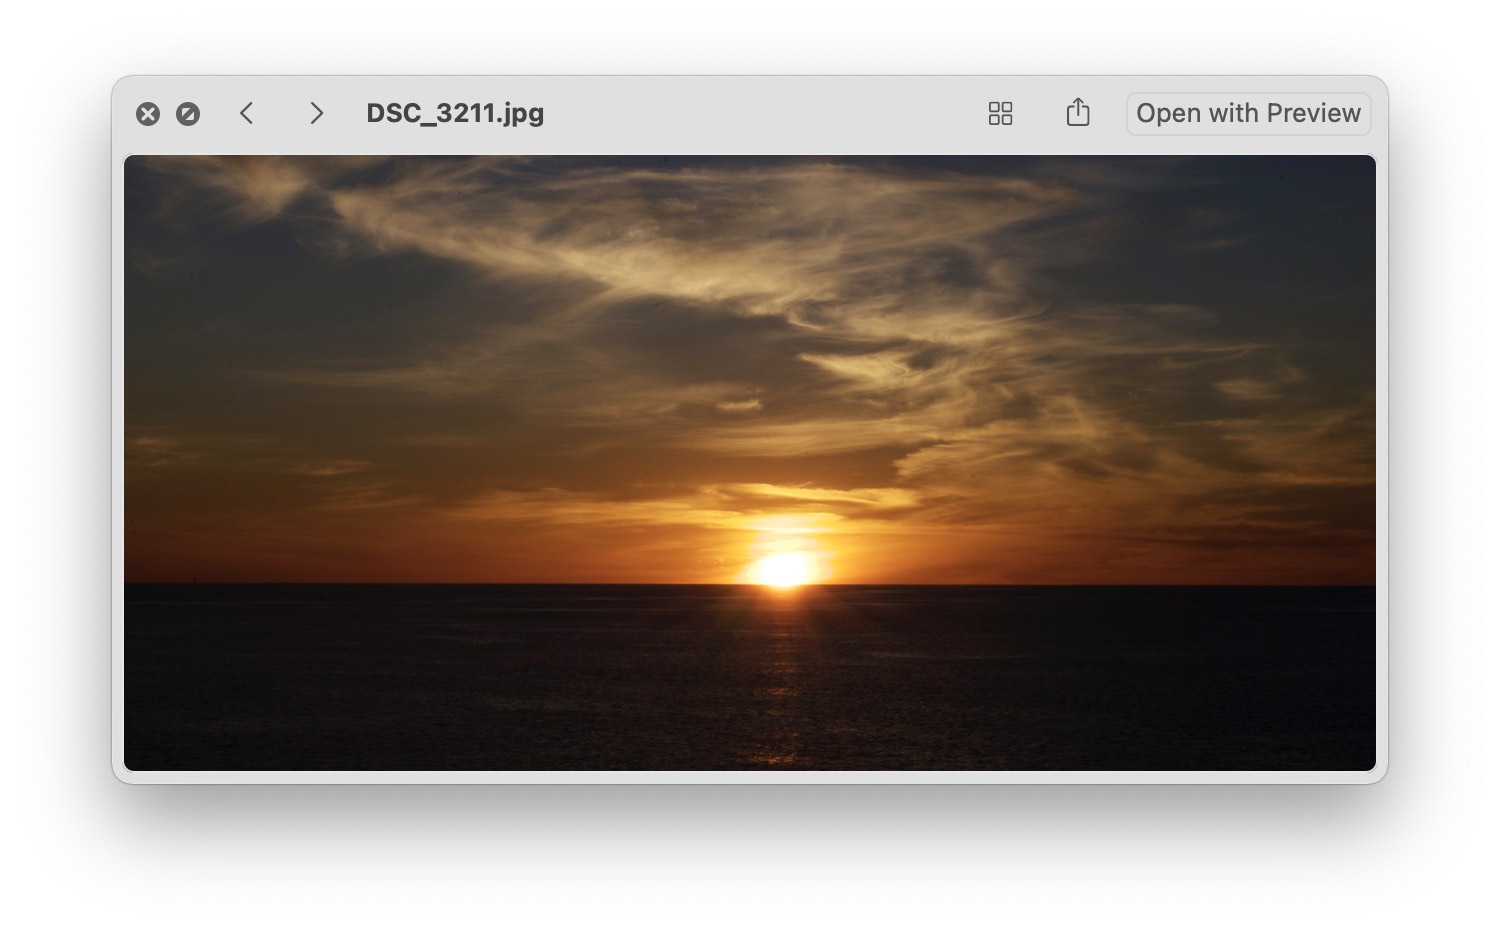
You can move and resize this window, and even open the source file in Preview. Close the window by clicking the 'x' in the upper left corner, or by pressing the Escape key.
If you want to see previews for all the files you're renaming, click the grid icon on the window's toolbar; this will provide a thumbnail image for all files you are renaming:
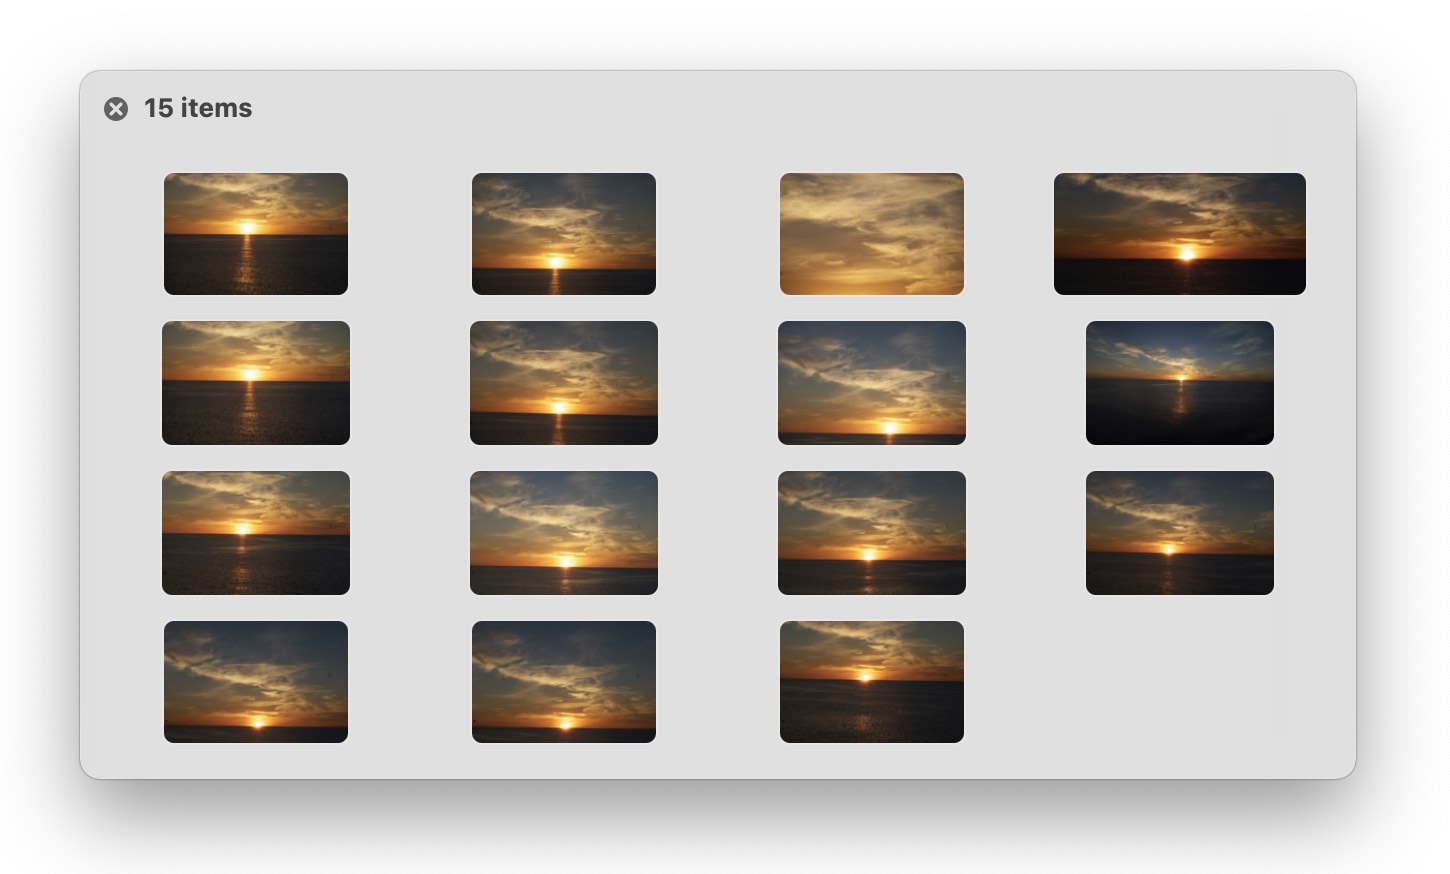
Click the 'x' to close the thumbnail view and return to viewing the selected file's QuickLook preview.