Keyboard mode lets you control Moom's moving and resizing actions using your keyboard, in one of two ways:
- Using a pop-up controller with access to both bundled actions as well as some of your custom actions.
- Using a pop-up menu that gives you access to the full menu of actions available in Moom's menu bar menu.
Using either or both of these methods, you can fully control Moom using your keyboard. Neither of these modes is active when you install Moom, so you'll need to enable each individually.
Pop-Up Controller
To enable the pop-up controller, enter a keyboard shortcut next to the Control active window via hot key setting. With the shortcut in place, press those keys to open an overlay keyboard controller. Here's what it looks like showing both the control indicator and a cheat sheet, both of which are optional:
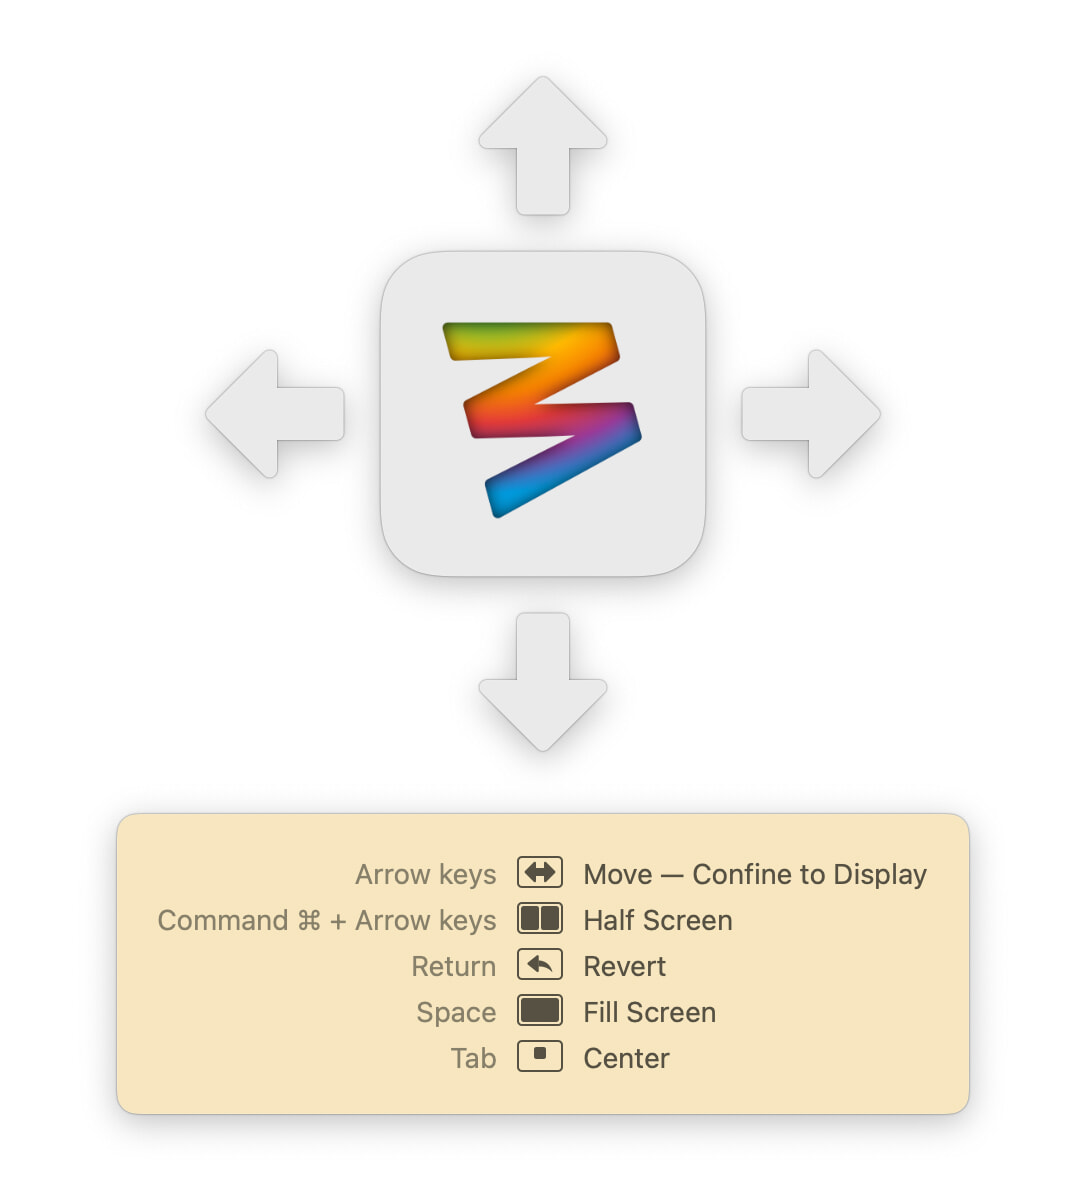
Once the controller is visible, pressing the arrow keys will move the frontmost window around, and holding ⌃ and an arrow key will resize to half screen in the direction of the arrow, etc. It may not look like there's much there in stock form, but what you see there is fully customizable.
For you vim enthusiasts out there, you can also use HJKL to move the windows around in keyboard controller mode.
Standard Keys
The top section of the keyboard controller's settings let you assign a number of standard Moom actions to a few predefined keys: The arrow keys (with optional modifiers), and Return, Space, Tab, and Escape. Here's how it looks in default form:
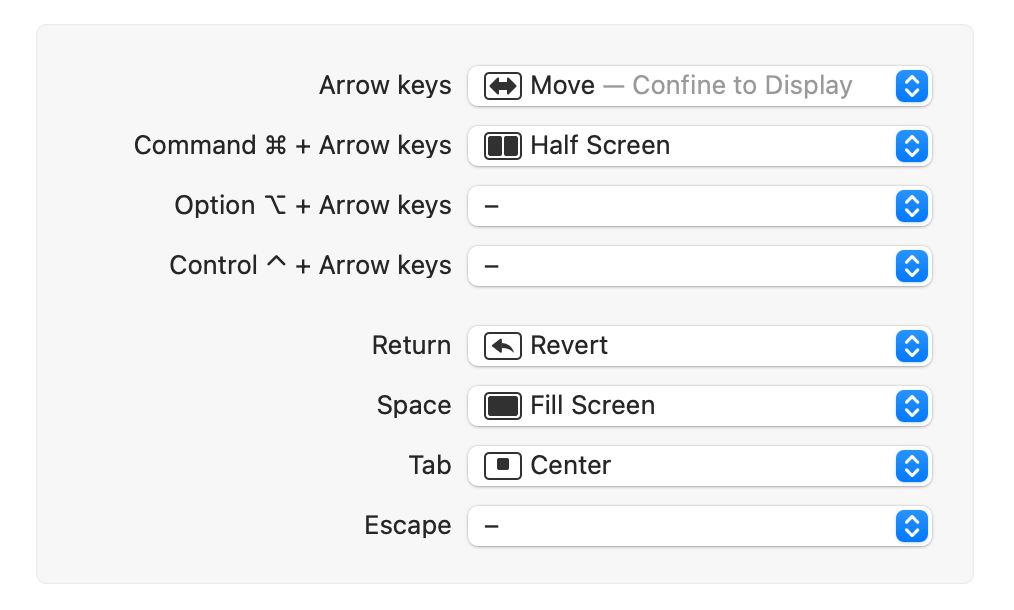
The Arrow Keys
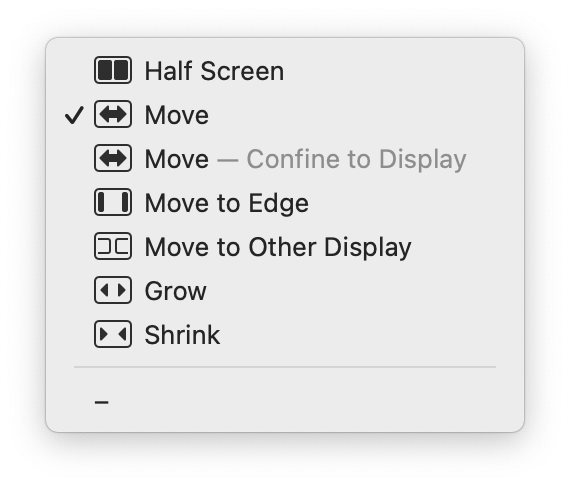
As seen at right, each of these four arrow key functions can be set to one of seven different actions, plus a "do nothing" option:
-
Half Screen: Using the defined shortcut, this action will move the frontmost window to the specified screen edge, and set its size to half the available space, either vertically or horizontally depending on the chosen edge.
You can also use this action to resize windows to quarter screen. First press the chosen shortcut key once to move to half-width (or height), then in quick succession, press the key for half-height (or width). For instance, you could resize to the top right quarter by pressing your "right half" shortcut followed immediately by your "top half" shortcut.
You can also move a window to another display by hitting the same shortcut twice in a row, in the direction of the other display. Depending on which edge you're on and where the display is relative to that edge, the window may first move to the other edge of the current display; repeat the command once more, and it will move to the other display.
-
Move: This mode will move the frontmost window 50 points in the specified direction. Press the arrow keys repeatedly to move the window around the screen. You can move a window beyond the edge of a screen when using this mode.
-
Move — Confine to Display: This mode is identical to Move, except that Moom will not let you move any portion of the window beyond the edge of the display.
Hold the ⇧ key to move in one-point increments (instead of 50 point increments) when using either Move or Move - Confine to Display.
-
Move to edge: This action moves the window to the screen edge, based on which arrow key you press: Up for top, etc.
-
Move to other display: If you have more than one display on your Mac, this shortcut will move the selected window to that display, without resizing it. (The window will be reduced in size if that's the only way it will fit on the chosen display; it will never be scaled up, though.)
-
Grow: Allows you to increase the window's size using the arrow keys.
-
Shrink: Allows you to reduce the window's size using the arrow keys.
You probably don't need to assign both Grow and Shrink, as either mode can do either action. The only restriction is that the arrow keys' initial action will be to either increase or decrease the window size, depending on if you've assigned them to Grow or Shrink.
After the initial press of an arrow key (with modifier, if defined in that way), the window will grow/shrink, based on the assigned action. After that initial action, though, you can use the opposite arrow key to reverse the action if you press it without too much delay.
For example, with a Grow action linked to the arrow keys, pressing Right Arrow will grow the window, from the right edge. Pressing Left Arrow immediately after Right Arrow will shrink the window, again from the right edge. Keep pressing Left Arrow and Right Arrow (without too much delay), and the right side of the window will shrink and grow.
But if you then pause for a second or so and press Left Arrow, you'll see that the window grows from the left edge, and you can shrink it with Right Arrow (again, if you press it without too long of a delay).
Although complicated to explain, this dual functionality of the arrow keys makes it easy to shrink or grow a window with only one assigned arrow key command.
Return, Tab, Space, and Escape
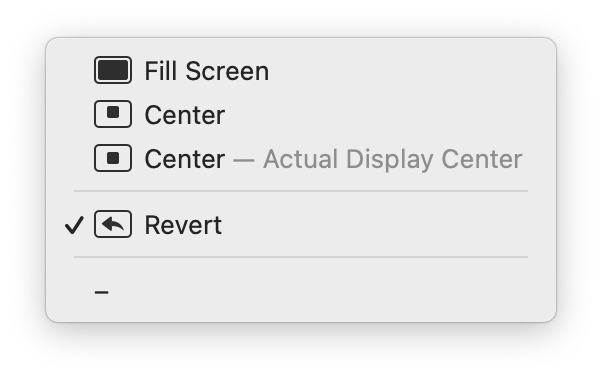
These keys can each be set to perform one of four actions, in addition to doing nothing, as seen in the image at right.
Fill Screen: Zoom the frontmost window to fill the available screen space. Note that this is not Apple's Full Screen mode; rather, it's a window resized to completely fill the scree while leaving the menu bar in place.
Center: Center the window in the screen. This center command uses the macOS standard "upper vertical" center, which places windows above the horizontal center of the screen.
Center — Actual Screen Center: Just like Center, except positions the window at the absolute screen center.
Revert: After moving a window using Moom, this option will return it to its previous location.
If you'd prefer to use the above keys for your own actions, you can do so: Just create custom actions and assign them one of the above single-keystroke shortcuts. You can't override the modifier version of the arrow key commands, though, as only single-key custom actions can be used with the pop-up controller.
Customization
You can add your own custom actions to Moom's Keyboard mode, with one important caveat: The only actions that will show here are those with single key shortcuts (see Hot Keys for more on this), as that's how Moom determines if an action is restricted for use when the keyboard controller is visible. (You wouldn't want an action you assigned to the A key to fire every time you typed an "A!")
Here's an example of the cheat sheet for a customized keyboard controller, showing a number of custom actions including two that redefine the left and right arrow keys:
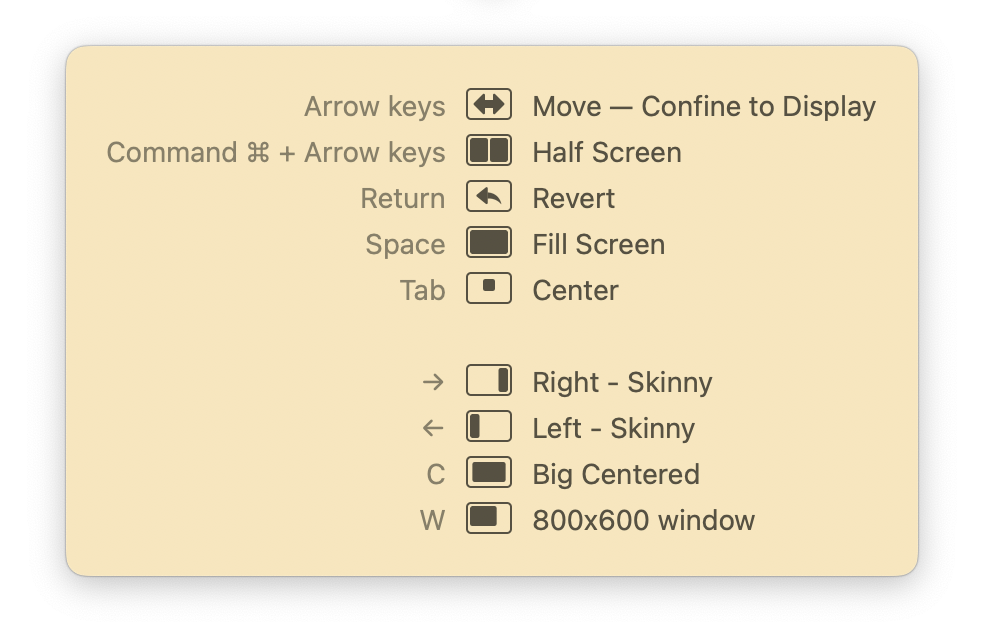
Although two arrow keys have been redefined, the with-modifier arrow key commands will still work for their defined functions. You can add as many custom actions as you like, and of almost any type. The only requirement is that they have assigned single-key shortcuts.
Behaviors
The bottom section of the keyboard mode settings area controls how the keyboard controller behaves:
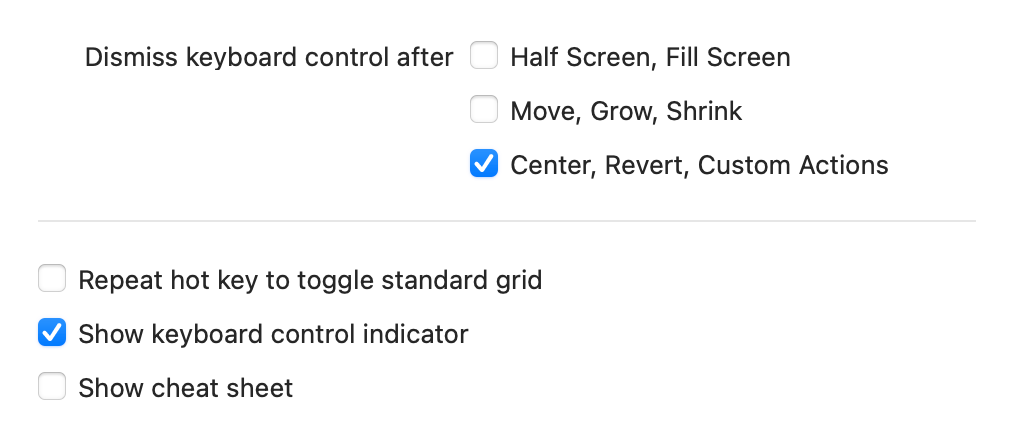
The checkboxes in the "Dismiss keyboard control after" section control what types of actions cause the keyboard controller to vanish, ending keyboard mode. Each checkbox should be self-explanatory; enable any or all of them to tell Moom when to dismiss the keyboard controller. (You can also make it vanish by clicking on a window, or just waiting a few seconds.)
If you'd like the Moom keyboard interface to remain visible until it times out, make sure none of these options are checked. To cancel keyboard mode when configured in this way, press any key that's not assigned to an action, and the controller will go away.
The ▢ Repeat hot key to toggle standard grid option enables grid-based resizing via the keyboard. Once enabled, you can perform grid-based resizing by pressing the keyboard mode trigger twice in a row. Or just once, if you also check the ▢ Start with grid checkbox, which will appear after you enable the grid:

You can change the grid's dimensions by clicking the small circled arrow next to the word "grid." This will open Moom's general settings, where you can choose new grid dimensions.
When you activate the grid, you'll see an outline of one cell of the grid, with its starting location set by the Keyboard-induced grids start setting in the Gear menu: Top left corner of the display, near the top left corner of the window, or near the mouse. You can then use the arrow keys to move the grid's starting location, and hold down the ⇧ key and press the arrow keys to resize the grid. Press Return to resize the window to the defined dimensions.
Alternatively, you can use the mouse to move the starting point, and to drag out the new window size and location; when you release the drag, the window will be moved and resized.
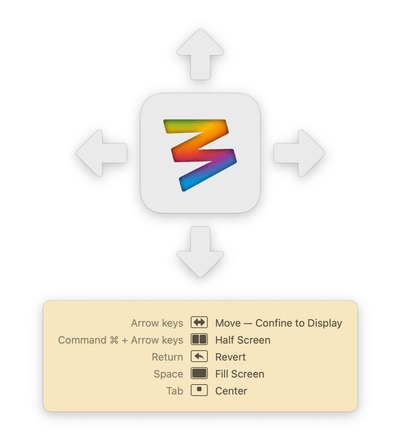
When enabled, the ▢ Show keyboard control indicator checkbox displays the colorful Moom icon and arrow keys—the top part of the small image seen at right (or see the full size version at the top of this section).
Enable the ▢ Show cheat sheet checkbox to have Moom display a list of your active keyboard-mode actions just below the keyboard mode overlay (if enabled)—the bottom yellow box in the image at right, or again, full-size at the top of this section. With the cheat sheet active, the keyboard interface will remain visible longer, too, so you have time to read the cheat sheet.
Both of these indicators can be disabled, which would leave just the front window highlight effect (in the Gear icon's drop-down) to show that you're in keyboard mode. We do not recommend also disabling the highlight—you should have at least one of these three indicators enabled!
Pop-Up Menu
The Access custom actions via hot key setting resides at the very bottom of the keyboard mode window:
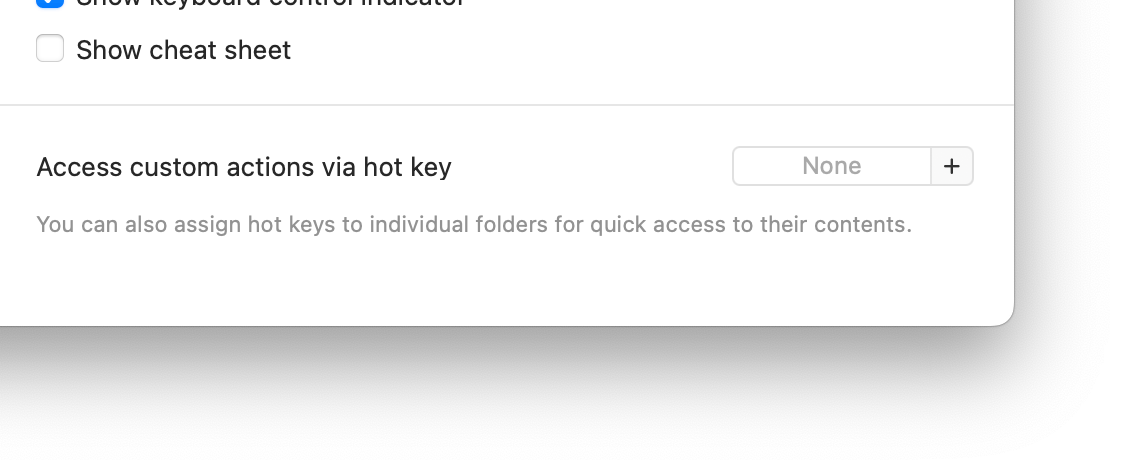
Type a keyboard shortcut in the box on the right to enable the pop-up menu mode; hit the defined shortcut, and you'll see a pop-up menu that contains everything in Moom's menu bar item. Here's the pop-up menu on the left, and the menu bar menu on the right:
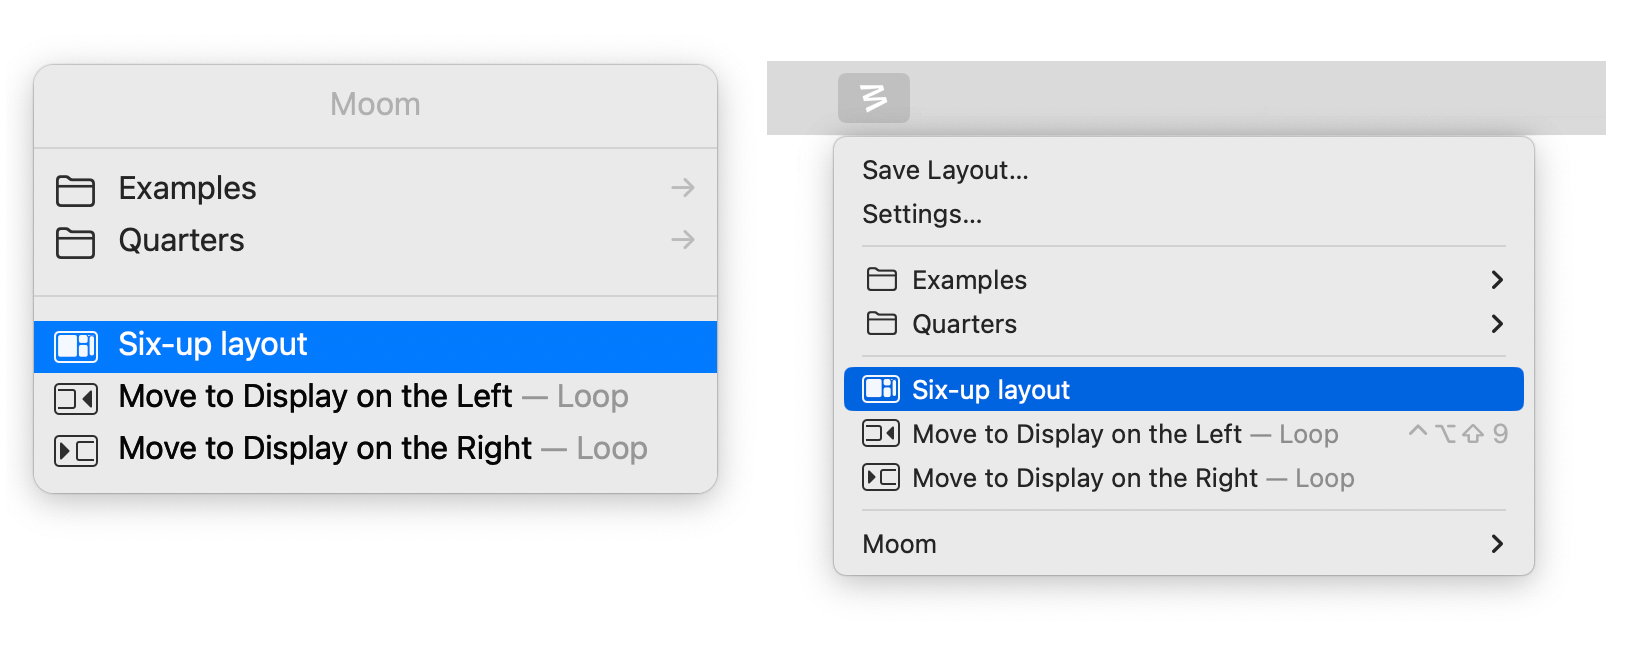
Use the up and down arrows to step through items in the current list, right arrow to step into a folder, and left arrow to move back up out of a folder. Press Return to activate the selected item.
You can also use keyboard navigation—start typing letters, and matching letters will be underlined in the menu. Moom uses a fuzzy matching algorithm that highlights the best match for you. Press Return to select the highlighted match, or continue typing to further narrow the matches, if necessary.

