

Moom's general settings—what you might think of as its settings—are reached by clicking the gear icon in the top right corner of Moom's window. You can also type ⌘, while the Settings window is open. The drop-down sheet that appears contains settings that apply to Moom in general, as opposed to settings specific to Moom's four main usage modes or custom actions.
As there's quite a bit available here, the settings have been broken into sections for easier reading.
All values shown are the defaults, as set when you launch Moom for the first time.
Window Positioning
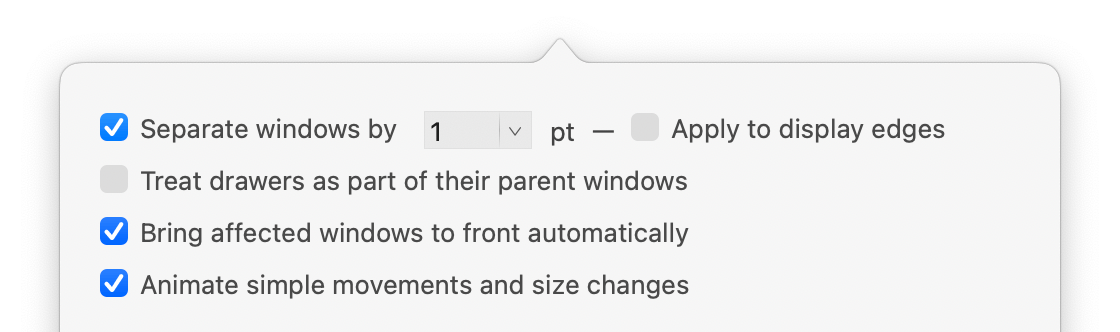
▢ Separate windows by [ ] pt - ▢ Apply to display edges Moom can separate windows it places by a defined amount of space—just select a value from the drop-down menu, or type it into the box. If you check the box for display edges, windows will also stay the specified distance away from the edges of the display(s).
▢ Treat drawers as part of their parent windows A long time ago, many Mac apps used drawers that slid into and out of the app's interface. Today, you'll find them in only a handful of apps. If this setting is enabled, then those drawers will be considered part of the app when Moom does anything that affects that app.
▢ Bring affected windows to front automatically If this setting is enabled and you restore a saved window layout (or use the palette on a background window), then all the windows associated with that saved layout will be brought to the foreground.
When disabled, your frontmost app will remain frontmost, and the windows from the saved layout will be restored in the background.
If you disable this setting, then hidden and minimized windows will be ignored when restoring a layout. Technically, Moom will put the windows where they belong, but leave them in their current state. When you then make them visible or unminimize them, they'll be at the saved size and location.
▢ Animate simple movements and size changes If enabled, then Moom will (assuming there's enough time) animate things such as window resizings. The effect is subtle given how quickly actions are run. Try some actions with the setting enabled and then disabled, and leave it whichever way you prefer.
Grid and Snap
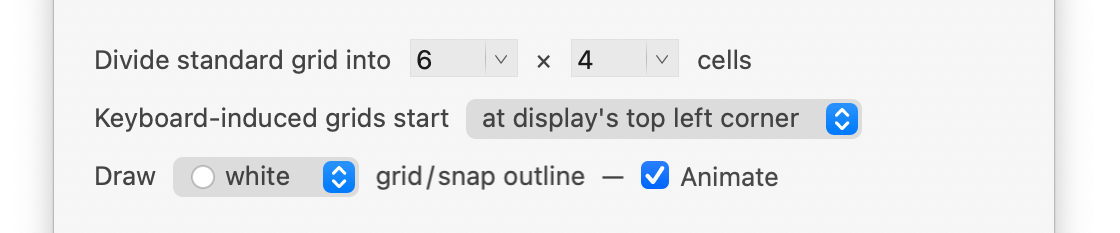
Divide standard grid into [ ] × [ ] cells Enter your desired grid dimensions, with horizontal cells first and vertical cells second. These grid settings apply to the grid that's available in both Palette mode and Keyboard mode. In Palette mode, these dimensions apply to both the in-pop-up hexagon grid and the full-screen grid. (Keyboard mode only has the full-screen grid.)
Although both cell dimension boxes have drop-down menus, they're also input fields: Type whatever you like there, up to a maximum of 50.
Keyboard-induced grids start [at display's left corner | near window's top left corner | near mouse pointer] If you activate the overlay grid via the keyboard, this setting controls where the grid's first cell appears, as described by each option in the pop-up menu.
You can interact with the grid using your mouse or keyboard. To use the mouse, move to the desired starting location, then click and drag the desired size and release the drag. On the keyboard, use the arrow keys to move to the starting location, then hold down ⇧ while dragging out the desired size with the arrow keys. Press Return to resize the window.
In either mode, pressing Escape will cancel the grid without affecting the window.

Draw [black & white | white | accent color] grid/snap outline — ▢ Animate This setting controls the color and optional animation of the outline that surrounds grid cells and snap zones.
You can choose from three color schemes: White, black and white, or your chosen macOS highlight color. If you check the Animate box, the borders will animate in "crawling ants" style; hover the screenshot at right to see all three options in motion (the accent color was set to orange).
When you change your selection, you'll see a quick real-time preview around the window, so you can see how it looks in use.
Appearance

Affected window highlight When using the overlay resizing grid or keyboard mode, this slider controls how much the background darkens to call out the window that Moom will modify. Move the slider fully left to disable the highlight; move it fully right to make the affected window really pop against a very dark (or very light) background.
Custom action chooser size This slider controls the size of the pop-up that displays a list of choices. This list can be all of your custom actions (if you've enabled access via the Access custom actions via hot key setting in Keyboard), or a list of actions in a folder or chain that you've dropped into an edge zone in Snap.
Move the slider around, and you'll see a preview of the size of the action chooser.
App Behavior
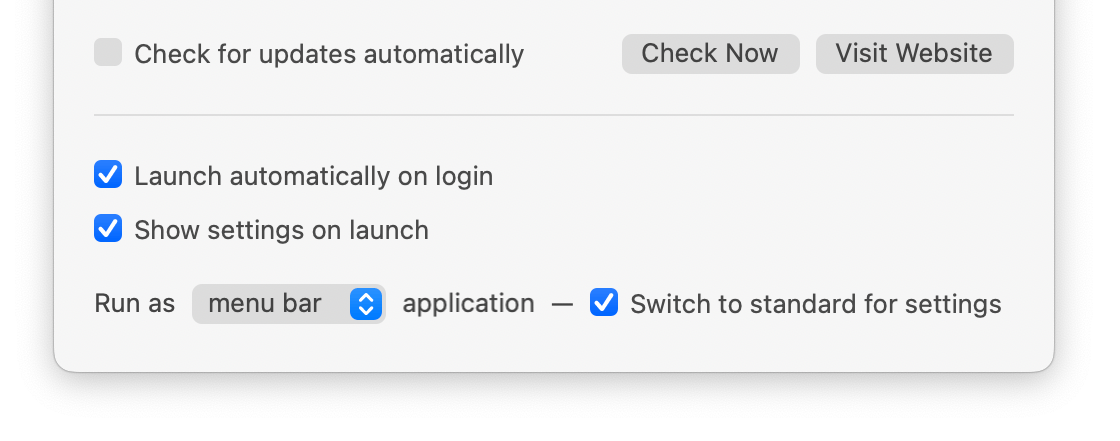
▢ Check for updates automatically As Moom 4 isn't available in the macOS App Store, update checks are done by the app itself. If you'd like those to happen automatically, check this box and Moom will occasionally and silently check for updates—it will never install them without your permission. You can also use the nearby Check Now button to force an update check, or click the Visit Website button to load Moom's web page.
▢ Launch automatically at login As hopefully expected, when checked, Moom will launch each time you login.
▢ Show settings on launch When checked, Moom's settings panel will open when Moom launches. Unless you are regularly changing Moom's settings every time you launch the app, you can disable this setting.
Run as [standard | standard + menu bar | menu bar | faceless] application This pop-up menu lets you specify how Moom will operate. When run as a standard application, Moom will have a Dock icon when running, and it can be selected like any other application. And as you'd guess, in standard + menu barMoom will have both a Dock icon and a menu bar icon.
If run as a menu bar application—which is the most common way people use Moom—you'll see the Moom icon in your menu bar; click the icon to reveal a menu that lets you run any of your custom actions, modify Moom's settings, open this help, quit Moom, and more. Here's how the menu looks by default:
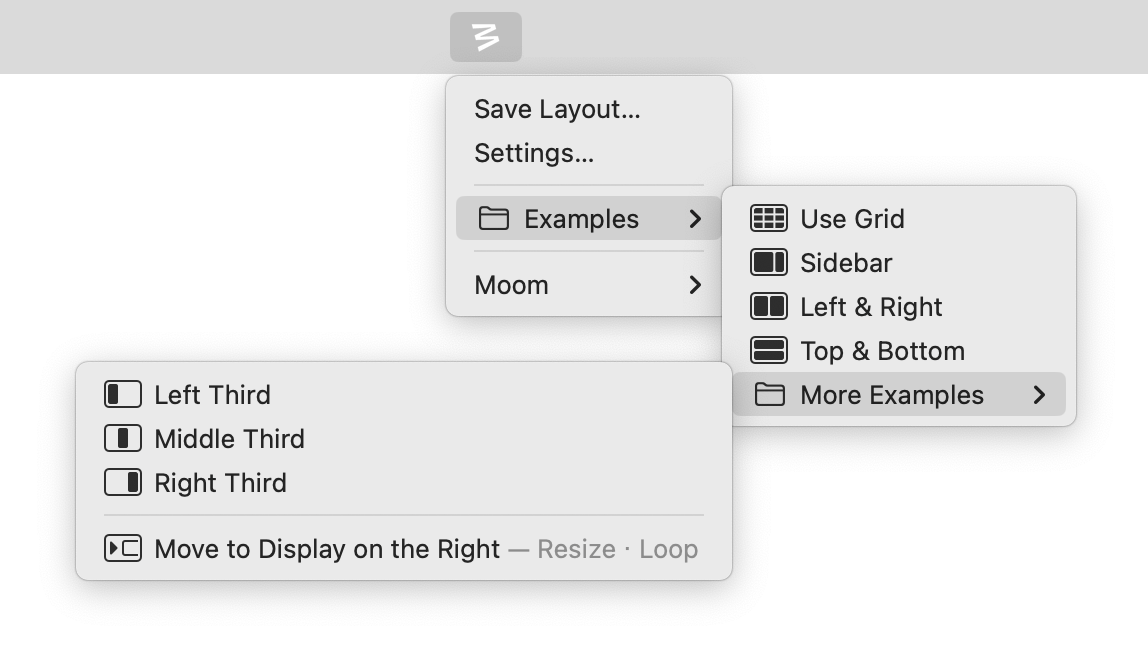
Those are the demo actions that ship with Moom; you can (and we hope you do) replace those with anything else you want to use; they're just there to get you started.
Finally, if run as a faceless application, Moom will be completely invisible: There won't be a menu bar icon or a Dock icon. You'll be able to use Moom's features that work solely via mouse or keyboard, but to change any settings or add new custom actions, you'll need to double-click on Moom's application icon—when Moom's running in faceless mode, this will force it to display its settings window.
Switch to standard for settings This checkbox will only appear if you have Moom set to run as a menu bar or faceless application. In those cases, when this setting is enabled, Moom's Dock icon will appear when you open Moom's settings. (It will vanish again when you close the settings window.)
If you're doing a lot of work in Moom's settings window, having it run in Dock mode makes it much easier to get to—you can click its Dock icon or use ⌘⇥ (or our own Witch) to switch to and from Moom's settings window.
Hot Key Visibility
By default, Moom displays the hot keys (keyboard shortcuts) you've assigned to actions, like this:
If you'd rather not see the keyboard shortcuts displayed, select in the menu to toggle this feature off.
This menu item actually has three states. Each time you select it, it will cycle through on (the default), off, and then a mixed mode as shown by a minus sign in front of the menu item.
In this mode, shortcut keys are hidden when Moom's window is at its narrowest, and are visible any time it's wider than that. Pick which of these three modes best matches your needs.